Settings
- Print
- DarkLight
- PDF
Settings
- Print
- DarkLight
- PDF
Article summary
Did you find this summary helpful?
Thank you for your feedback!
Key Information
The PROJECT INFO > Settings tab allows you to edit the project details that were entered when the project was created.
The project that appears in Settings is the one that has been selected in ORGANIZATION > Projects.
Editing the Project Tabs
General
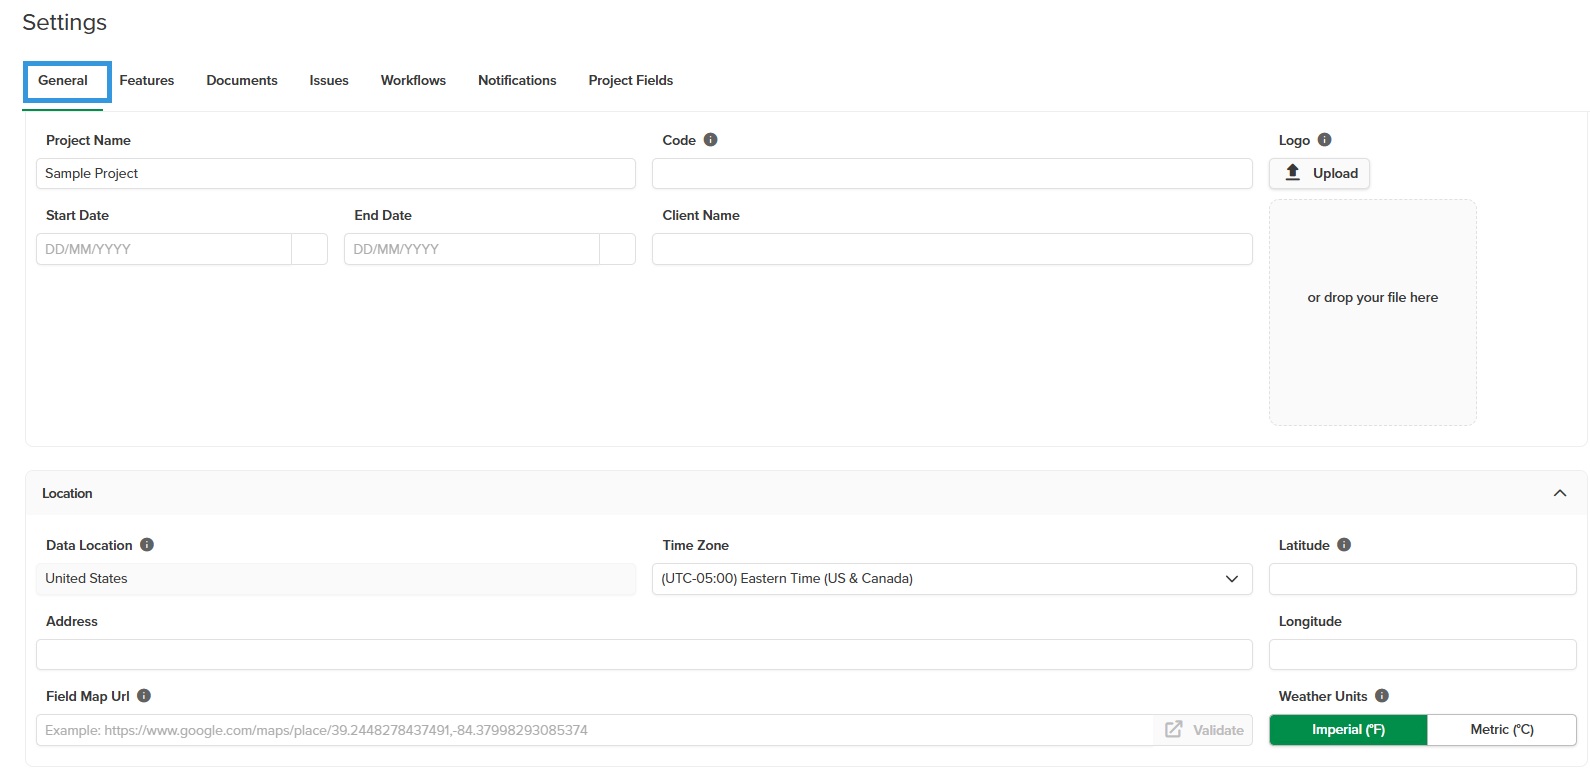
PROJECT NAME: If needed, edit the name of the project.
CODE: If applicable, enter the project code or number which can be used for internal or external purposes.
START DATE: Select the start date of the project.
END DATE: Select the end date of the project.
CLIENT NAME: Enter the name of the client.
LOGO: Upload the project logo by clicking on Choose and then navigating to the image you want. Click Upload to set it as the project logo. (PNG, JPG, SVG, and GIF files of less than 1MB are supported. We suggest using a minimum size of 400x400 pixels for optimal display.)
Location:
DATA LOCATION: From the drop-down, select where the project's data will be stored. Choose the data center closest to your project location. By default, the data location will be set within your organization settings. Once the project is created, the data location cannot be changed.
TIME ZONE: Select the project's time zone. This setting is used in Issues. When issues are created, they are shown in the project's time zone. And the same applies to issue history.
LATITUDE & LONGITUDE:Find and enter the location coordinates and copy and paste them into the fields.
IMPORTANT
The latitude and longitude must be set to have weather data into the Daily Reports.
Refer to the Tips on How to Find the Latitude Longitude section for more details.
ADDRESS: Enter the address of where the project is located.
FIELD MAP URL: Using a web mapping application such as Google Maps, enter the address of the project and search. Copy the URL address into the FIELD MAP URL field.
WEATHER UNITS: Select either Imperial or Metric weather units, depending on the location of the project and what unit is used in that specific location.
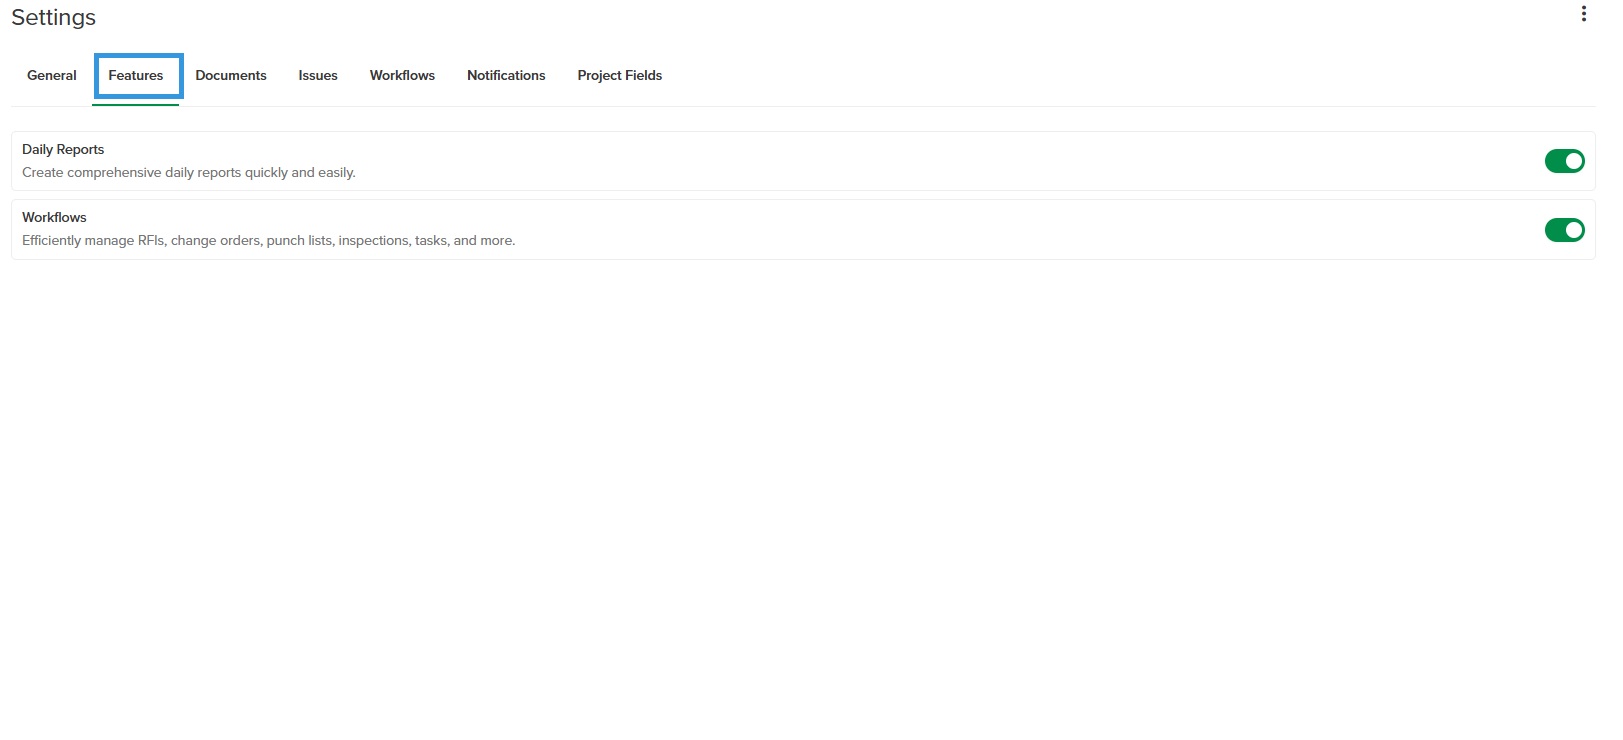
Features
NOTE
This tab is only available with the STACK | Build & Operate Pro-Package.
Toggle the button to turn on the following STACK | Build & Operate Pro-Package features:
Daily Reports
Workflows
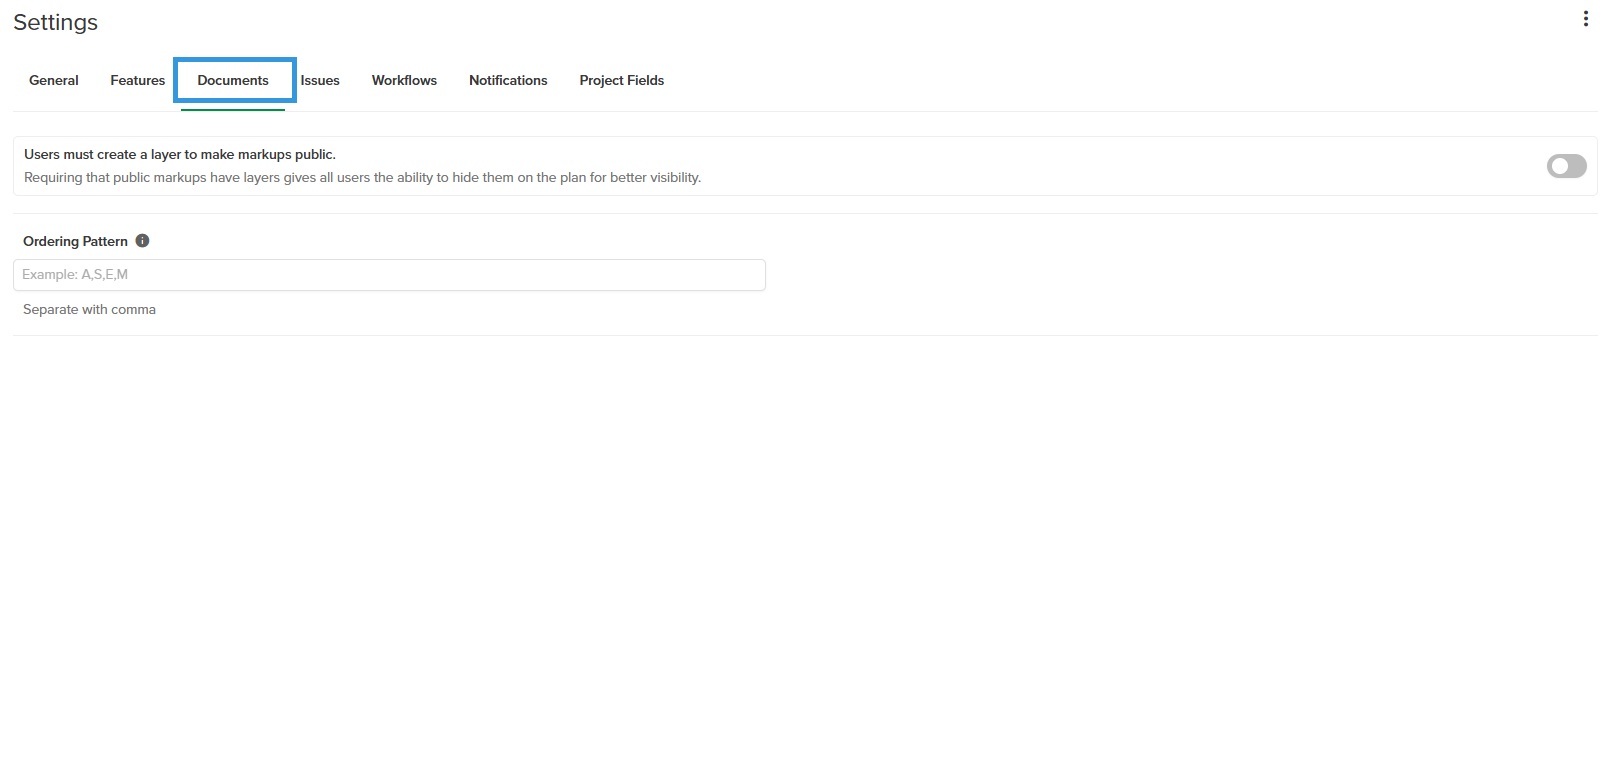
Documents
DOCUMENTS:
Users must create a layer to make markups public:By default, users can create public Markups without a layer. Switching this toggle on requires public markups to be created on a new layer.
ORDERING PATTERN (Comma separated): This setting changes the order of documents from standard numeric/alphabetical order. It is recommended to wait before adding a pattern until the project has determined that the standard display orders don’t match expectations. For example, if a team would like to see drawing sheets listed in Architectural, Structural, Electrical, Mechanical order, “A,S,E,M” would be entered in this field.
NOTE
The Ordering Pattern field is only accessible to the STACK Owner.
Issues
Photos and comments are mandatory to complete issues: When this setting is toggled, the user is required to enter a comment and add a photo when closing an issue. Can be useful for those who fix punch-list items to document their work.
Custom configurable fields: Add three custom configurable fields that will be filled in when creating an issue. These fields can be used to filter and manage issues based on priority.
LIST FIELD NAME 1
LIST FIELD NAME 2
LIST FIELD NAME 3

Workflows
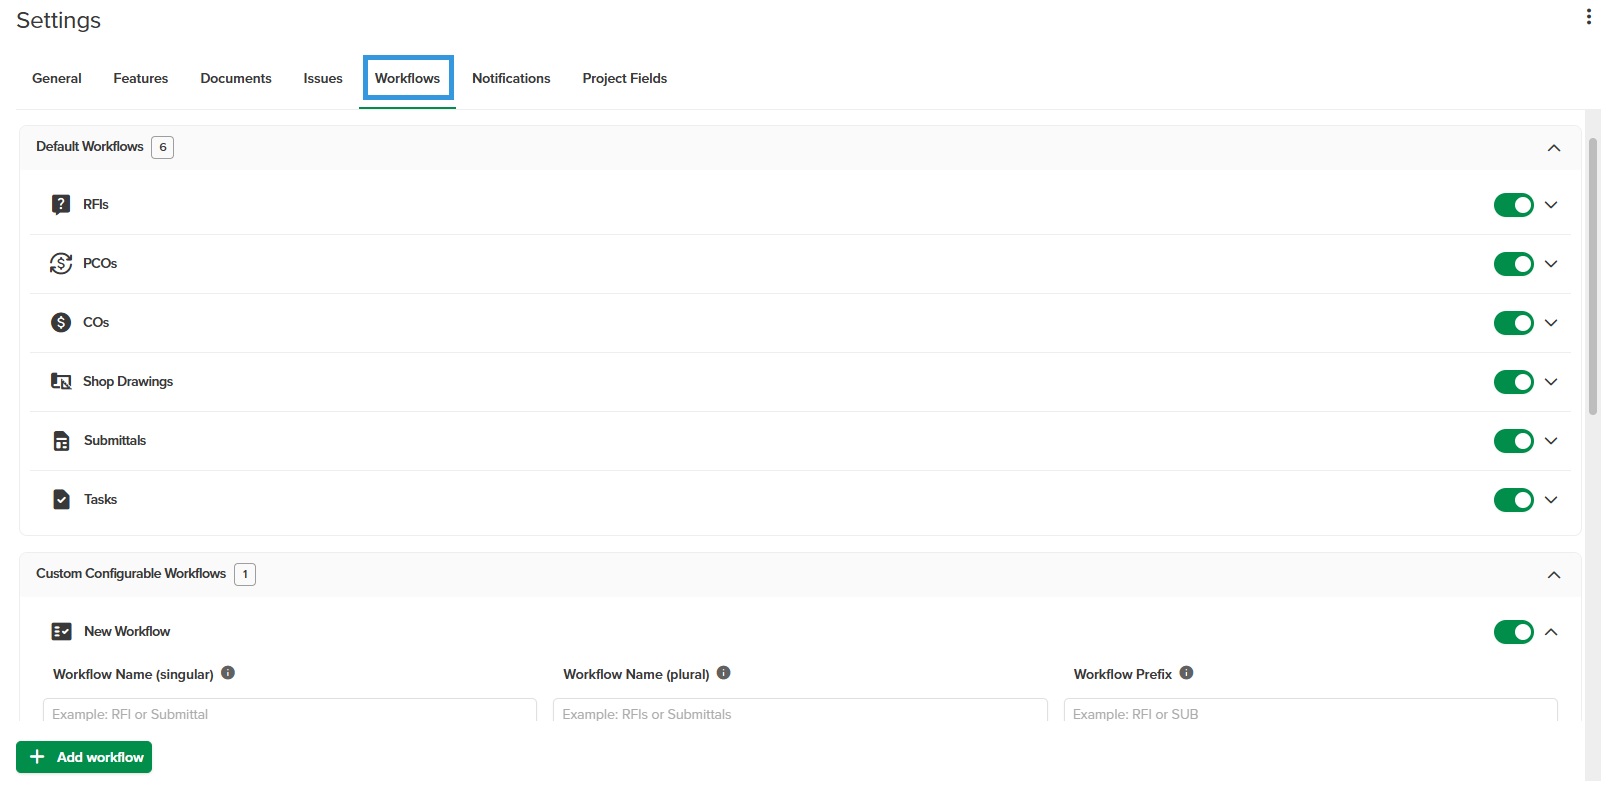
- Toggle existing workflows or create workflows here and they will appear in your team's PROJECT INFO navigation menu.
- Default Workflows:
- RFIs
- PCOs
- COs
- Shop Drawings
- Submittals
- Tasks
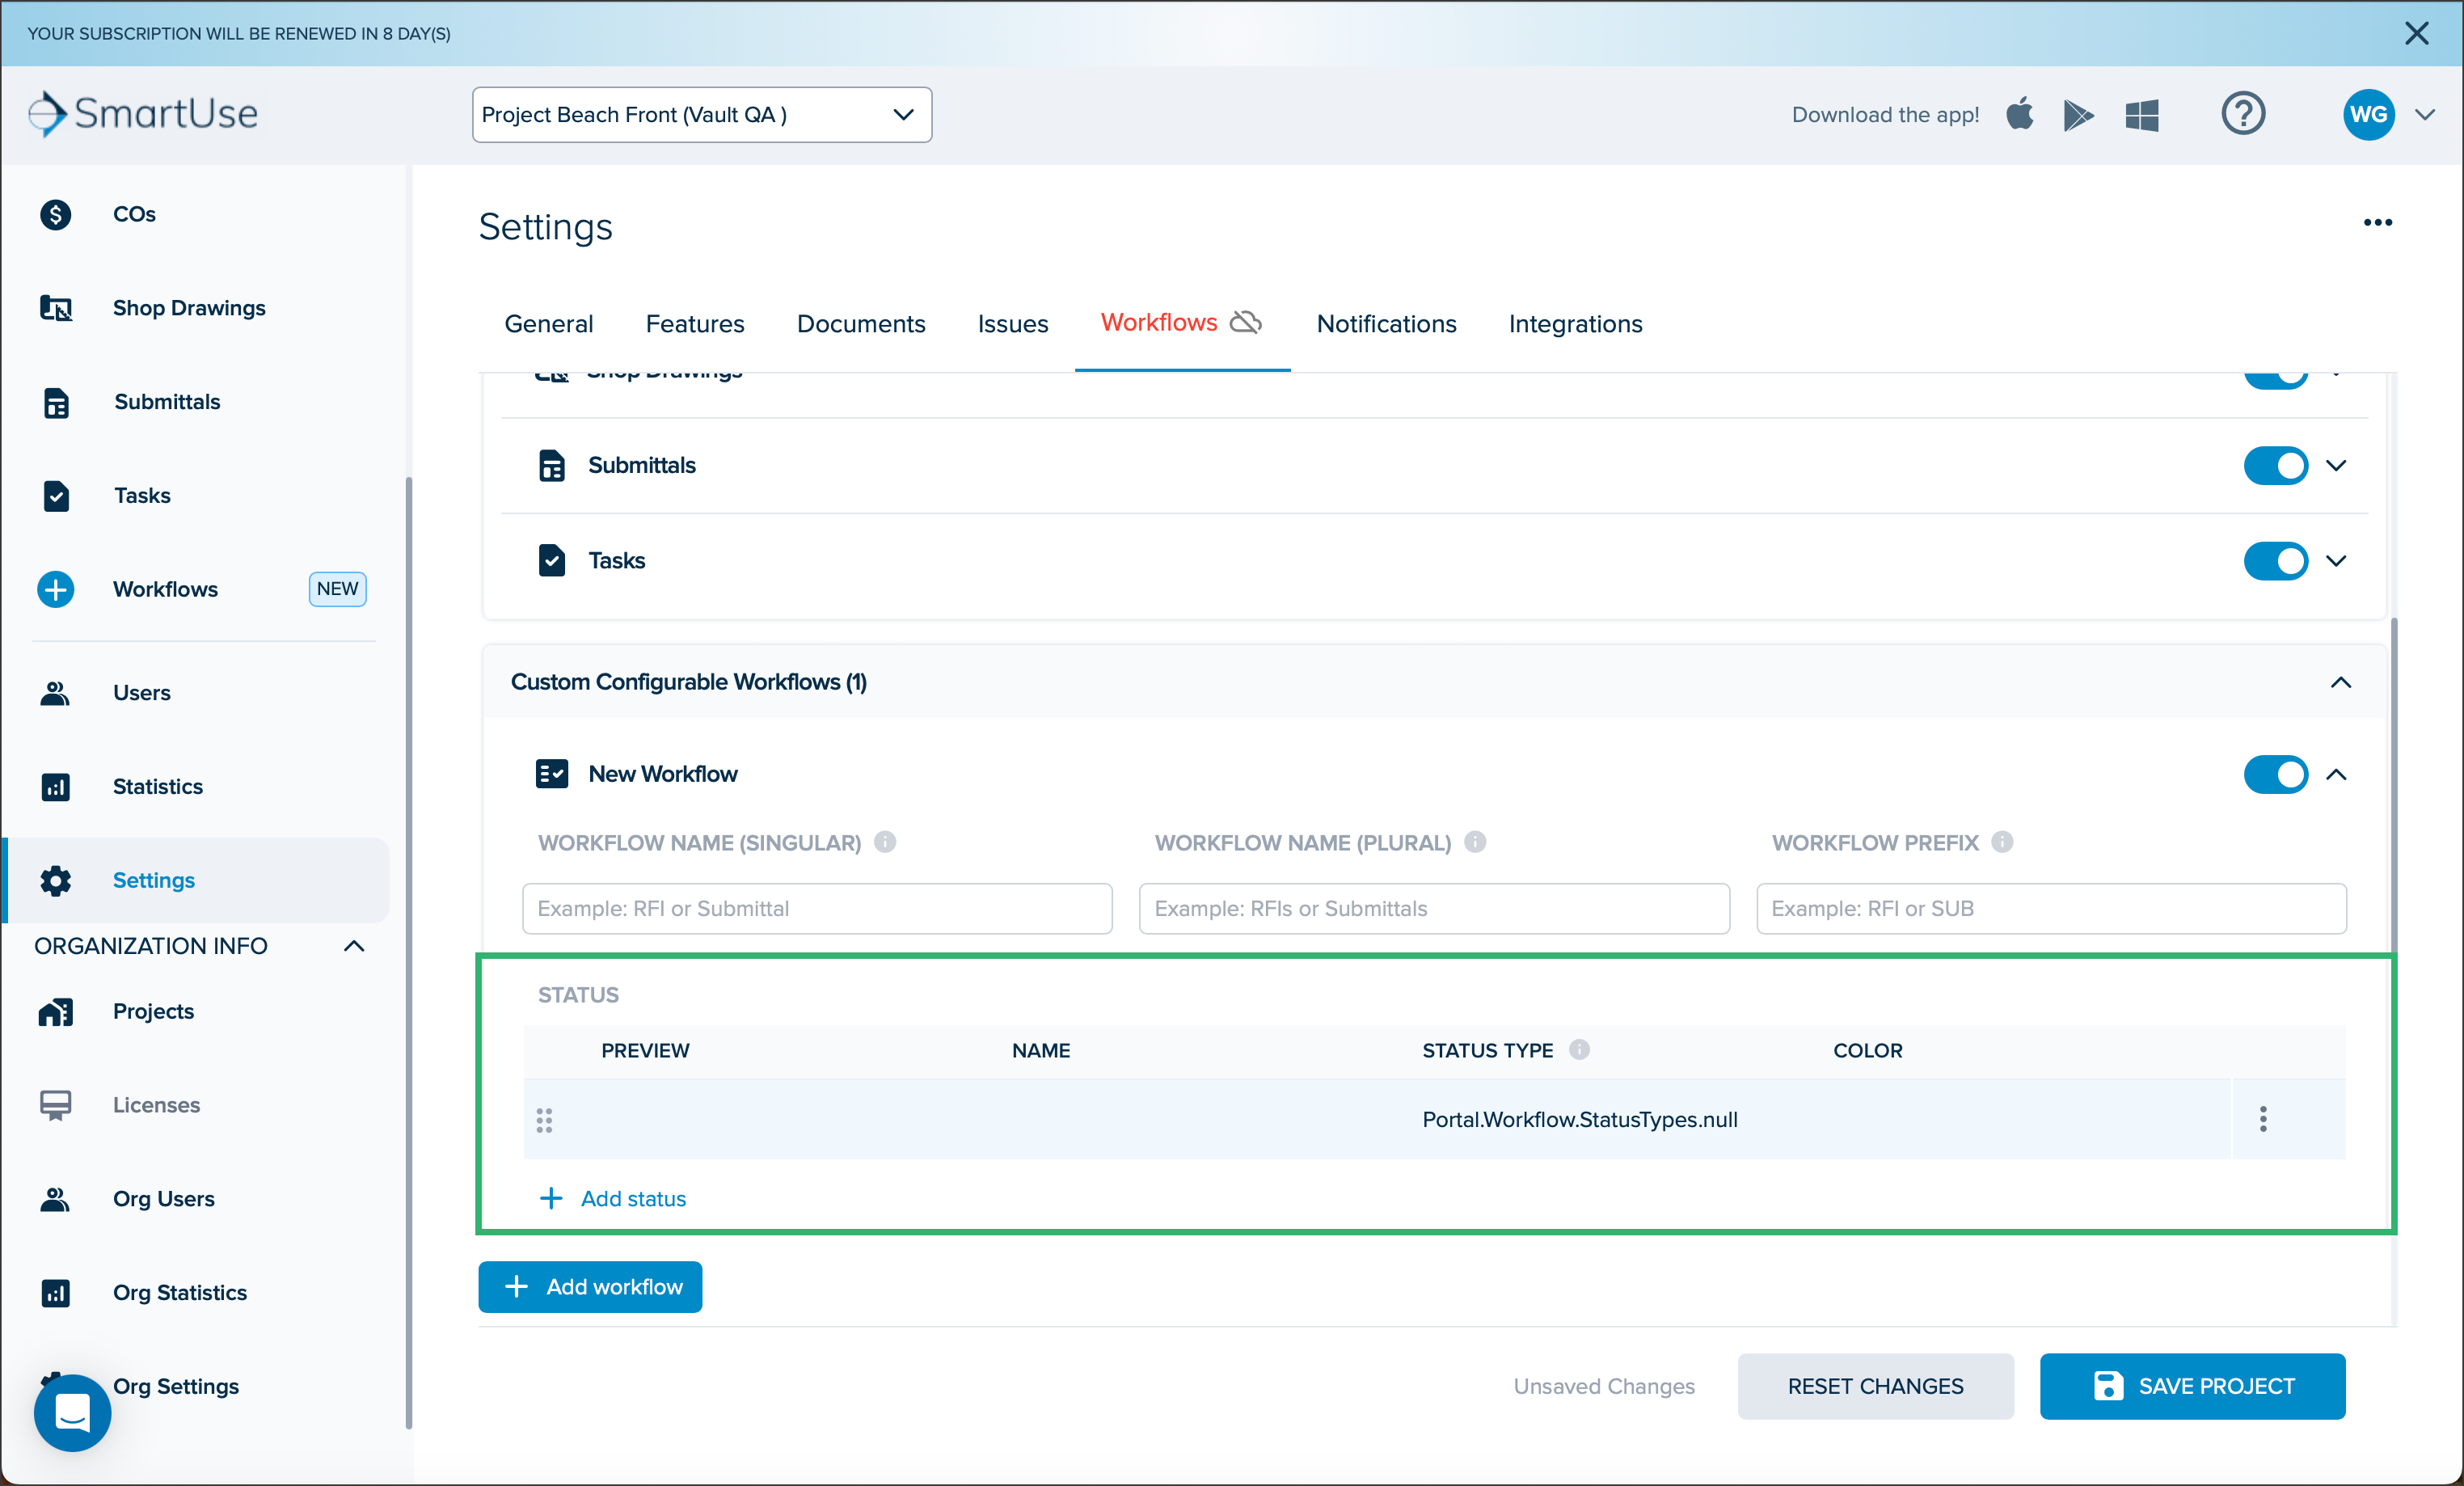
- Custom Configurable Workflows
- New Workflow
- WORKFLOW NAME (SINGULAR): The name of the workflow how it will appear in emails.
- WORKFLOW NAME (PLURAL): The name of the workflow how it will appear in the left-side navigation menu and emails.
- WORKFLOW PREFIX: Prefix added to the automatic numbering of workflow in STACK.
- New Workflow
- Default Workflows:
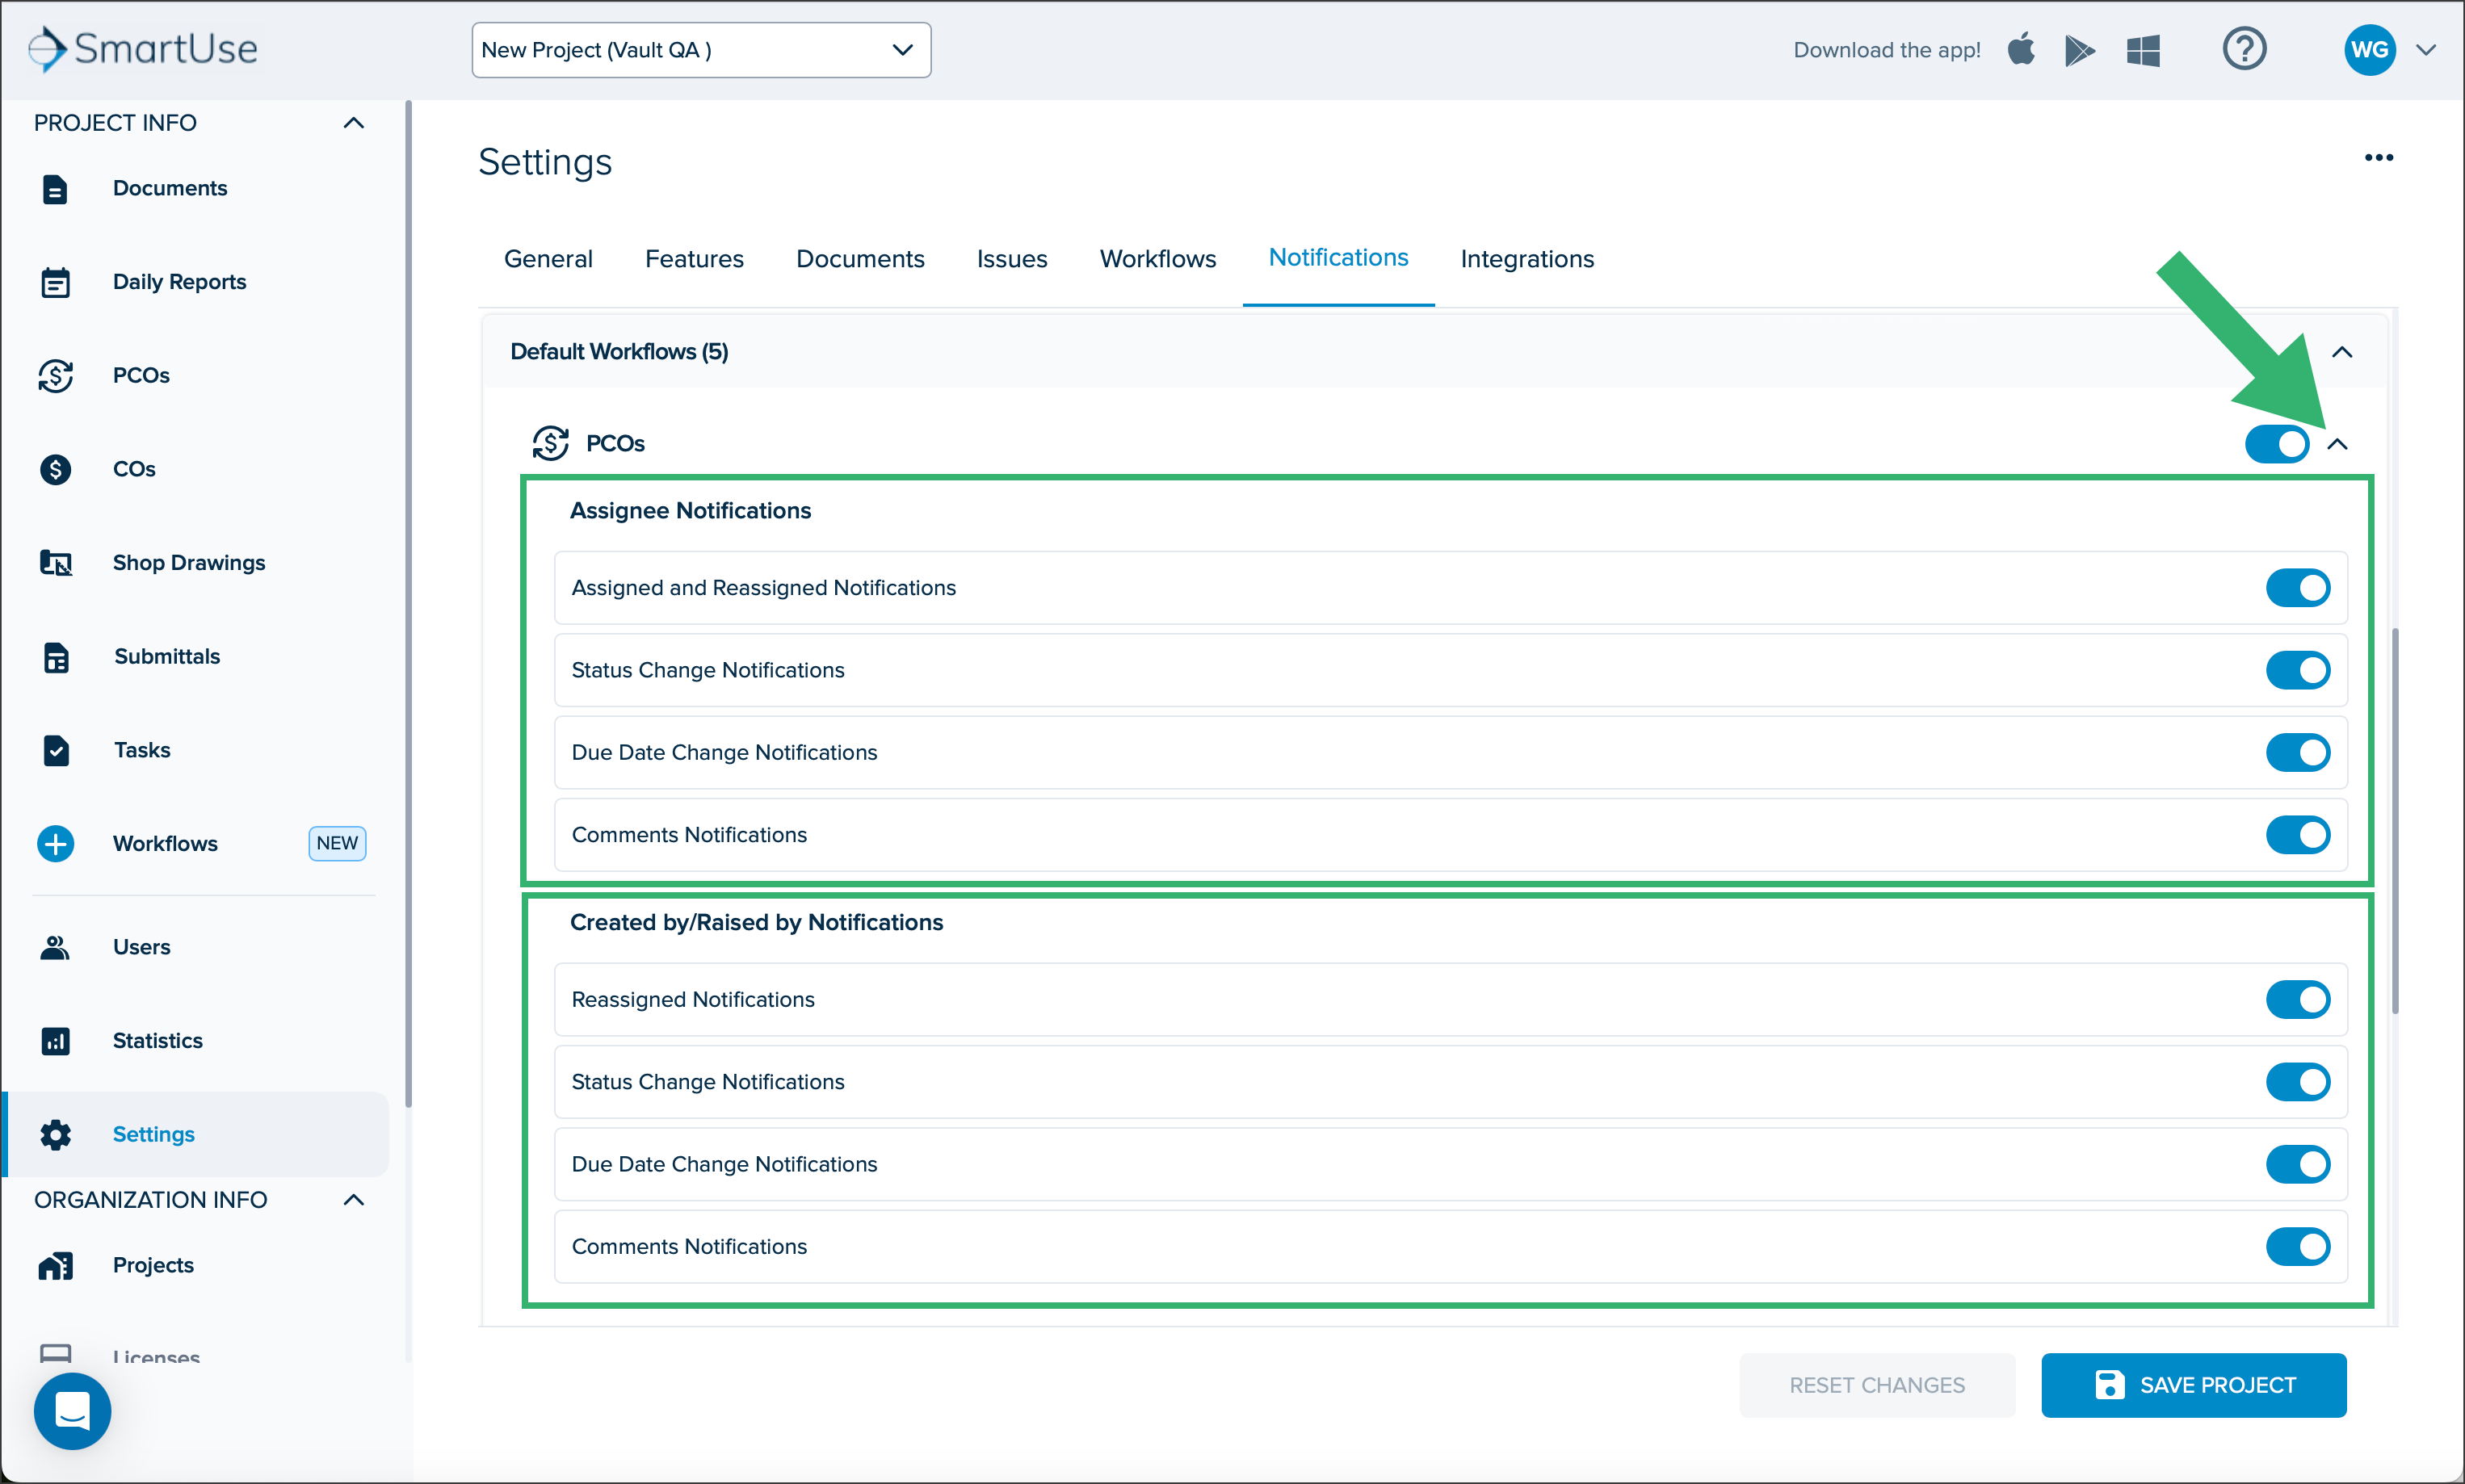
- Click the dropdown arrow next to each workflow to configure email settings.
- STATUS: Click the dropdown arrow next to Custom Configurable Workflow and +Add status to configure statuses:NOTEIt is only possible to delete statuses for Custom Configurable Workflows and not Default Workflows. To delete a status, click the three dots next to the status.
- PREVIEW: Shows a preview of what the status badge will look like with the configured colour and text.
- NAME: Add the name of the status (maximum 24 characters), if not it will use the default value.
- New Status (default)
- STATUS TYPE: Status types are used to categorize statuses so that items can act intuitively and correctly in STACK.
- Drafted
- Opened
- Closed
- Voided
- COLOR: Double-click to select a colour from the dropdown. You assign any meaning you want to each colour, but here are a few suggestions:
- Grey: Draft
- Blue (default): Initial scoping or Initial pricing
- Yellow: On hold
- Orange: Initial review
- Brown
- Purple: Official document
- Red: Rjected, Initial rejection, Reject & closed
- Teal
- Green: Initial approval, Approved
- Silver: Void
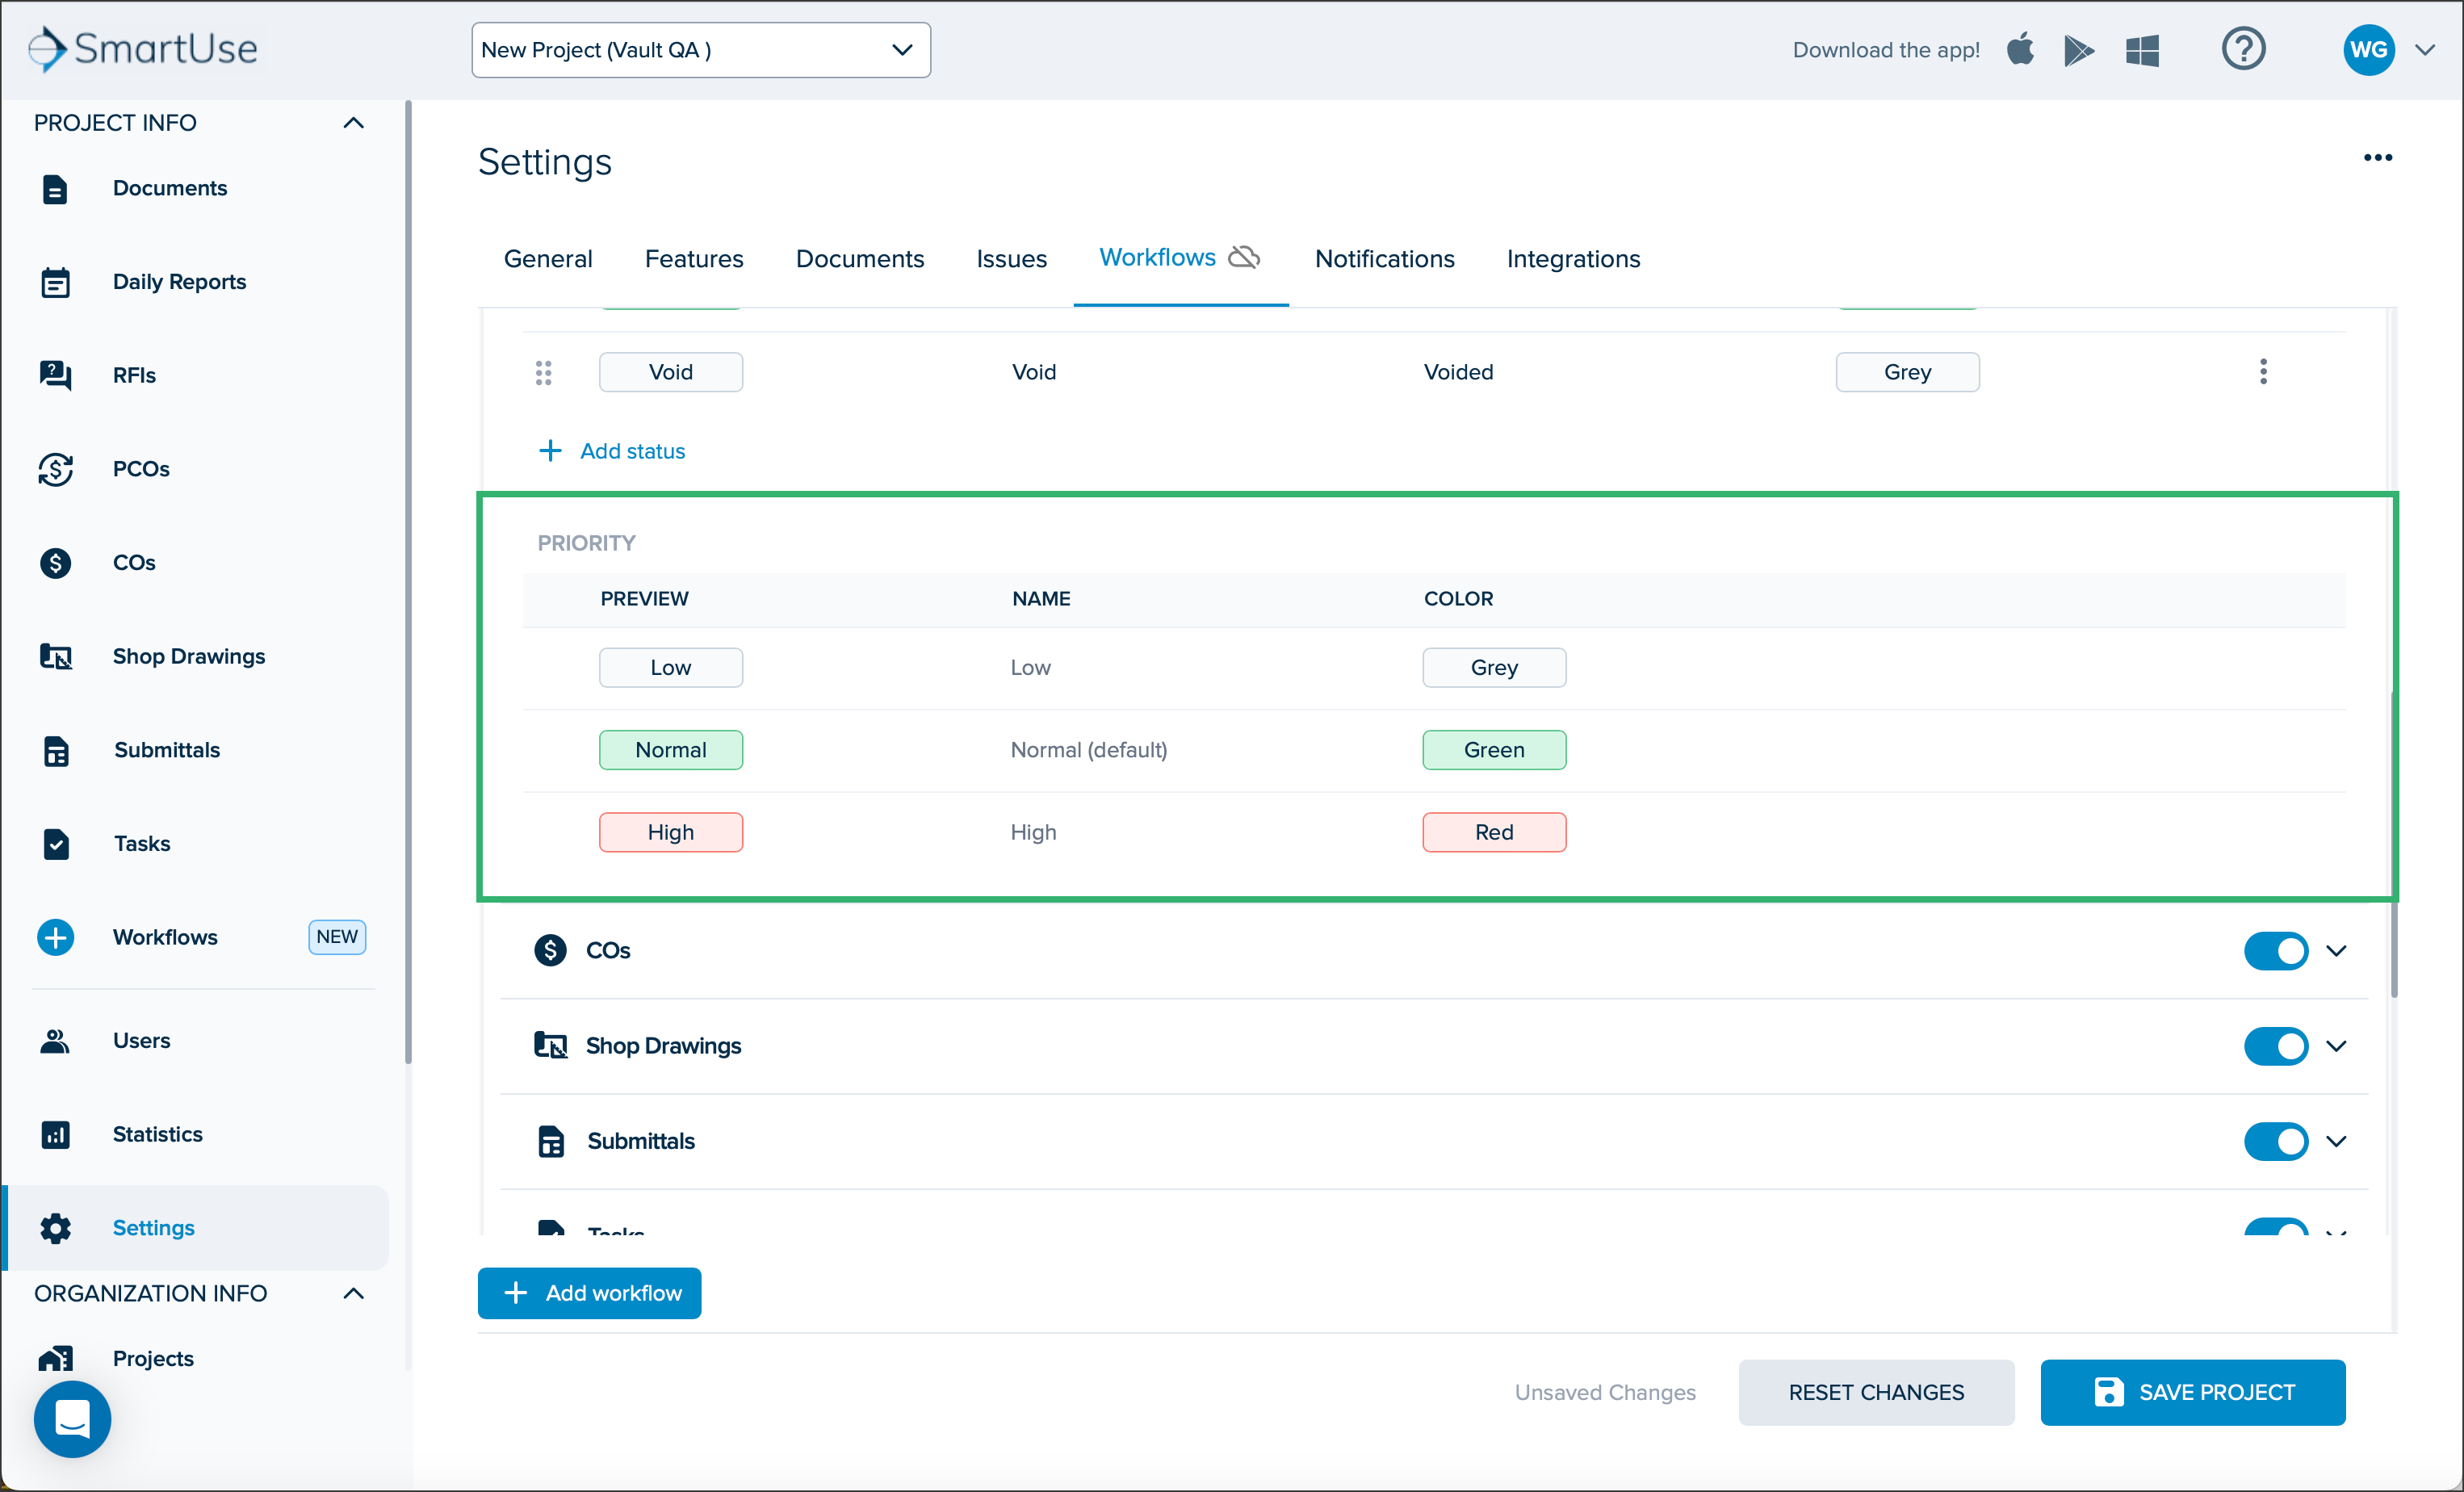
- PRIORITY: For Default Workflows, the priority levels have already been set and cannot be changed, but for Custom Workflows, you can set your own priority levels by adding priority levels, adjusting the colours, changing the order of the priorities, and deleting priority levels.
- Default Workflows: Click the dropdown arrow to view the priority levels.
- Custom Configurable Workflows: Start by adding a new Custom Workflow and then you can make changes to the priorities.

- Default Workflows: Click the dropdown arrow to view the priority levels.
Project Fields
NOTE
Project Fields automatically save as they are edited.
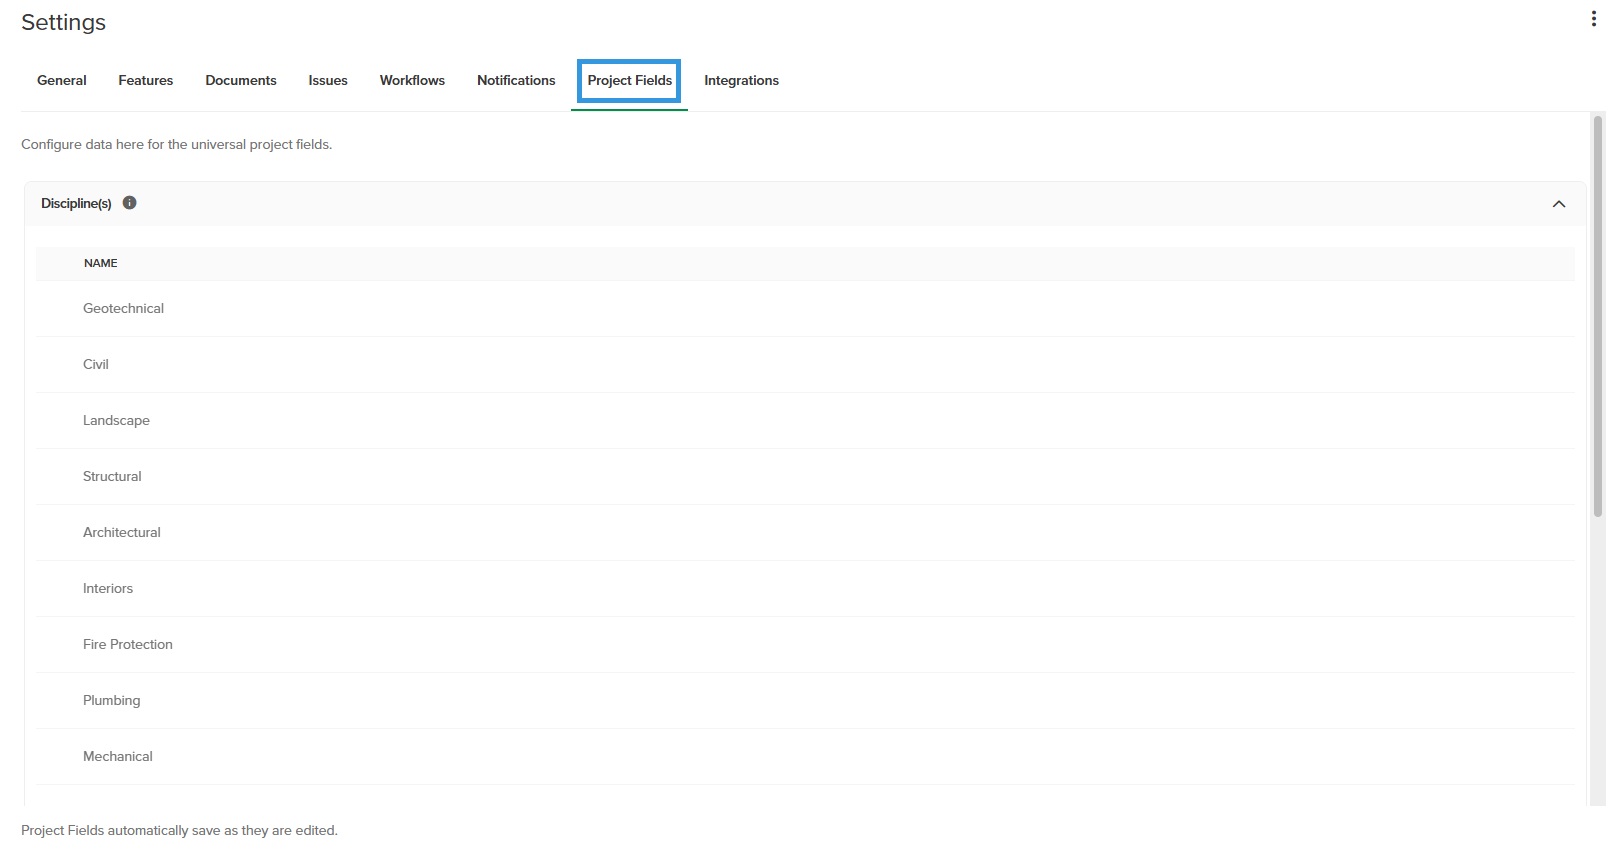
+Add Discipline: Enter the name of a new discipline and tap enter.
Three Dots menu: Click to Delete row (delete a discipline).
Six Dots: Drag and drop a discipline to reorganize the order of the disciplines.
Notifications
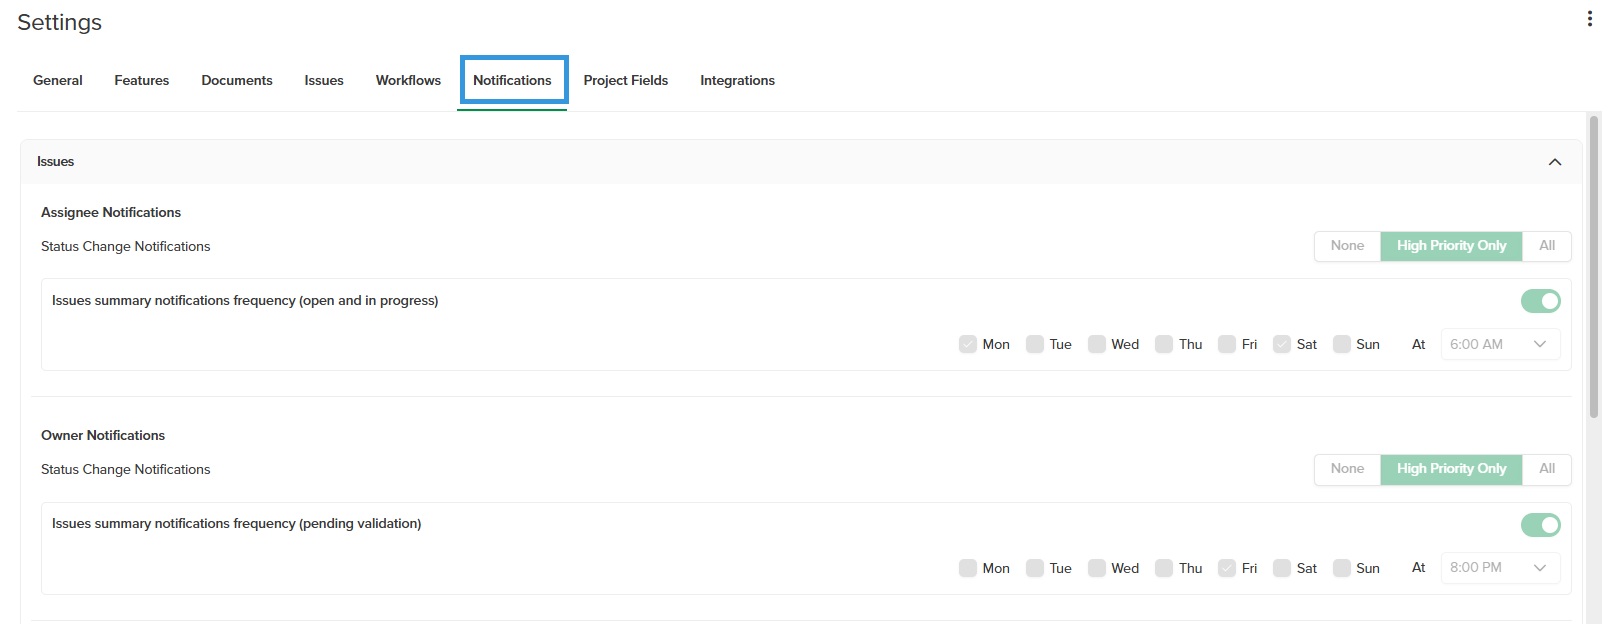
Issues
Assignee Notifications
Status Change Notifications: Select if you want to change the status of None, High Priority Only or All notifications. This setting is used to reduce notifications for non-urgent items. Daily Reports will summarize all notifications for open and in-progress Issues.
Issues summary notifications frequency (open and in progress): Select the days and times for which you want Issues summary notifications to be sent out.
Owner Notifications
Status Change Notifications: Select if you want to change the status of None, High Priority Only or All notifications. This setting is used to reduce notifications for non-urgent items. Daily Reports will summarize all notifications for Issues pending validation.
Issues summary notifications frequency (pending validation): Select the days and times for which you want Issues summary notifications to be sent out.
Automated Issues Report
Report Type: Select if you want an automated report to be sent in CVS, PDF, or Both forms.
Send to: Select the users to whom you want the report to be sent to.
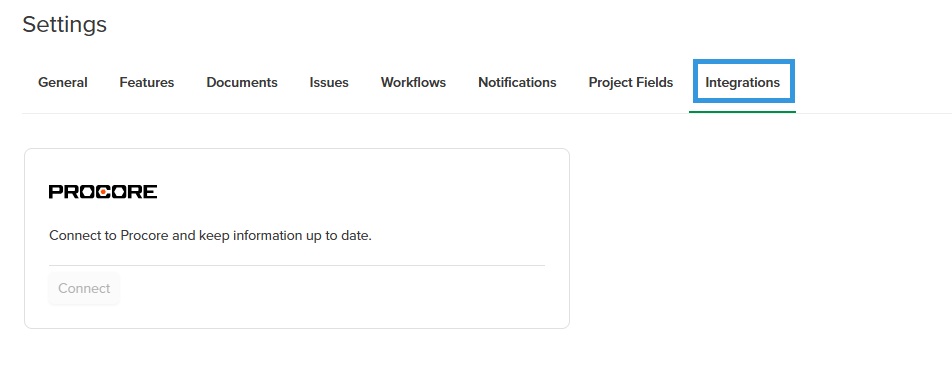
Integrations
NOTE
Integrations automatically save as they are edited.
Connect: Connect STACK with another application to access documents and drawings from that application. Click Connect to retrieve the project/drawings you want to connect your STACK project to.
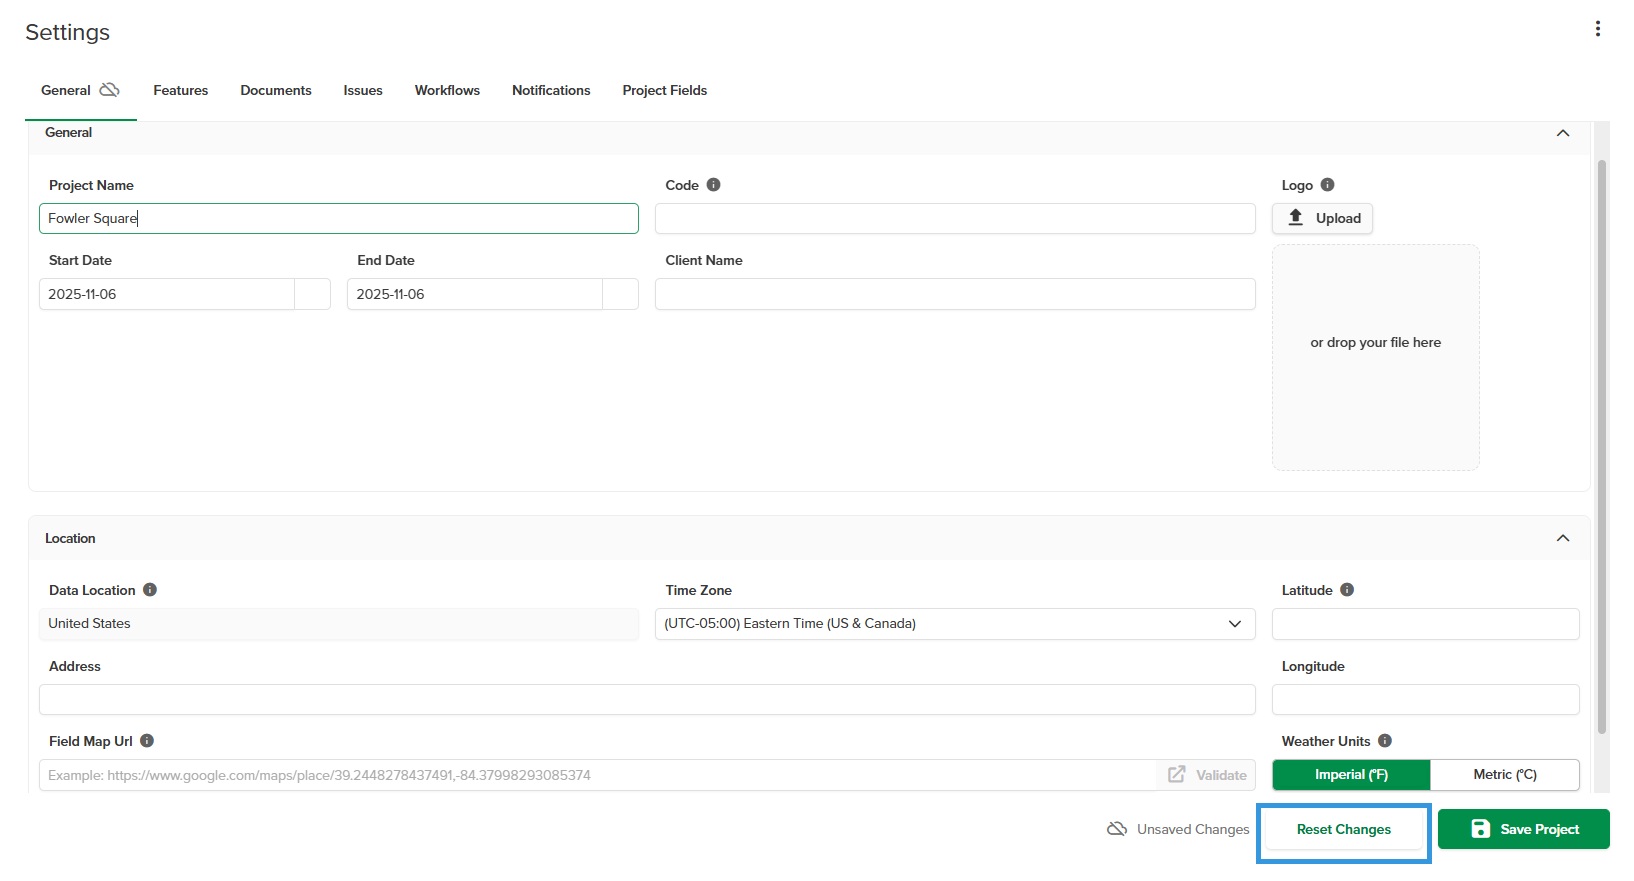
To cancel the changes applied before saving the project, click RESET CHANGES. This will revert all fields to as they were before you started the edits.
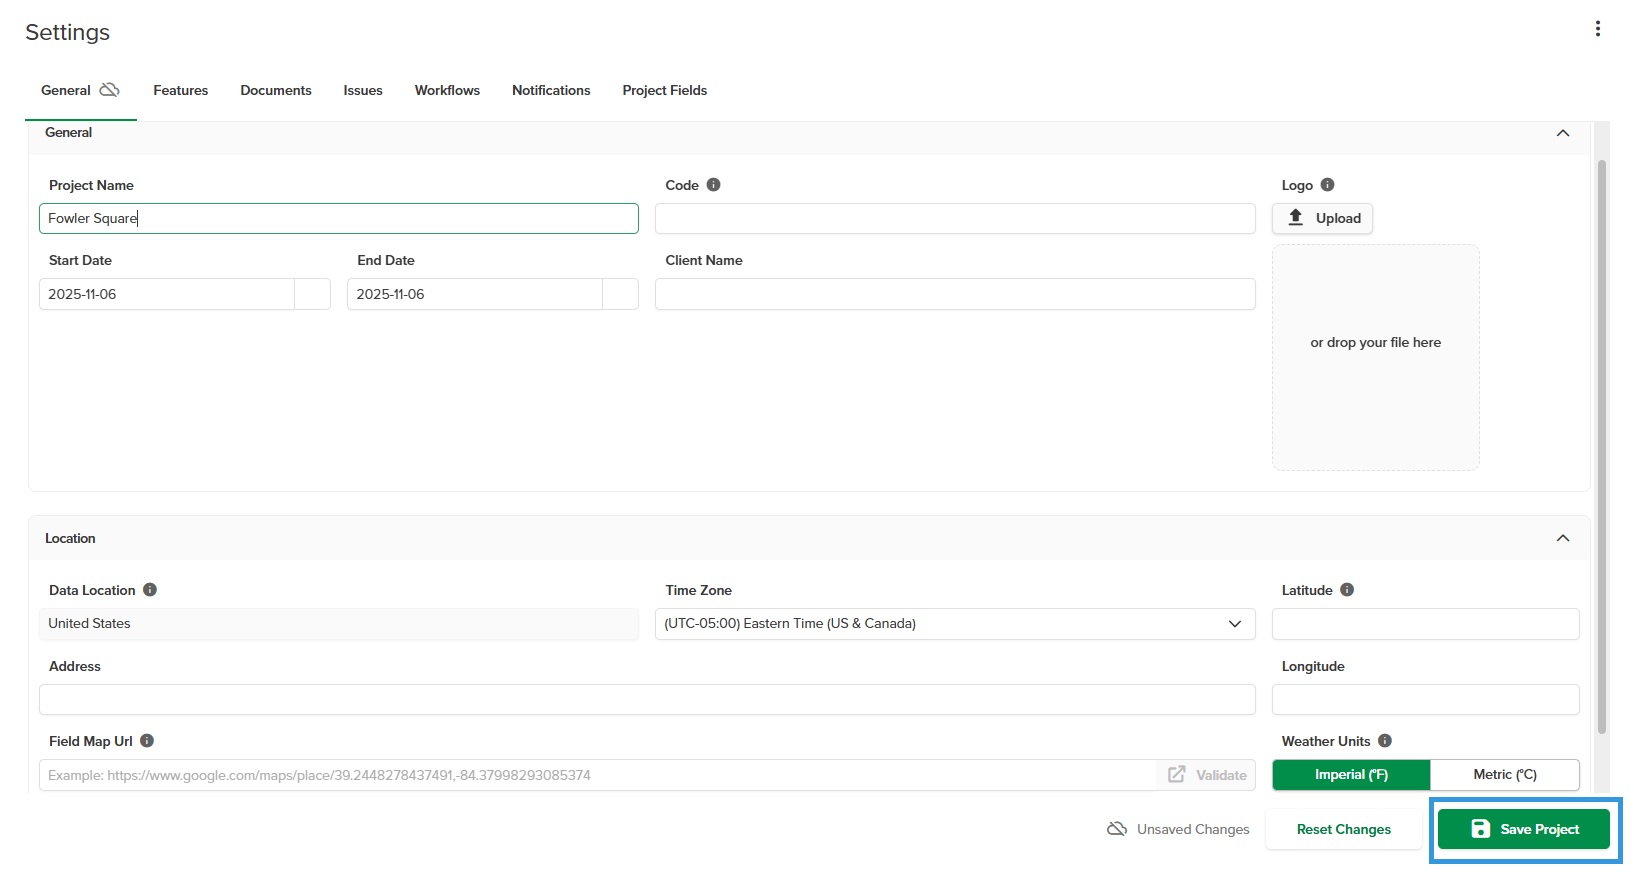
To save your edit, click SAVE PROJECT.
NOTE
A cloud with a slash indicates that there are unsaved changes in the project. Clicking SAVE PROJECT will save those changes.
Related Articles
If you need additional assistance, please Contact Us.
Was this article helpful?