Create Project Template
- Imprimir
- OscuroClaro
- DF
Create Project Template
- Imprimir
- OscuroClaro
- DF
The content is currently unavailable in Spanish (Mexico). You are viewing the default English version.
Resumen del artículo
¿Te ha resultado útil este resumen?
Gracias por tus comentarios
What to Know
STACK encourages the creation of project templates to streamline the setup of new projects.
Administrators can design multiple templates tailored to different project types.
Using project templates reduces configuration time and ensures greater consistency across projects.
See below for instructions to:
Project Template Overview
Copied Content
When creating a project from a template, the following elements are automatically transferred to the new project:
Documents folder structure
Project Settings:
Features
Daily Reports on/off toggle
Workflows on/off toggle
Documents
Markup layer on/off toggle
Ordering Pattern
Issues
Custom configurable fields
Categories
Lists
Photos and comment on/off toggle
Workflows
Default workflows
On/off toggles
Prefix
Custom Workflows
New Workflow name (Singular, Plural, Prefix)
On/off toggles
Statuses
Priorities
Notifications
Issues (all settings)
Default Workflows (all settings)
Custom Workflows (all settings)
Project Fields
Disciplines
Creating a Project Template
Creating a Project Template follows the same process as starting a new project, with the key difference being that you assign a clear, descriptive template name.
Under ORGANIZATION INFO > Projects, click + Create New Project.
Fill in the following fields:
Project Name: Provide a complete and descriptive name for your project template. Including the word "template" in the name will make it easier to find when setting up future projects, as all previously created projects will be listed in the Project Template dropdown.
Code: If applicable, you will be assigning a unique code to each new project, so there's no need to manually input it into the template.
Project Template: When creating a project template, you have the option to start from scratch or select a previous template to build upon. If you choose a previous template, select it from the dropdown.
Data Location: From the dropdown, select the data location for the template. Choose the data center closest to your organization. Although, if your company operates in various locations, it may be beneficial to create templates tailored to these specific locations, as the data location cannot be changed once a project, or in this case, a template has been created.
Click Create Project to create a single template or click Create Another to add multiple templates. Once you've finished creating the final template, click Create Project to complete.
.gif)
NOTE
 Previously, when users created a new project from an existing one, many inherited settings came from that project rather than the Organization Settings tab, which only included General, Markups, and Issues settings. To address this, STACK introduced project templates. These templates copy settings from a project, not from organization settings, allowing administrators to create multiple templates tailored to their company's needs. This provides consistency across projects and reduces configuration time. The settings transferred from the template to the new project are listed in the Copied Content section.
Fill in the Projects tabs:
General
Only the PROJECT NAME gets carried over if you do not enter one when creating a new project. You may also edit the name of your template if needed..jpg)
Features
Both the Daily Reports and Workflow toggles open/closed toggles are copied into a new project. Be sure to set them as desired in the template..jpg)
Documents
Set the Users must create a layer to make markups public toggle to on or off. This is the only value retained for new projects..jpg)
Issues
All fields in the Issues tab are copied into new projects. Toggle the Photos and comments are mandatory to complete an issue option on or off, and set values for the three Custom configurable fields if needed for your template..jpg)
Workflows
In the Workflow tab, toggle each Default Workflow type on or off while assigning a value for each Workflow Prefix, ensuring the appropriate configuration for your template. The Default Workflow Statuses and Priorities will automatically be carried over into new projects, providing consistency in your workflow setups..jpg)
For Custom Workflows, toggle the on/off option, enter both the singular and plural Workflow Names, assign a Workflow Prefix, and then add or modify any Statuses or Priorities that you would like to carry over alongside the existing ones, offering flexibility and customization within your project template.
.jpg)
.jpg)
Notifications
All fields in the Notifications tab are copied into a new project. For both Assignee and Owner Notifications, toggle the Issues summary notifications frequency on or off, and choose the type of Status Change Notifications you want to send - None, High Priority Only, or All. Toggle workflow options to on or off, depending on what you want carried over into new projects..jpg)
Project Fields
Add, reorder, or delete Disciplines to create the list you want included in your project template..jpg)
Integrations
Integrations do not get included into project templates..jpg)
Click Save Project.
.jpg)
Under PROJECT INFO, click Documents. Alternatively, go to ORGANIZATION INFO, click Projects, then click the three dots next to the project template, and choose Manage documents.
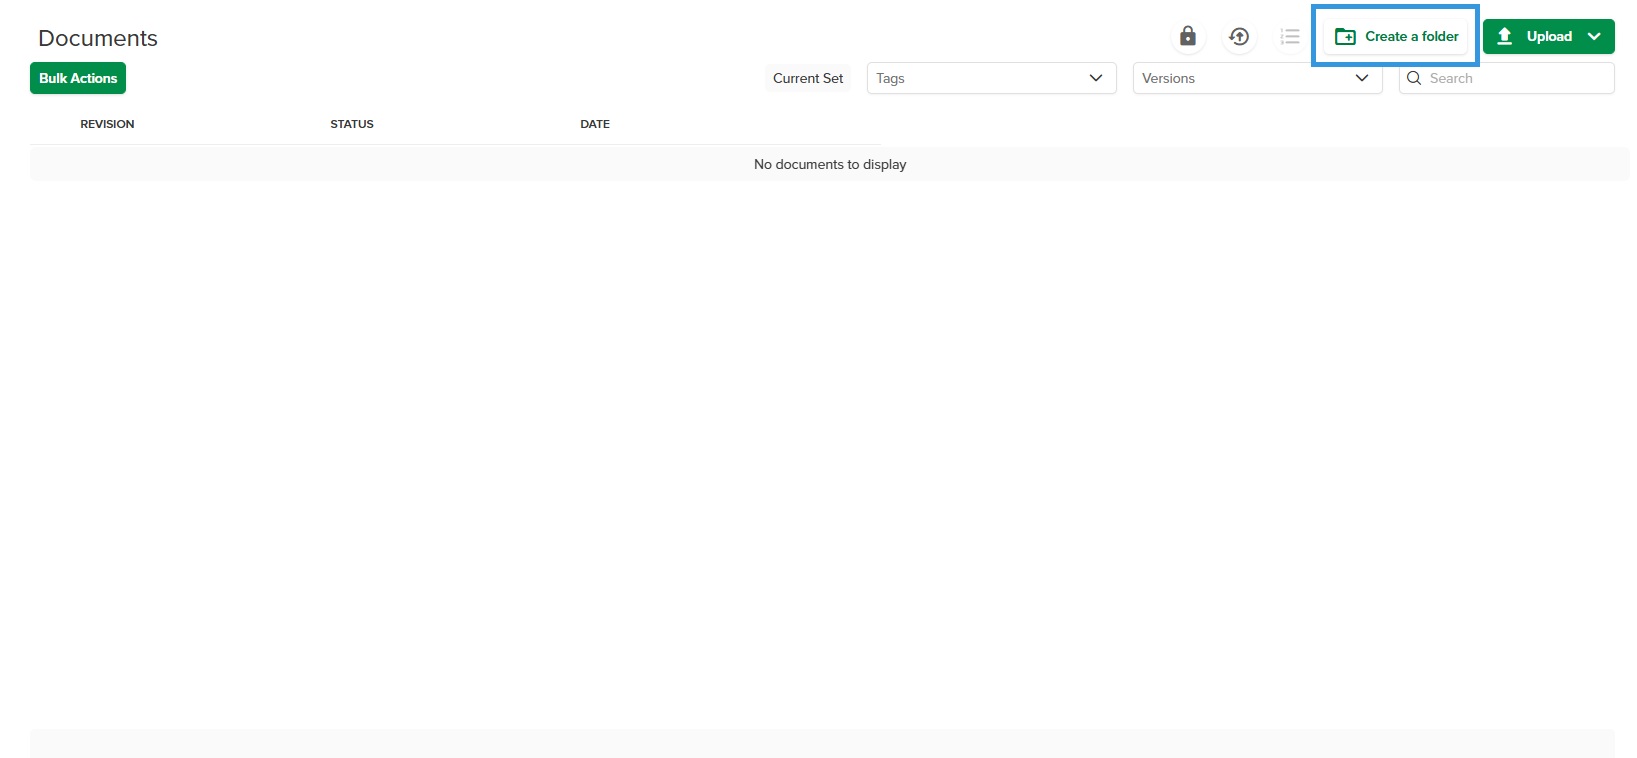
Set up your template's folder structure by clicking Create a folder to add your first folder. Repeat this action to build out the entire top-level folder hierarchy.
To create second-level folders, click on the top-level folder, then select Create a folder in the top right. Repeat this process to build your entire second-level folder hierarchy. Continue this method for each subsequent level of your folder structure.
Project templates also include issue categories. To create them, follow these steps:
Open the STACK Field App.
Select your project template from the list of projects.
Tap the hamburger menu in the top right corner.
Select Issues.
Tap Create new issue.
Tap Create new category.
Enter the category name, acronym, and tap OK.
Repeat this process for each issue category you want to add to your template.

Go back to ORGANIZATION INFO > Projects and you will see your newly created Project template in the Projects list.
Afterward, when you Create a New Project, choose your template from the Project Template dropdown and all elements you configured will be carried over.

Related Articles
If you need additional assistance, please Contact Us.
¿Fue útil este artículo?