STACK Field App Overview
- Print
- DarkLight
- PDF
STACK Field App Overview
- Print
- DarkLight
- PDF
Article summary
Did you find this summary helpful?
Thank you for your feedback!
Key Information
The STACK Field App is used to bring plans and documents on construction sites and to work on them on the go.
Blue prints and documents on the app may be consulted while the app is connected to wifi or data, but they can also be downloaded to be worked on in off-line mode.
In the STACK Field App, you can markup plans and documents, organizing them by layers, compare them side-by-side, and select from multiple viewing options.
The app functions on any smartphone, tablet, computer, 4K or HD screen.
Field App Overview
General Overview
When you first open the STACK Field App, you will land on the Projects page where you will see the projects that you have been assigned to work on. Tap on a project to get started. For more details on Project, see Project in the STACK Field App..png)
Profile icon: Access to the profile popup menu.
Search bar: By using key words search for a project in particular.
Project list: The list of projects that you have been assigned to work on including the following information:
NAME: The project name.
ROLE: The role assigned to you for this project.
ORGANIZATION: The name of the organization the project is for.
LAST UPDATED: The date when the project was last worked on in the STACK Field App.
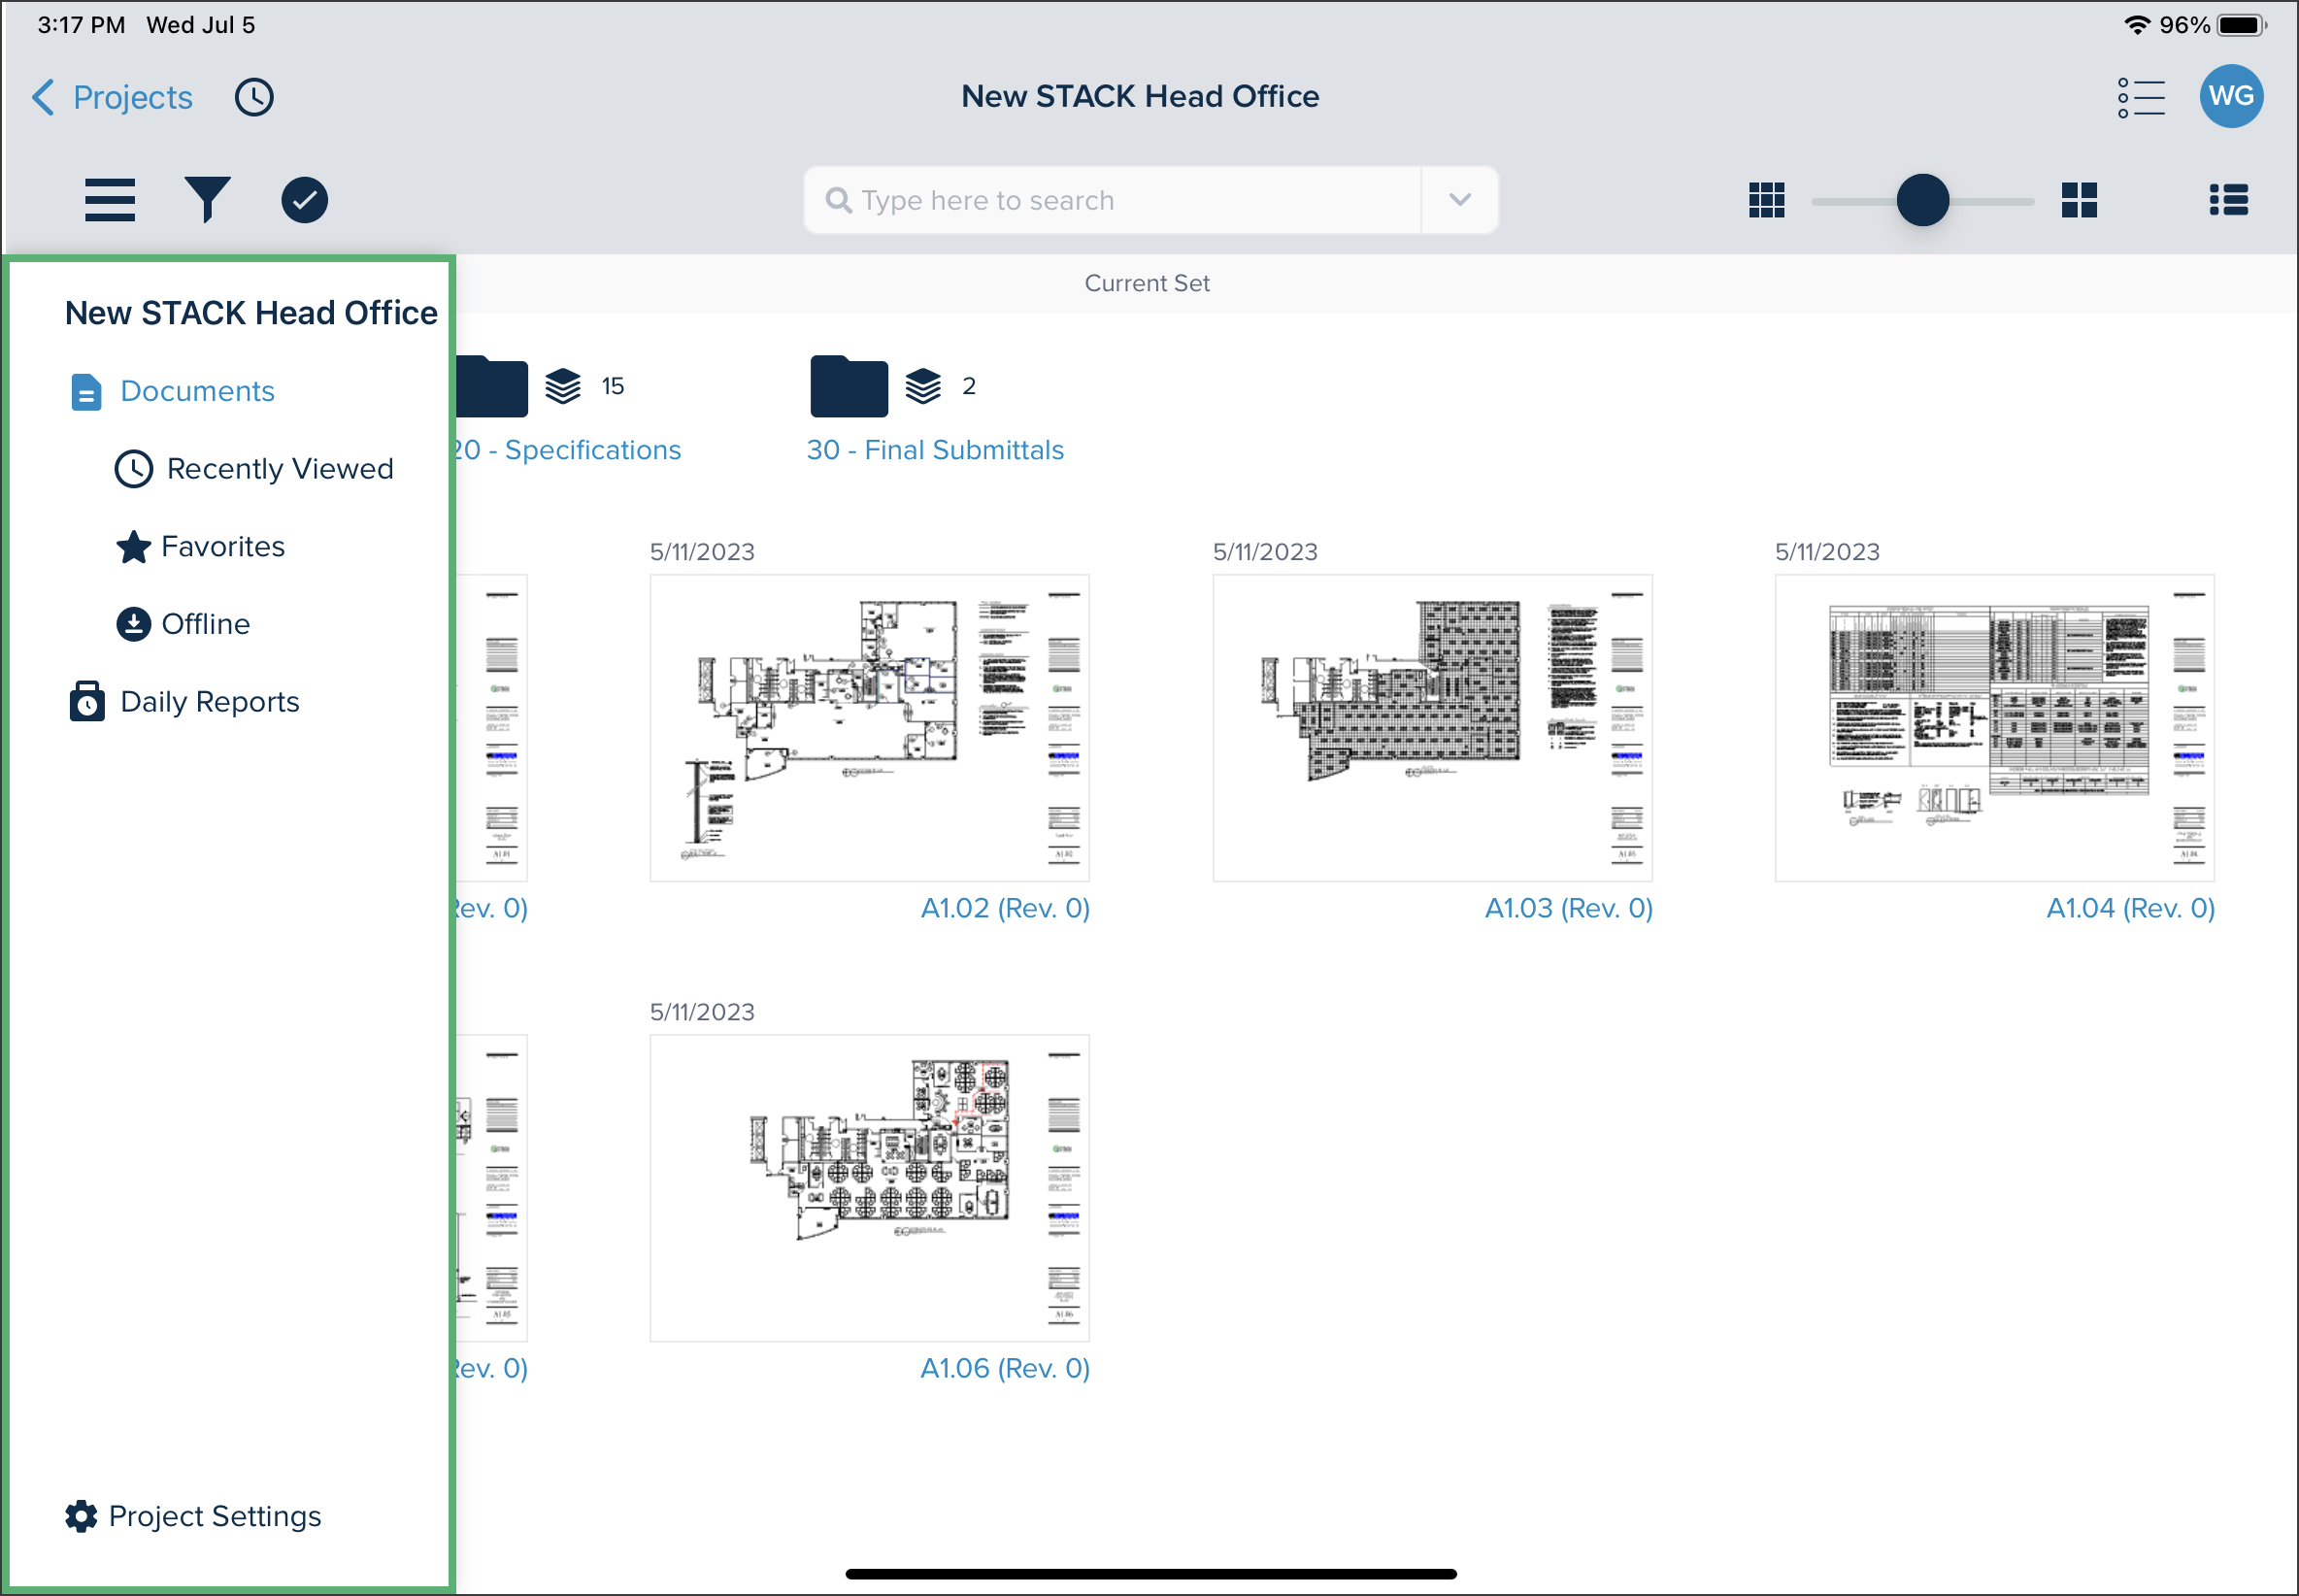
Documents
After tapping on a project, you will land on the Documents window. In this window, you will see your folders and documents..png)
Project name: The name of the project that is currently opened.
Search bar: Using key words search for a folder, document, document title, or even content within a document. The dropdown allows configuring what is searchable.

Zoom: Use the scroll bar to zoom in or out of the plans.
List menu: Access Issues or Photos.

View type: Switch from tile to list view.
Profile icon: Access to the profile icon popup menu.
Hamburger menu: Access to the left-side navigation menu.
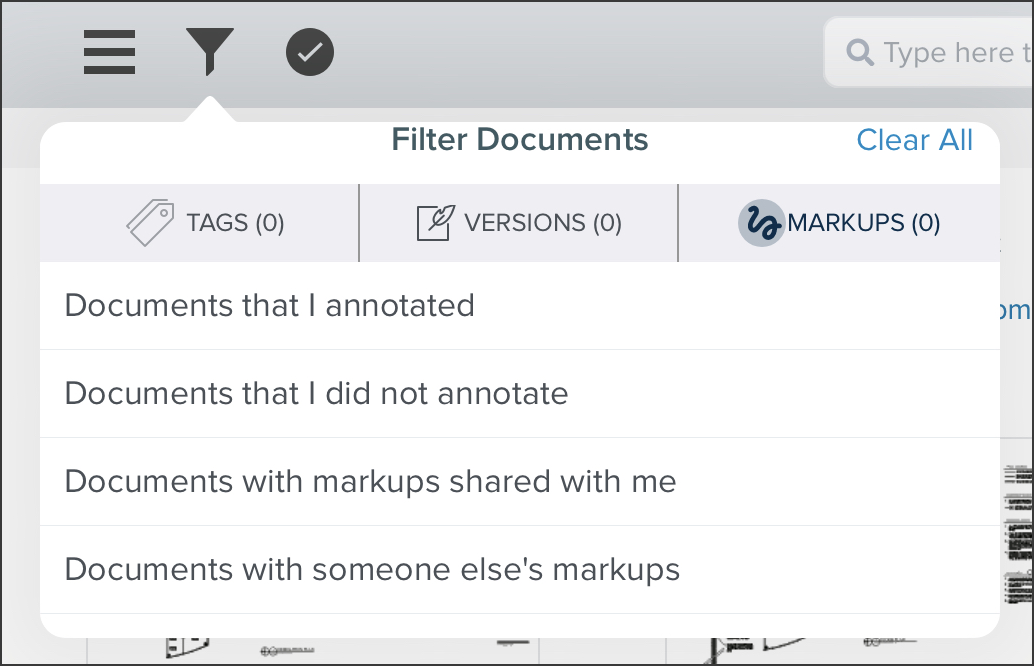
Filters:Access to the Filter Documents popup menu including filters on:
TAGS
VERSIONS
MARKUPS
Select:Allows selecting documents and/or folders to perform the following actions:
Export
Share a link
Download
Add to Favorites
Save for Offline
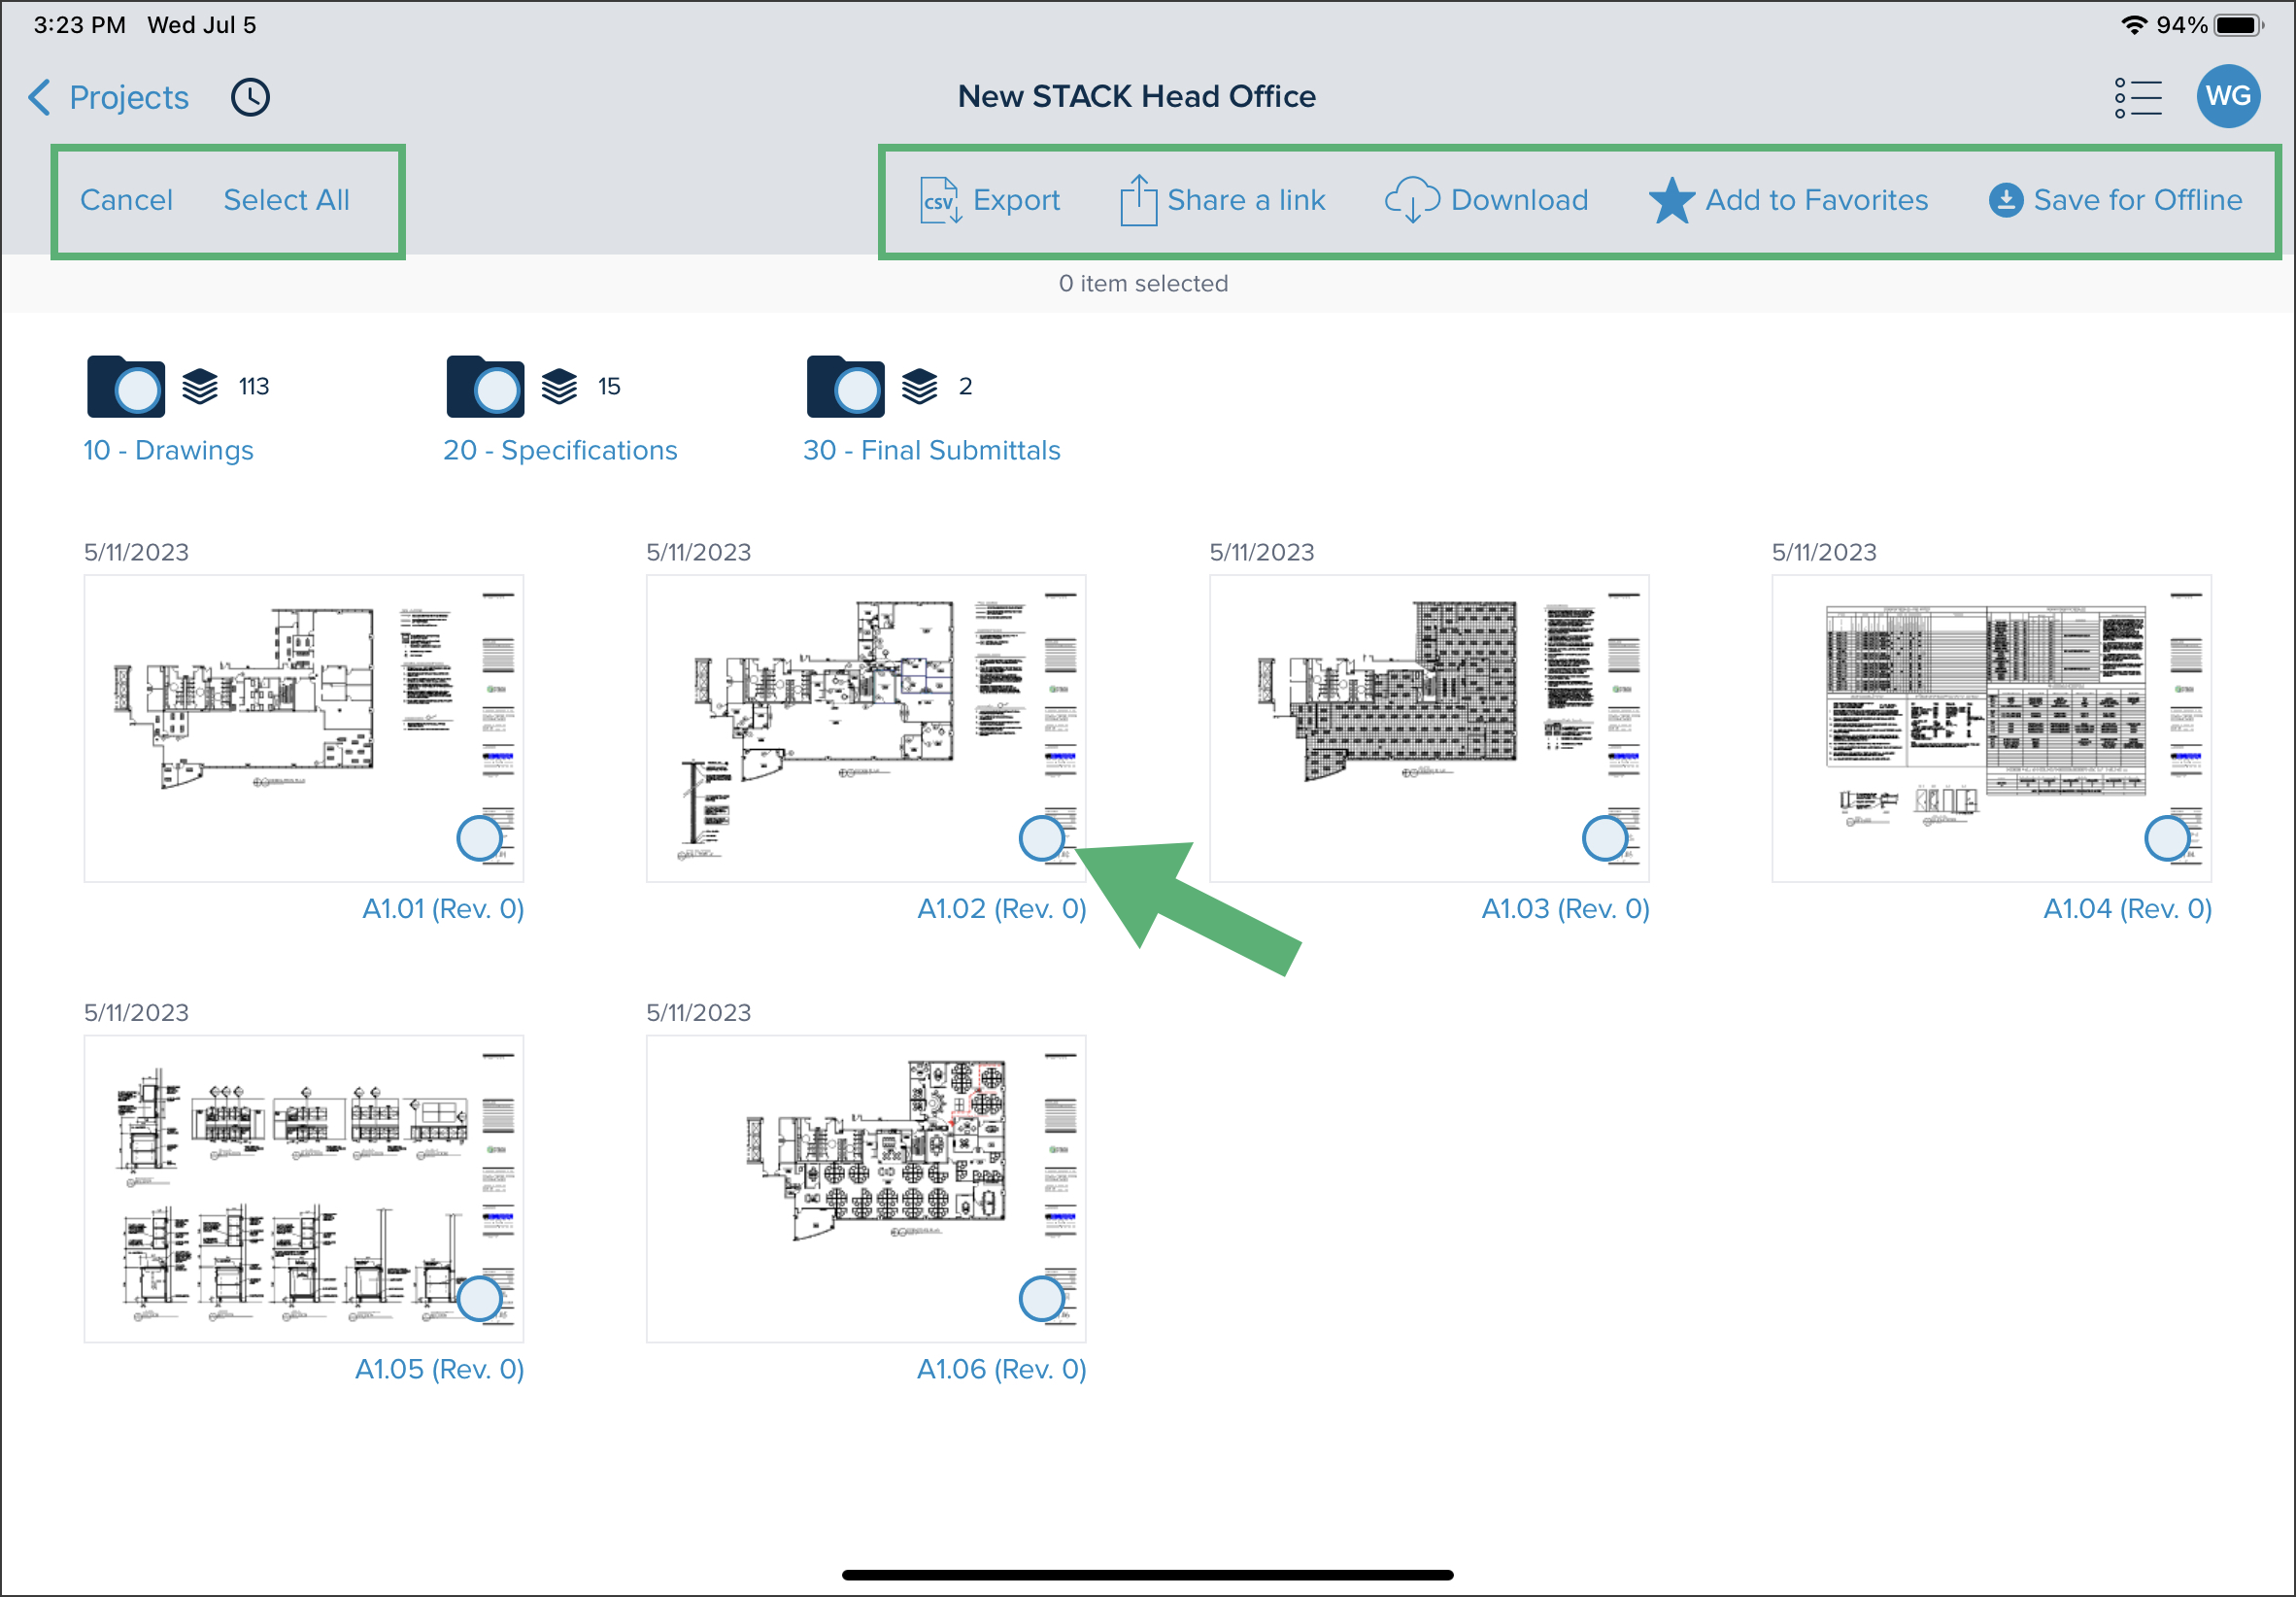
Recently Viewed: Allows scrolling through the documents that you recently viewed and opening one by tapping on it.
Hamburger Menu
The Hamburger menu allows navigating to the different dashboards of the STACK Field App.
Documents
In Documents, you will view your folder structure containing your documents. See the Documents section for more details.
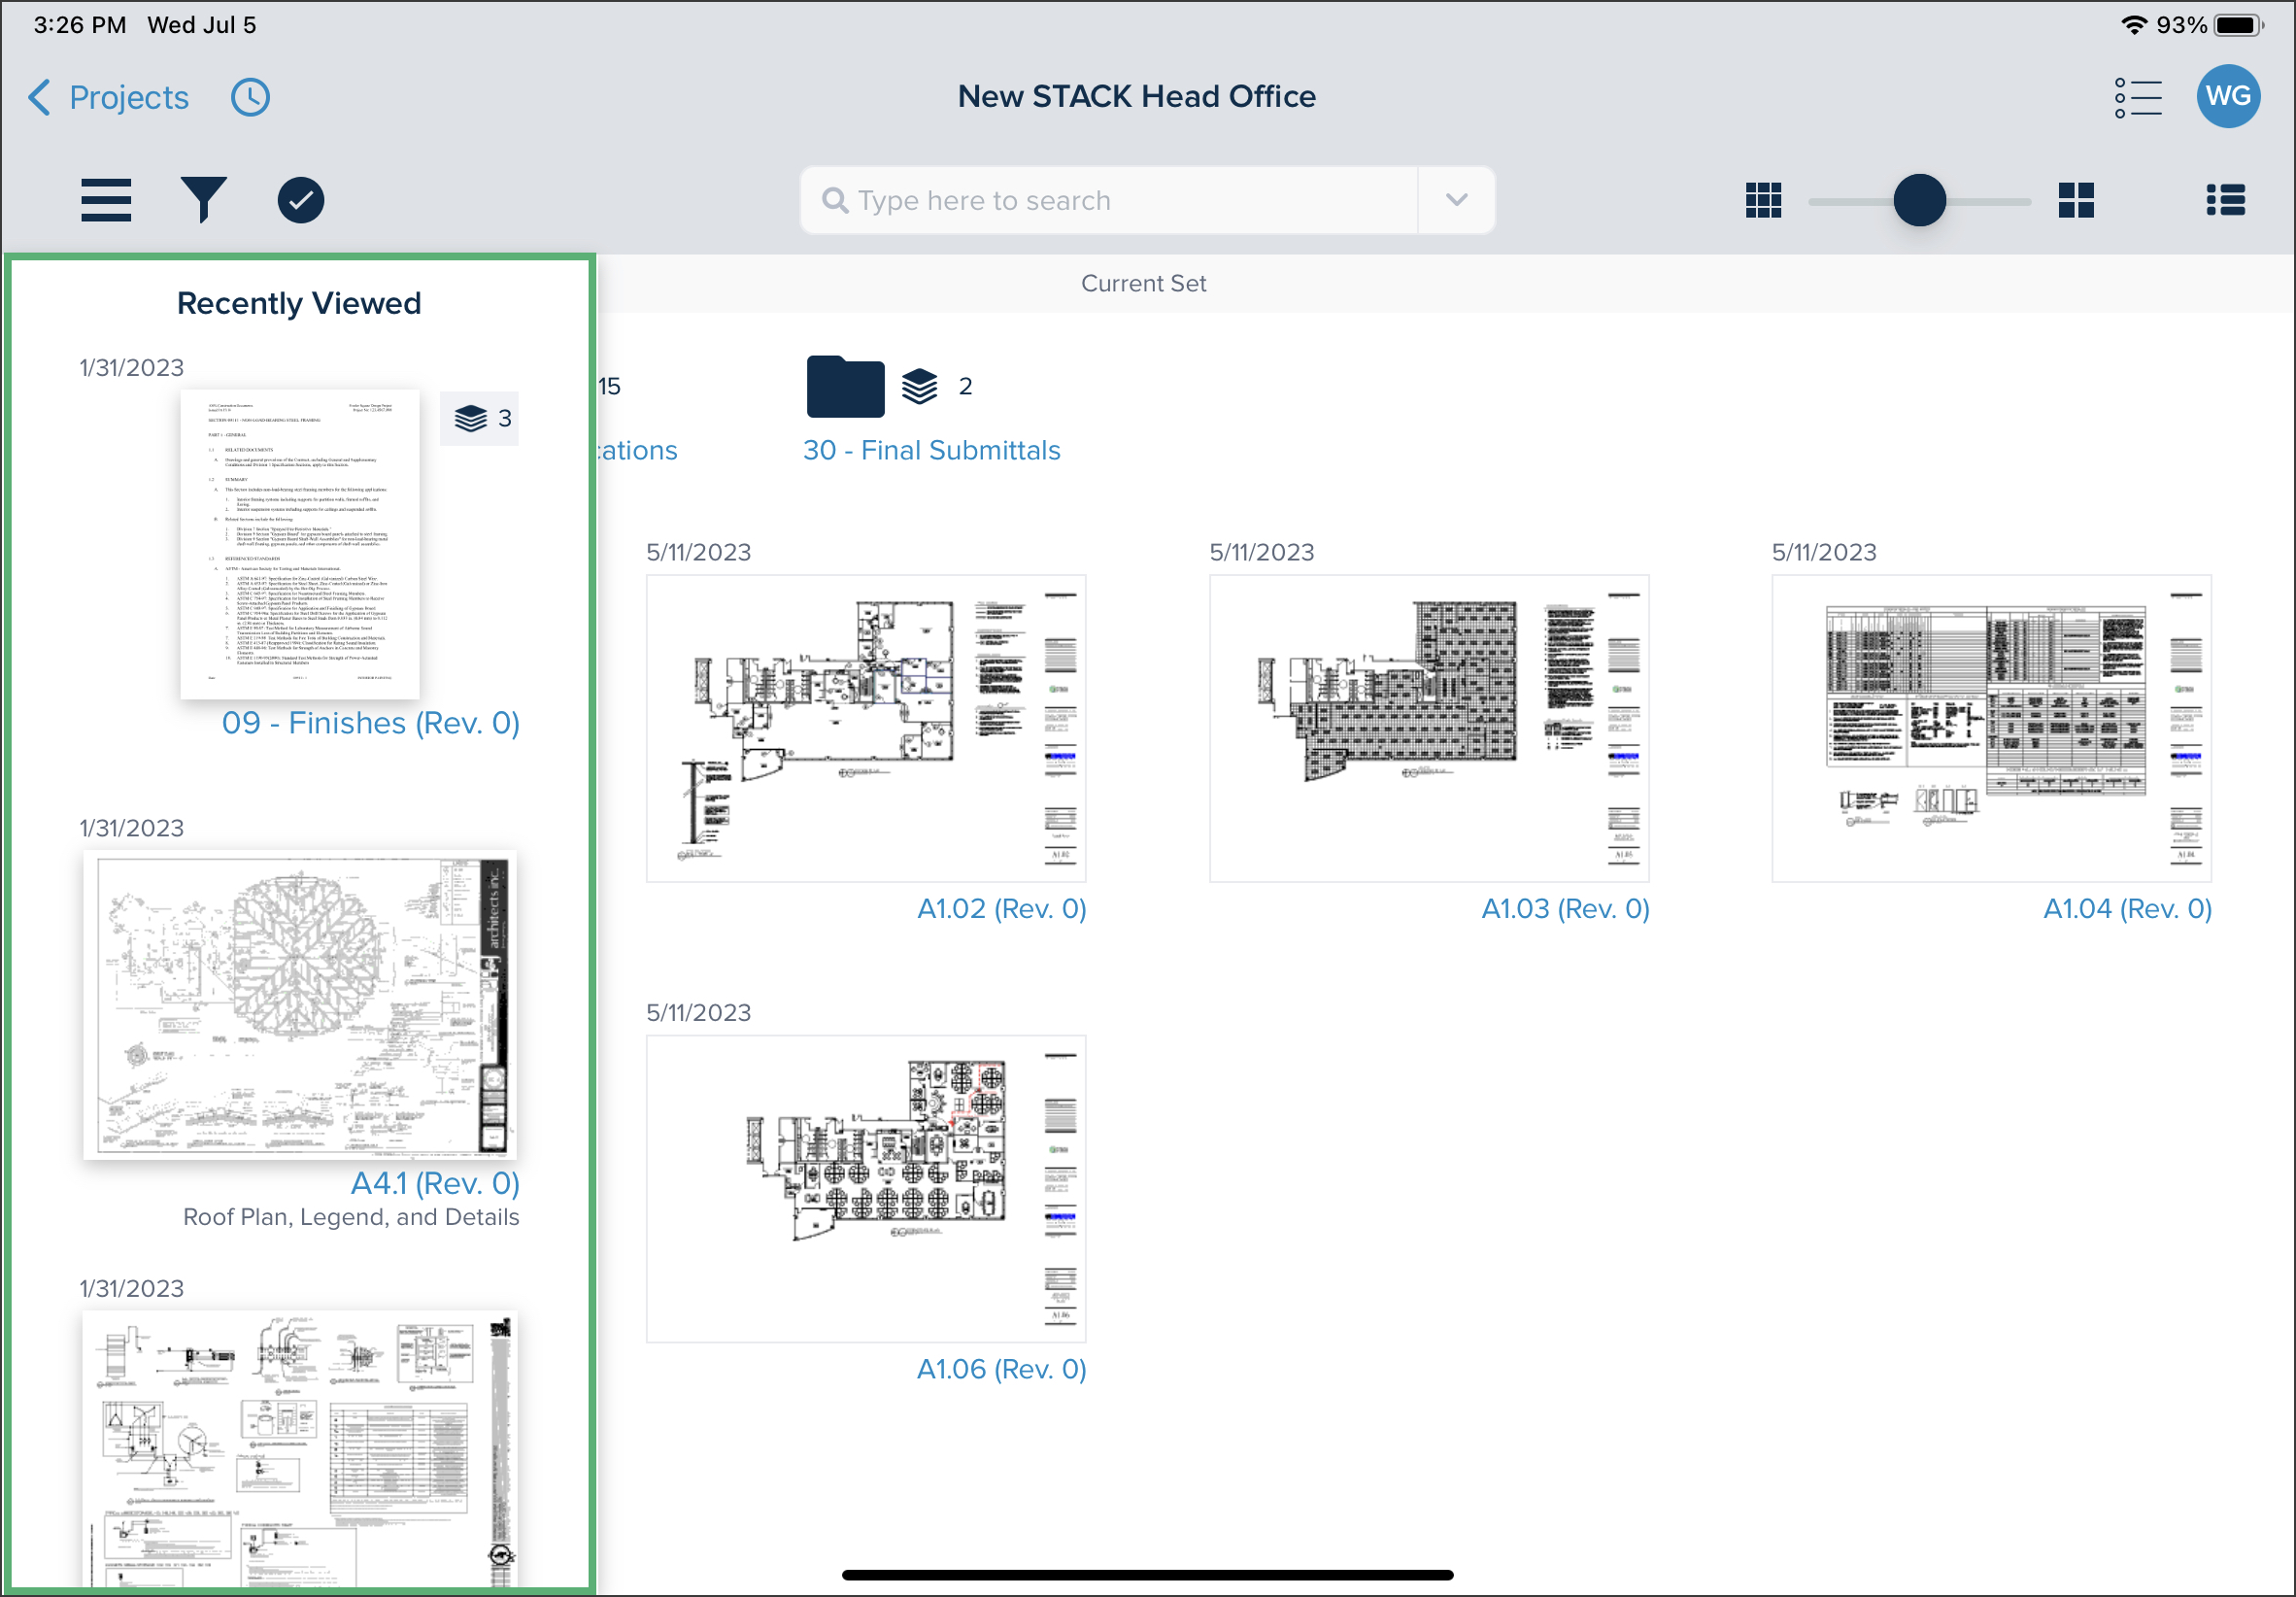
Recently Viewed
In Recently Viewed, you can scroll through the documents that you recently opened. Next to each document, you will find the following information:
When it was last opened
Number of pages
Review number
Preview of the document
Document name
Favorites
In Favorites, view the documents that you added to Favorites using the Select tool.
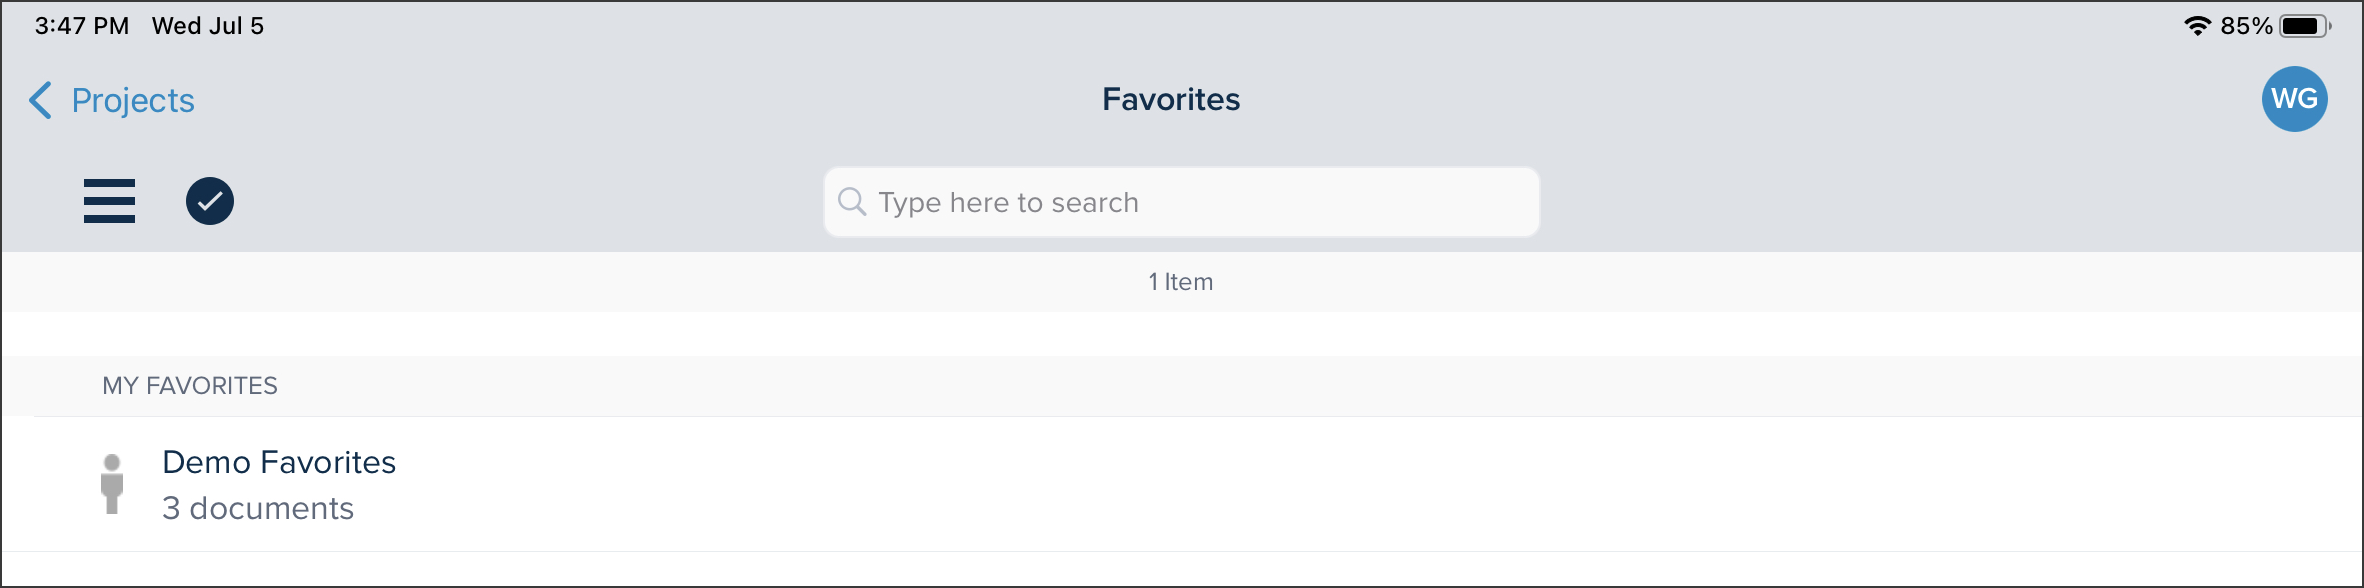 Tap on a one of the items in the MY FAVORITES list to view it.
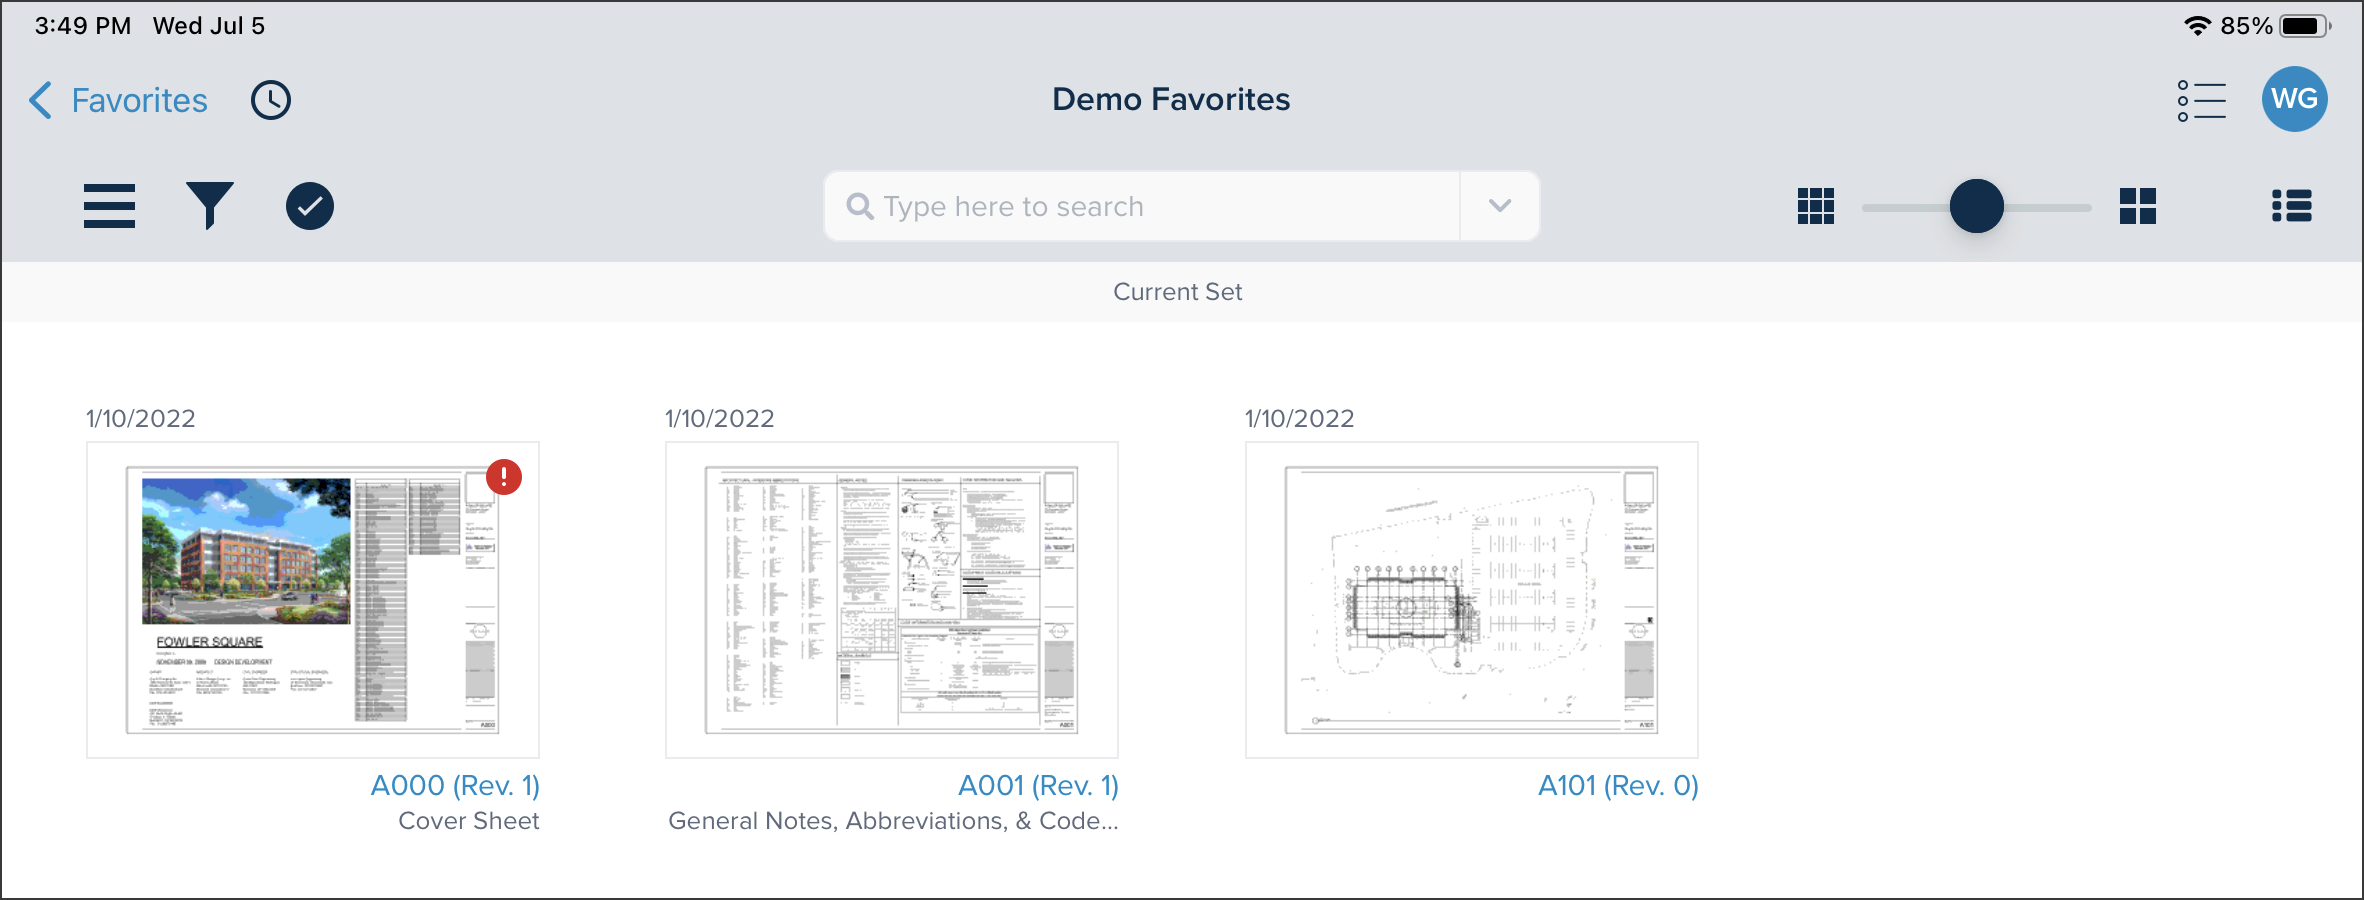
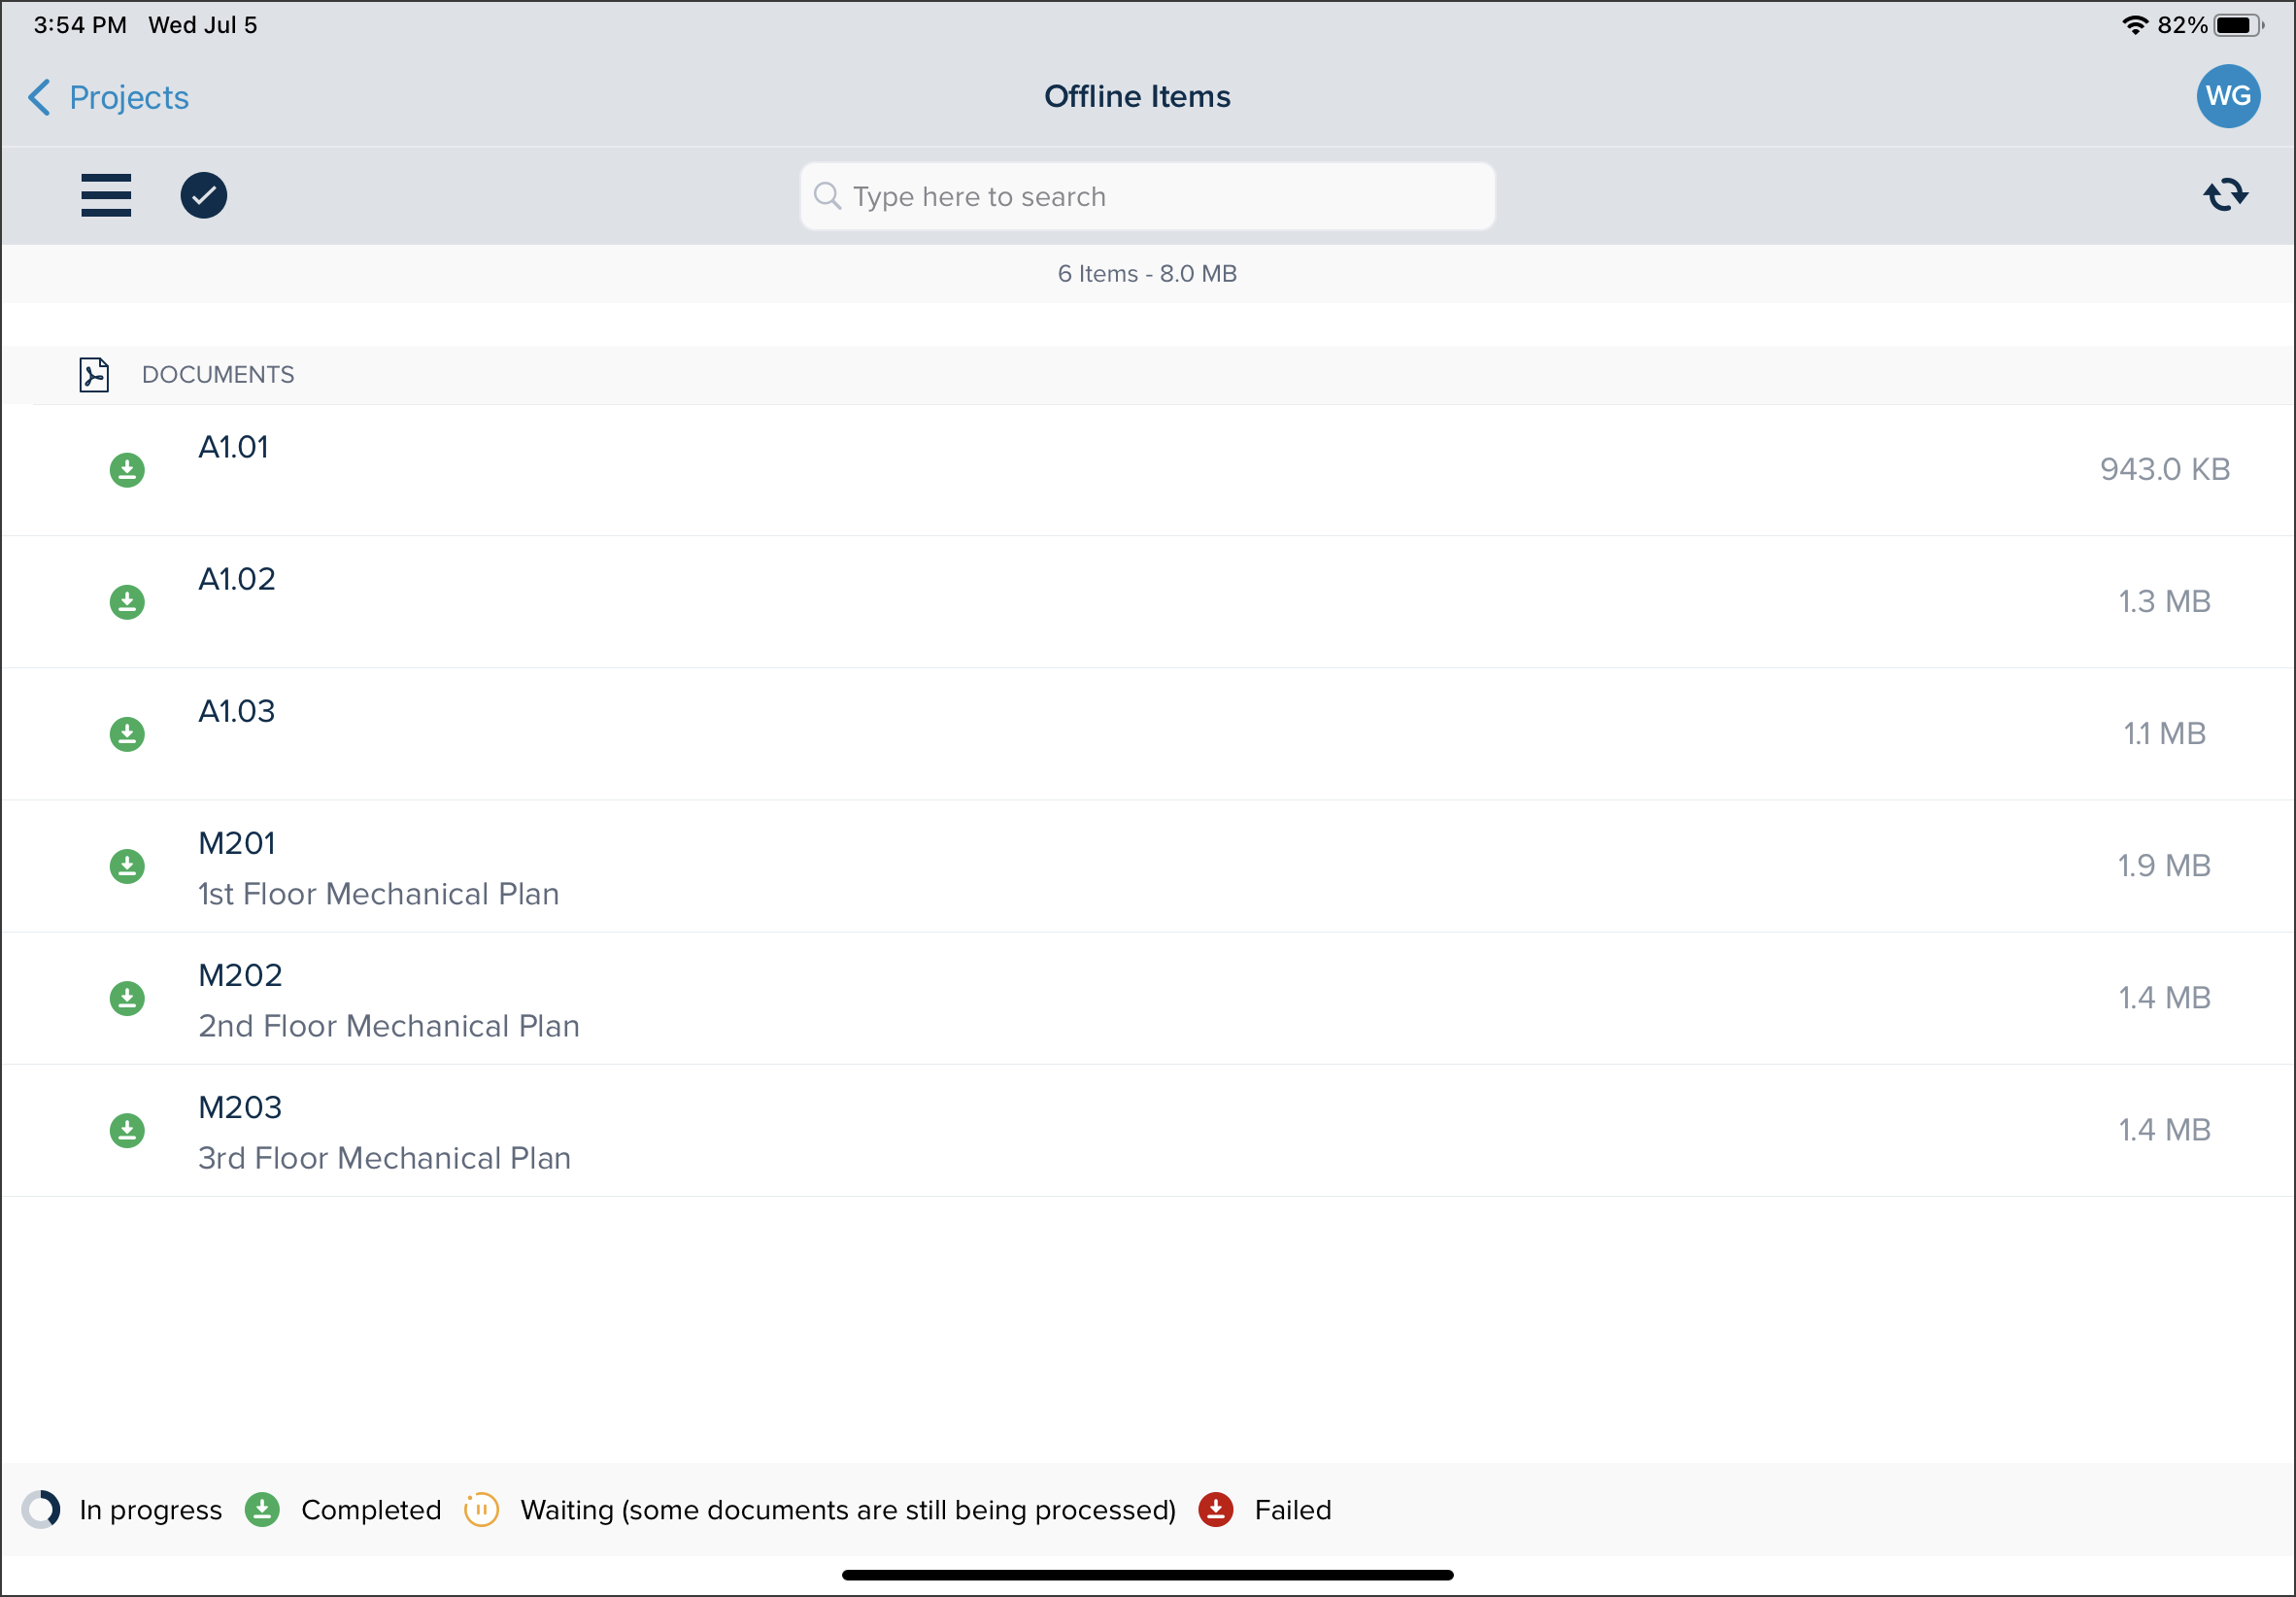
Offline
In Offline, view the documents that you saved for Offline using the Select tool.
Daily Reports
Access the Daily Reports function to view the existing ones and to create new Reports. For more details on the Daily Reports, see Daily Reports in the STACK Field App.
Tap on the + sign or on a date to create a new report.
Tap a date with the coloured dots to view existing reports.
Once open, the report can be viewed by the user or filled in by the Reporter.
Project Settings
Define the Project Setting by toggling the buttons..png)
List Menu
The List Popup menu allows viewing the Issues that have been created and the Photos that have been uploaded.
Issues.png)
- The number of issues on the project.
- Search: Using key words search for issues in particular. As you type, the results containing the most relevant results will appear.
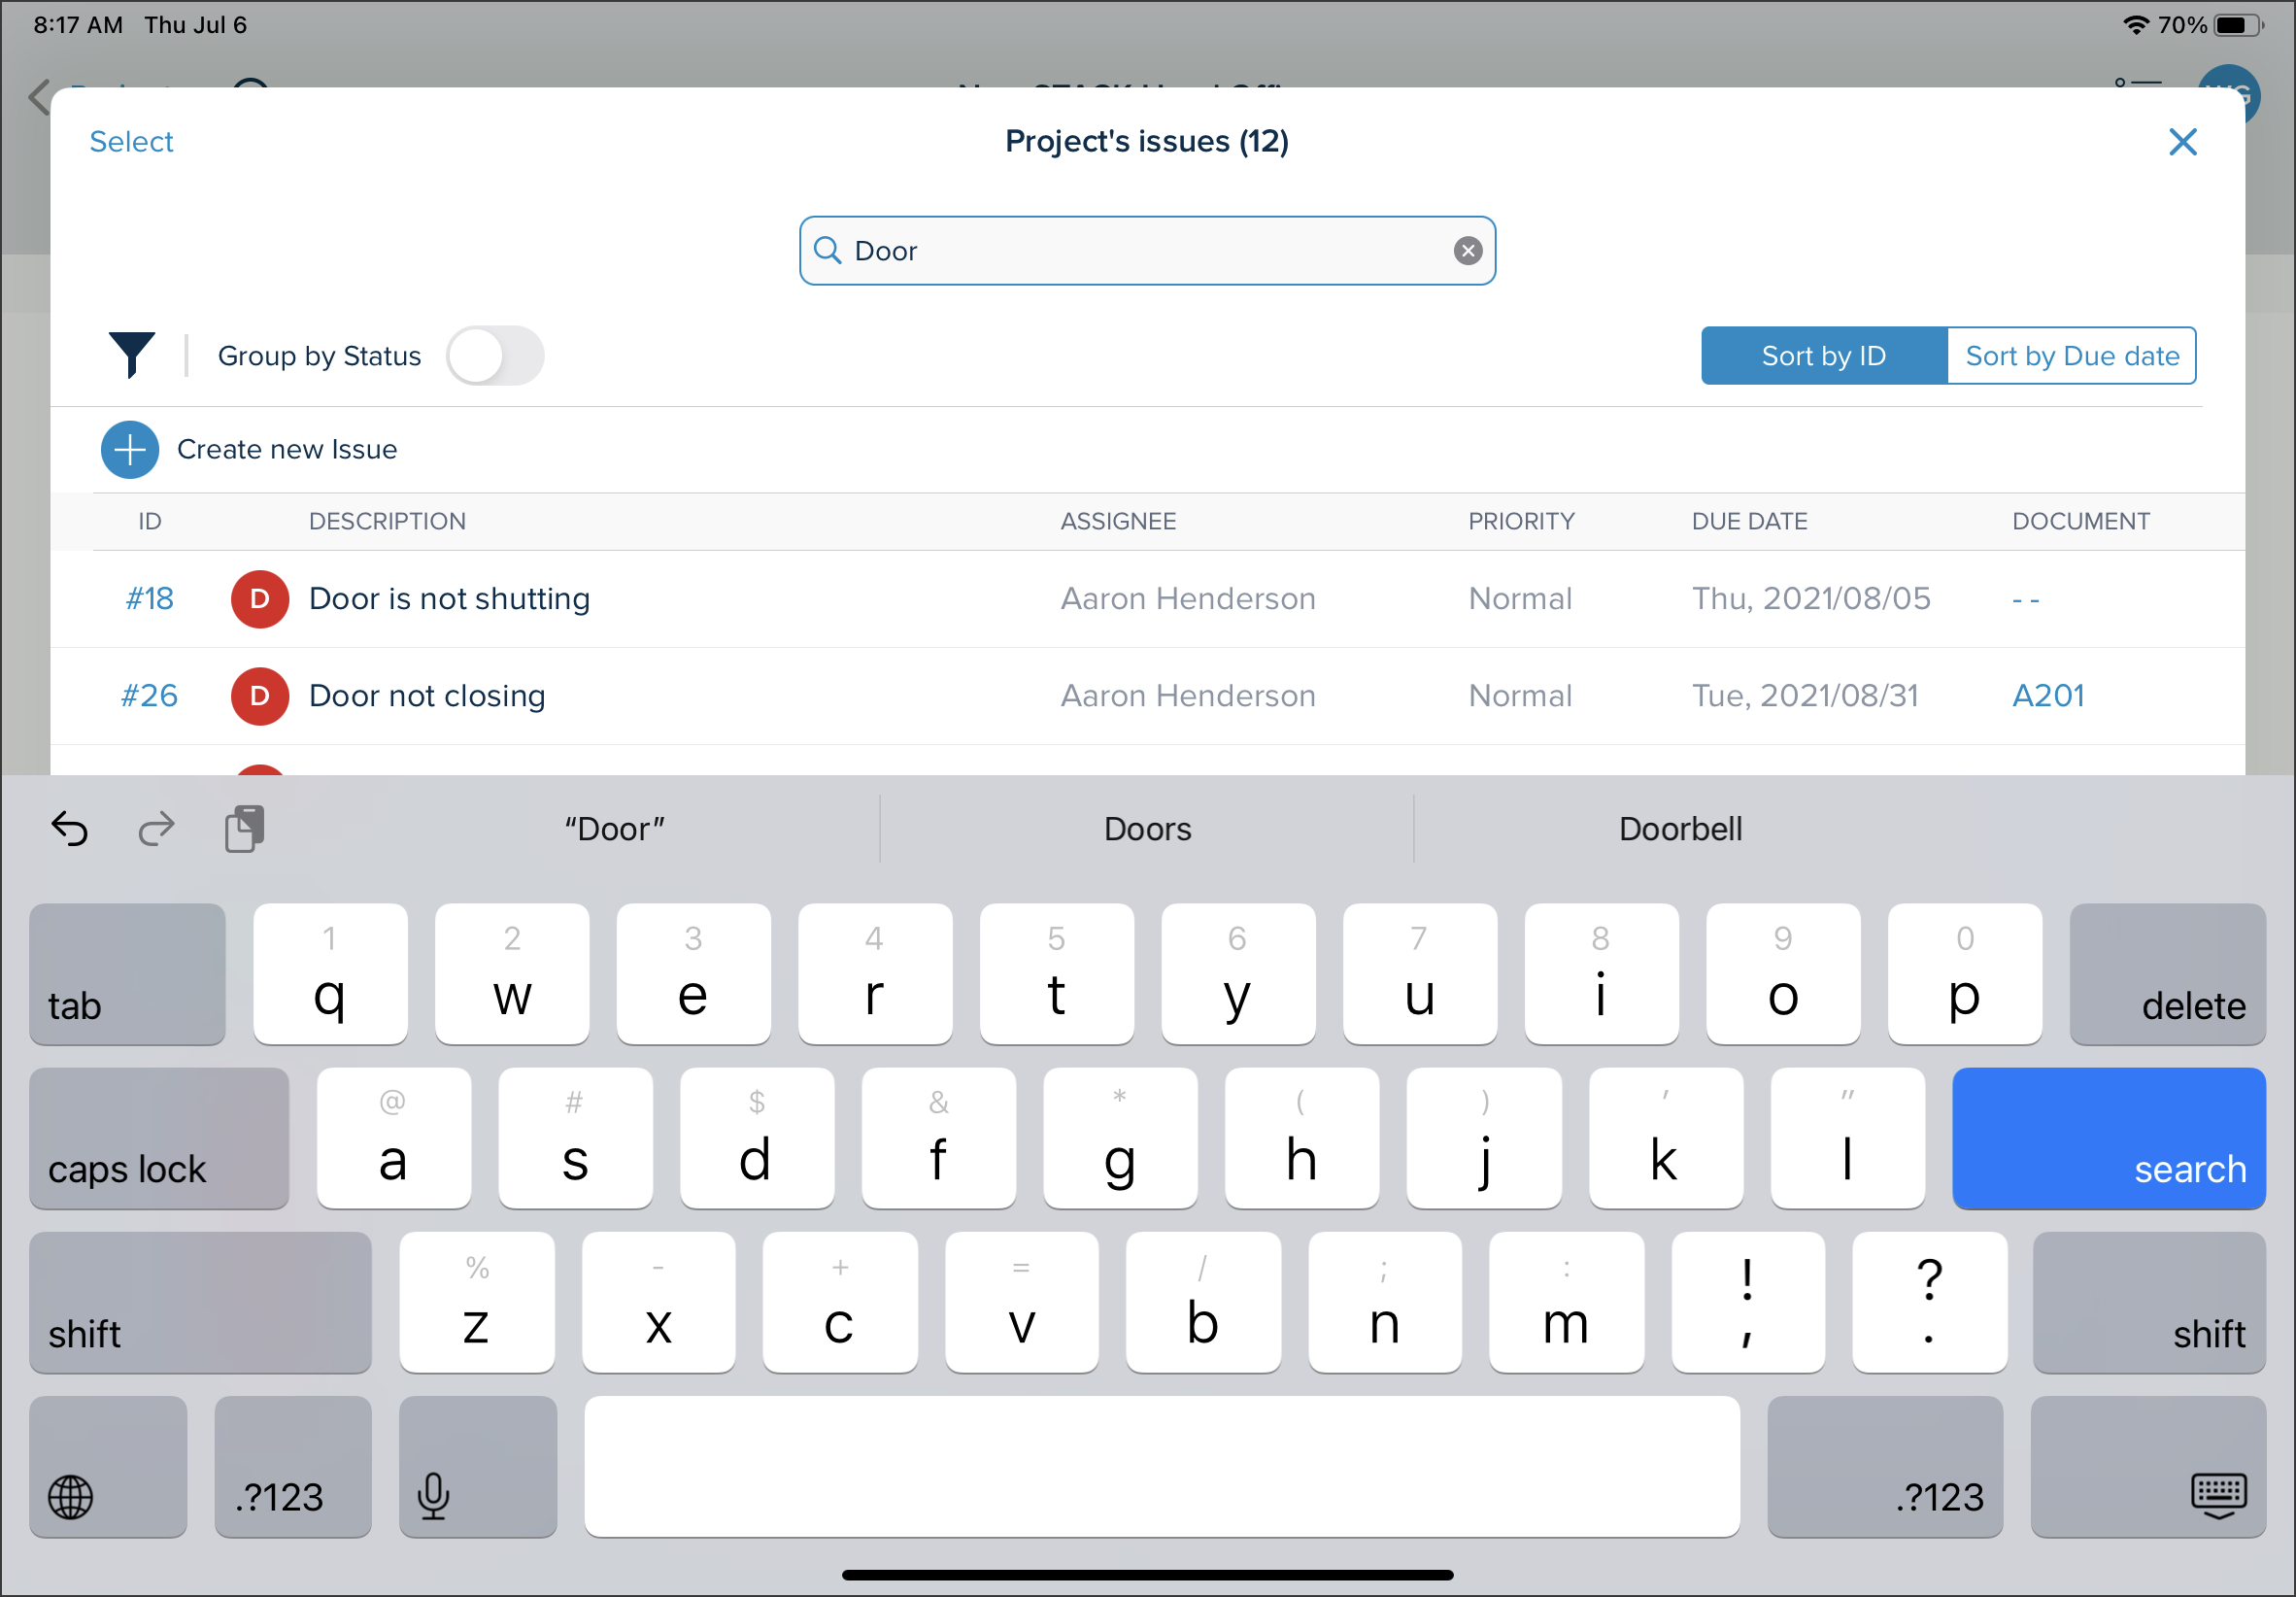
- Select: Deselect or select issues to perform certain actions on them:
- Assign
- Download as CSV
- Download as Word
- Download as PDF

- Filter: Apply filters on the issues to display the specific ones you are looking for.
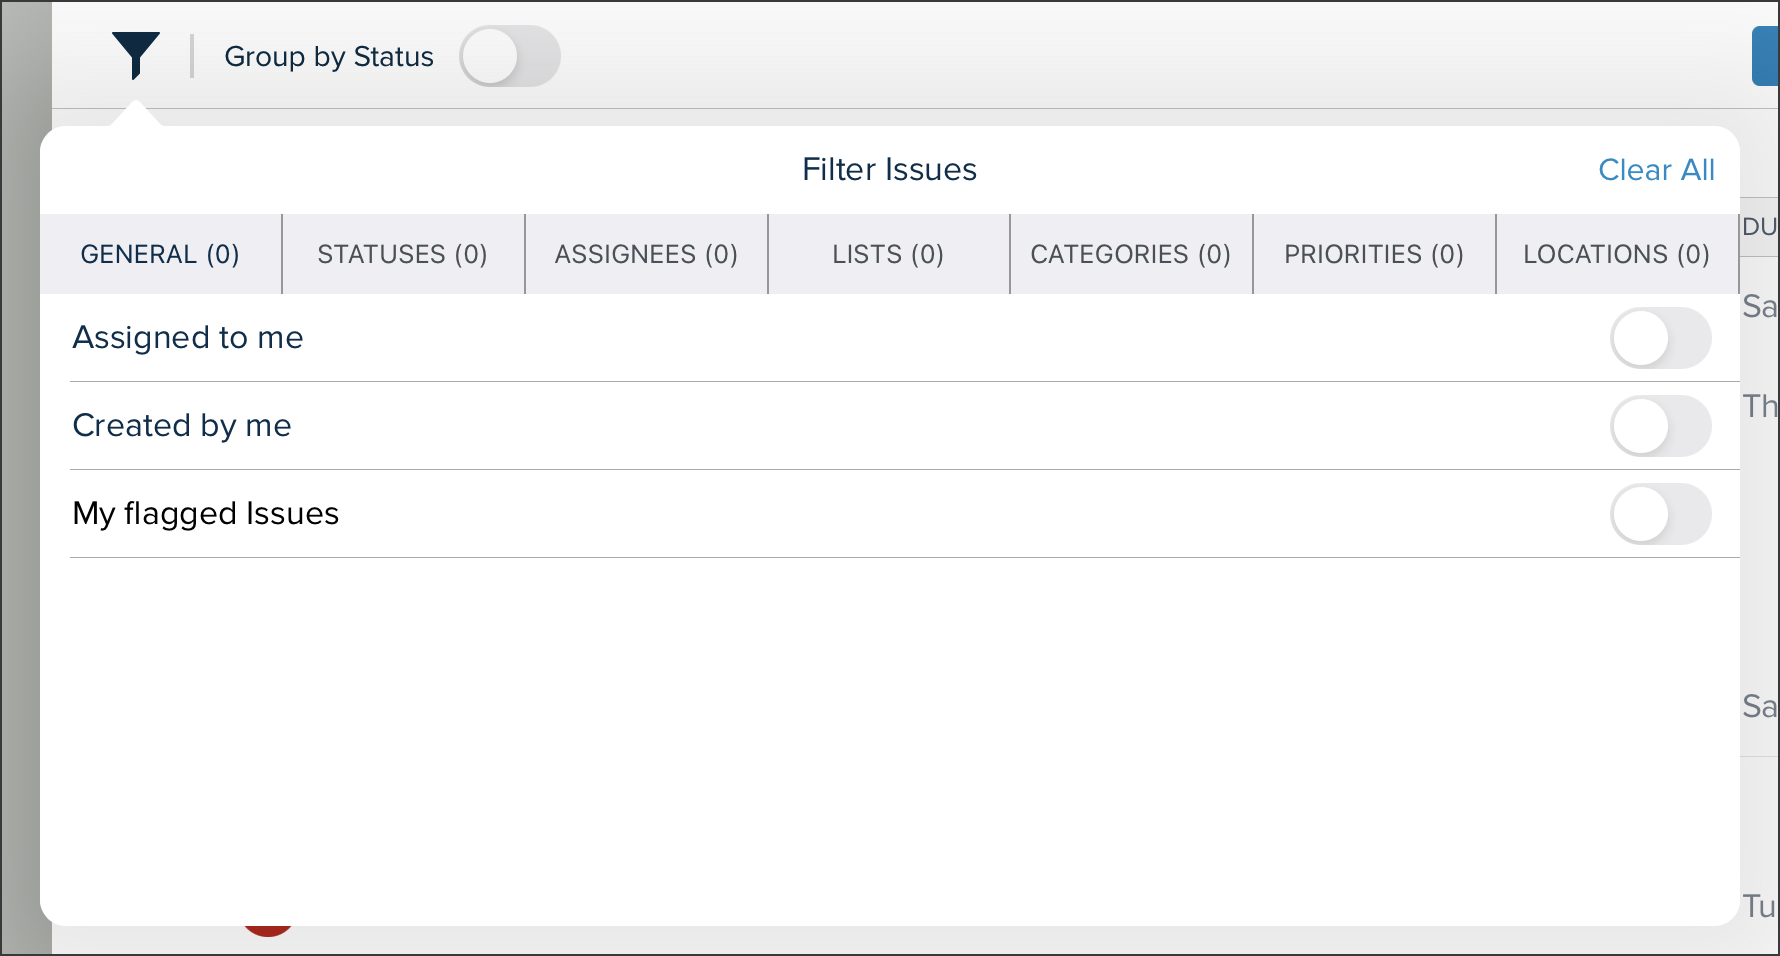
- GENERAL
- STATUSES
- ASSIGNEES
- LISTS
- CATEGORIES
- PRIORITIES
- LOCATIONS
- Group by Status: Toggling on the group status button will group the issues by their status. Otherwise, they will appear in the order of the ID numbers.
- Sort:
- Sort by ID
- Sort by Due Date
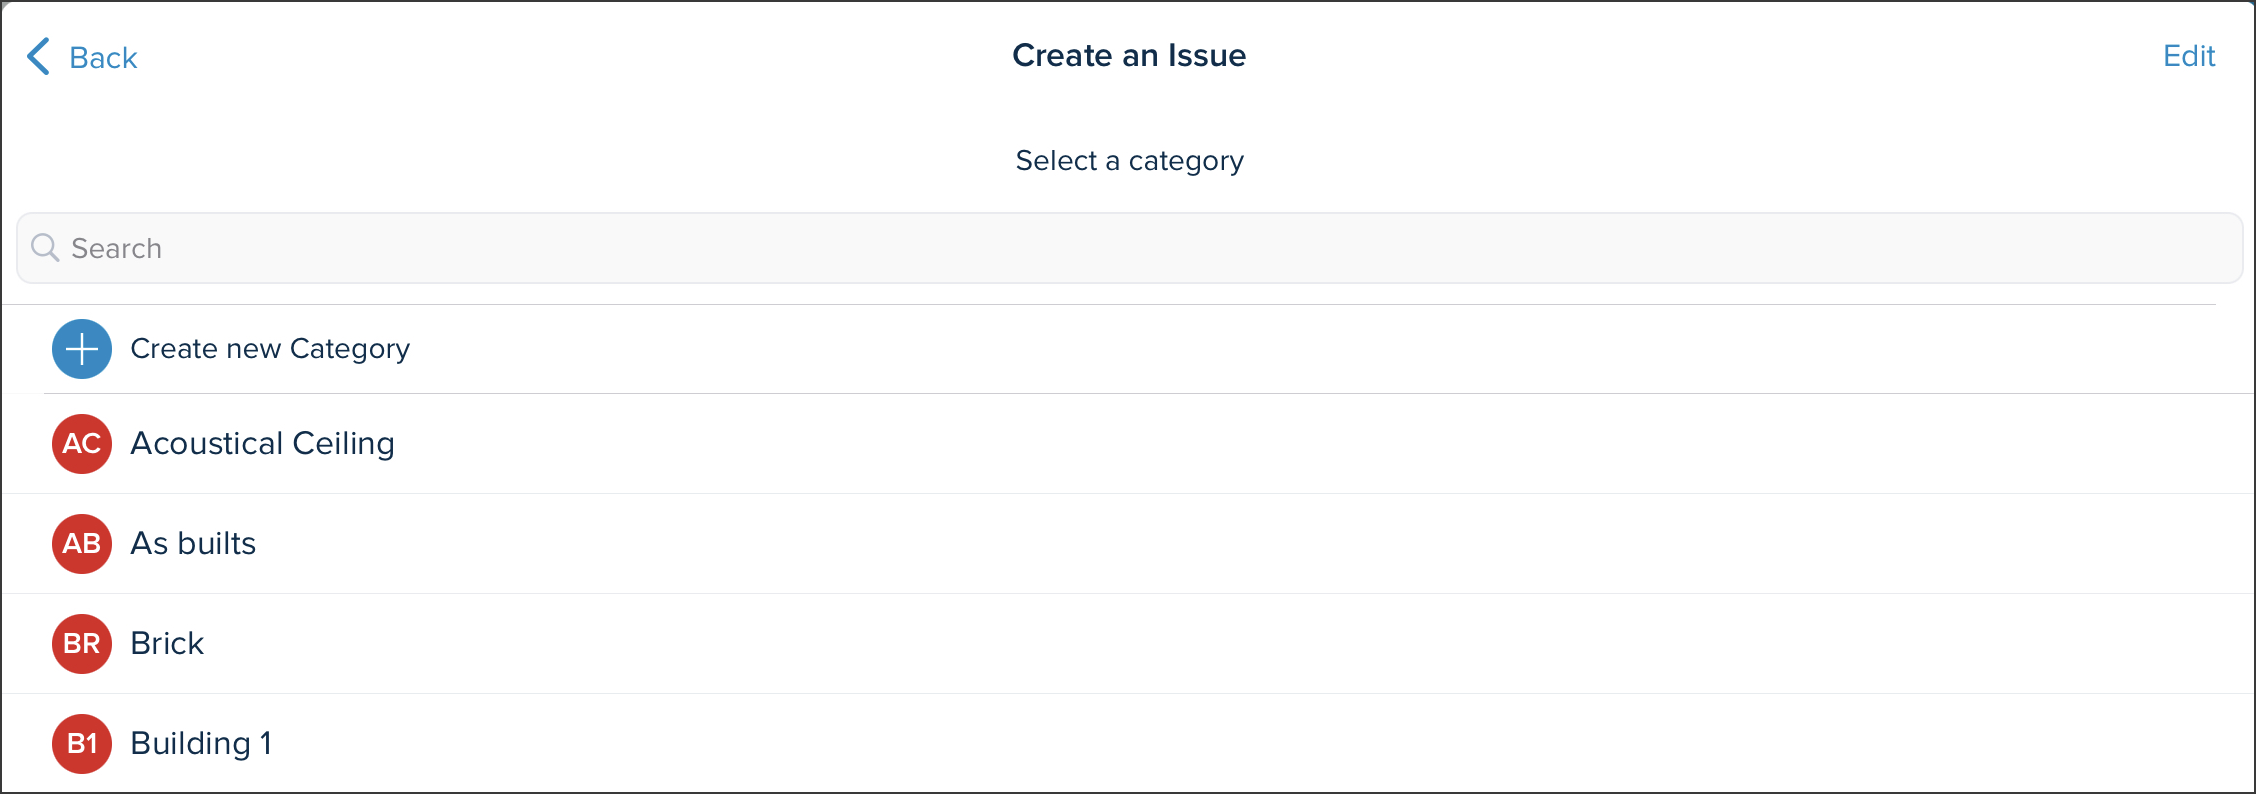
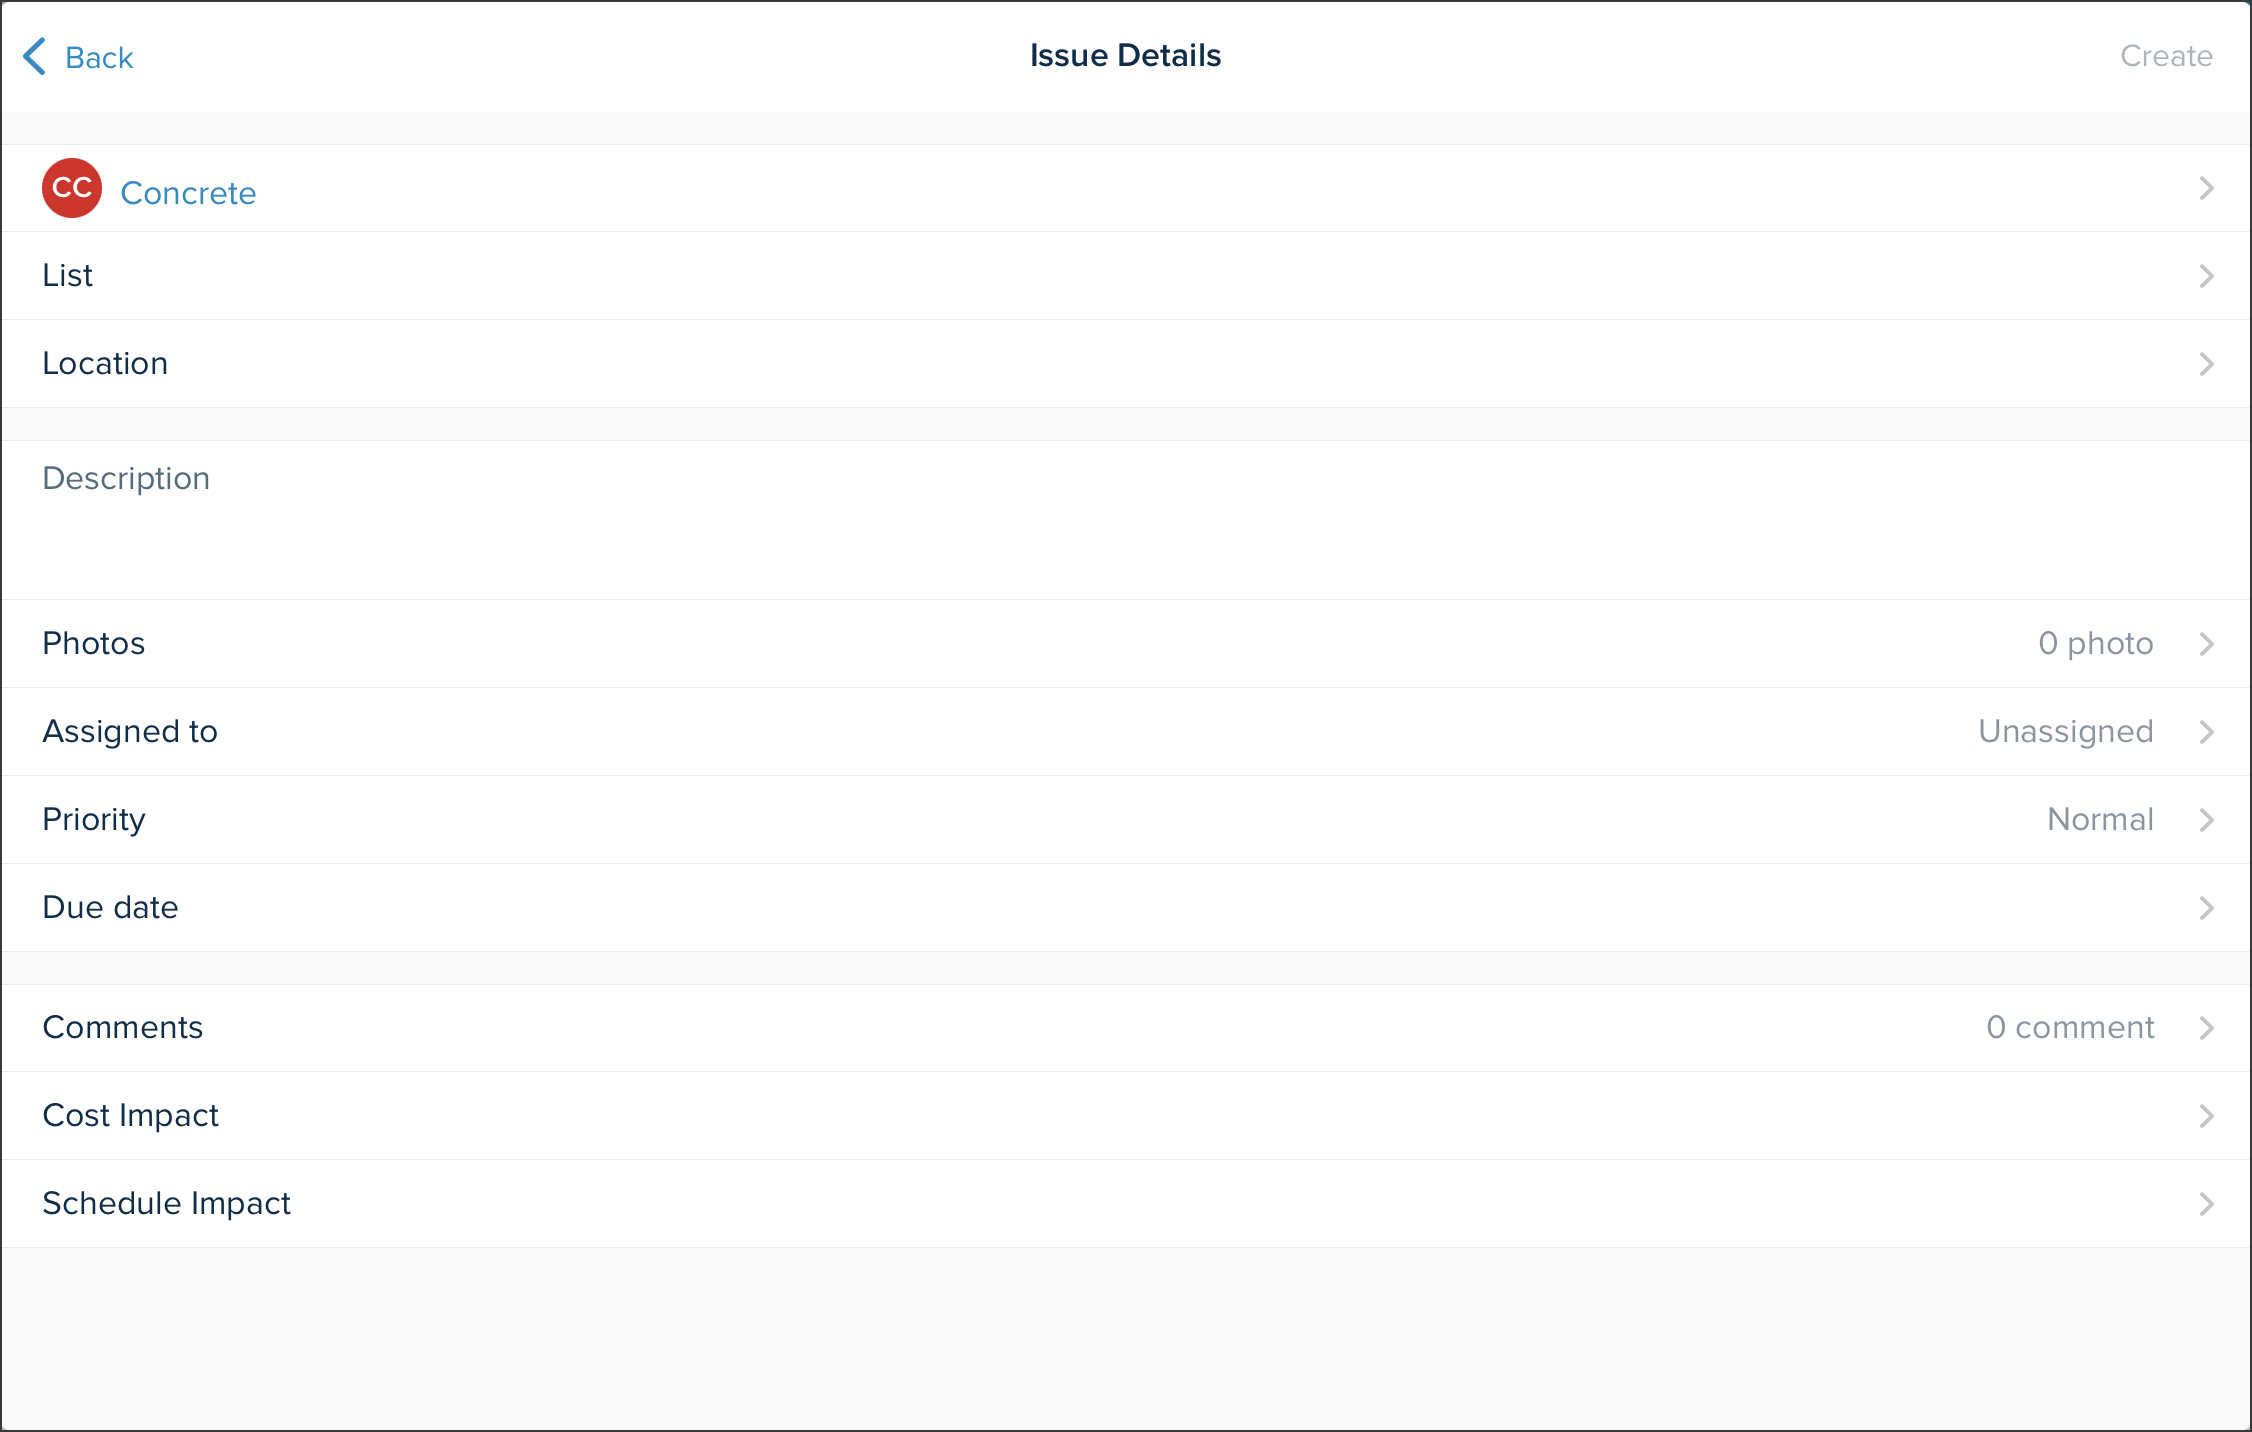
- + Create new issue: Create a new issue by selecting a category and by filling in the Issue Details.
- Issues list:Displays all the issues on the selected project with the following information:
- ID: When an issue is created, it is assigned an ID number. This number cannot be edited.
- DESCRIPTION: The description that was entered when the issue was created.
- ASSIGNEE: The name of the user the issue was assigned to when the issue was created.
- PRIORITY:The priority level of the issue.
- Low
- Normal
- High
- DUE DATE: The date that the issue is expected to be resolved.
- DOCUMENT: If the issue was create on a plan using the exclamation point markup tool, the sheet number will be displayed.
- Status legend: A legend of the issue statuses that appear next to the description.
- Open (Red)
- In Progress (Yellow)
- Completed (Green)
- Closed (Black)

Photos
Displays the photos that have been upload using the camera markup tool. For more information, refer to the Toolbar article. 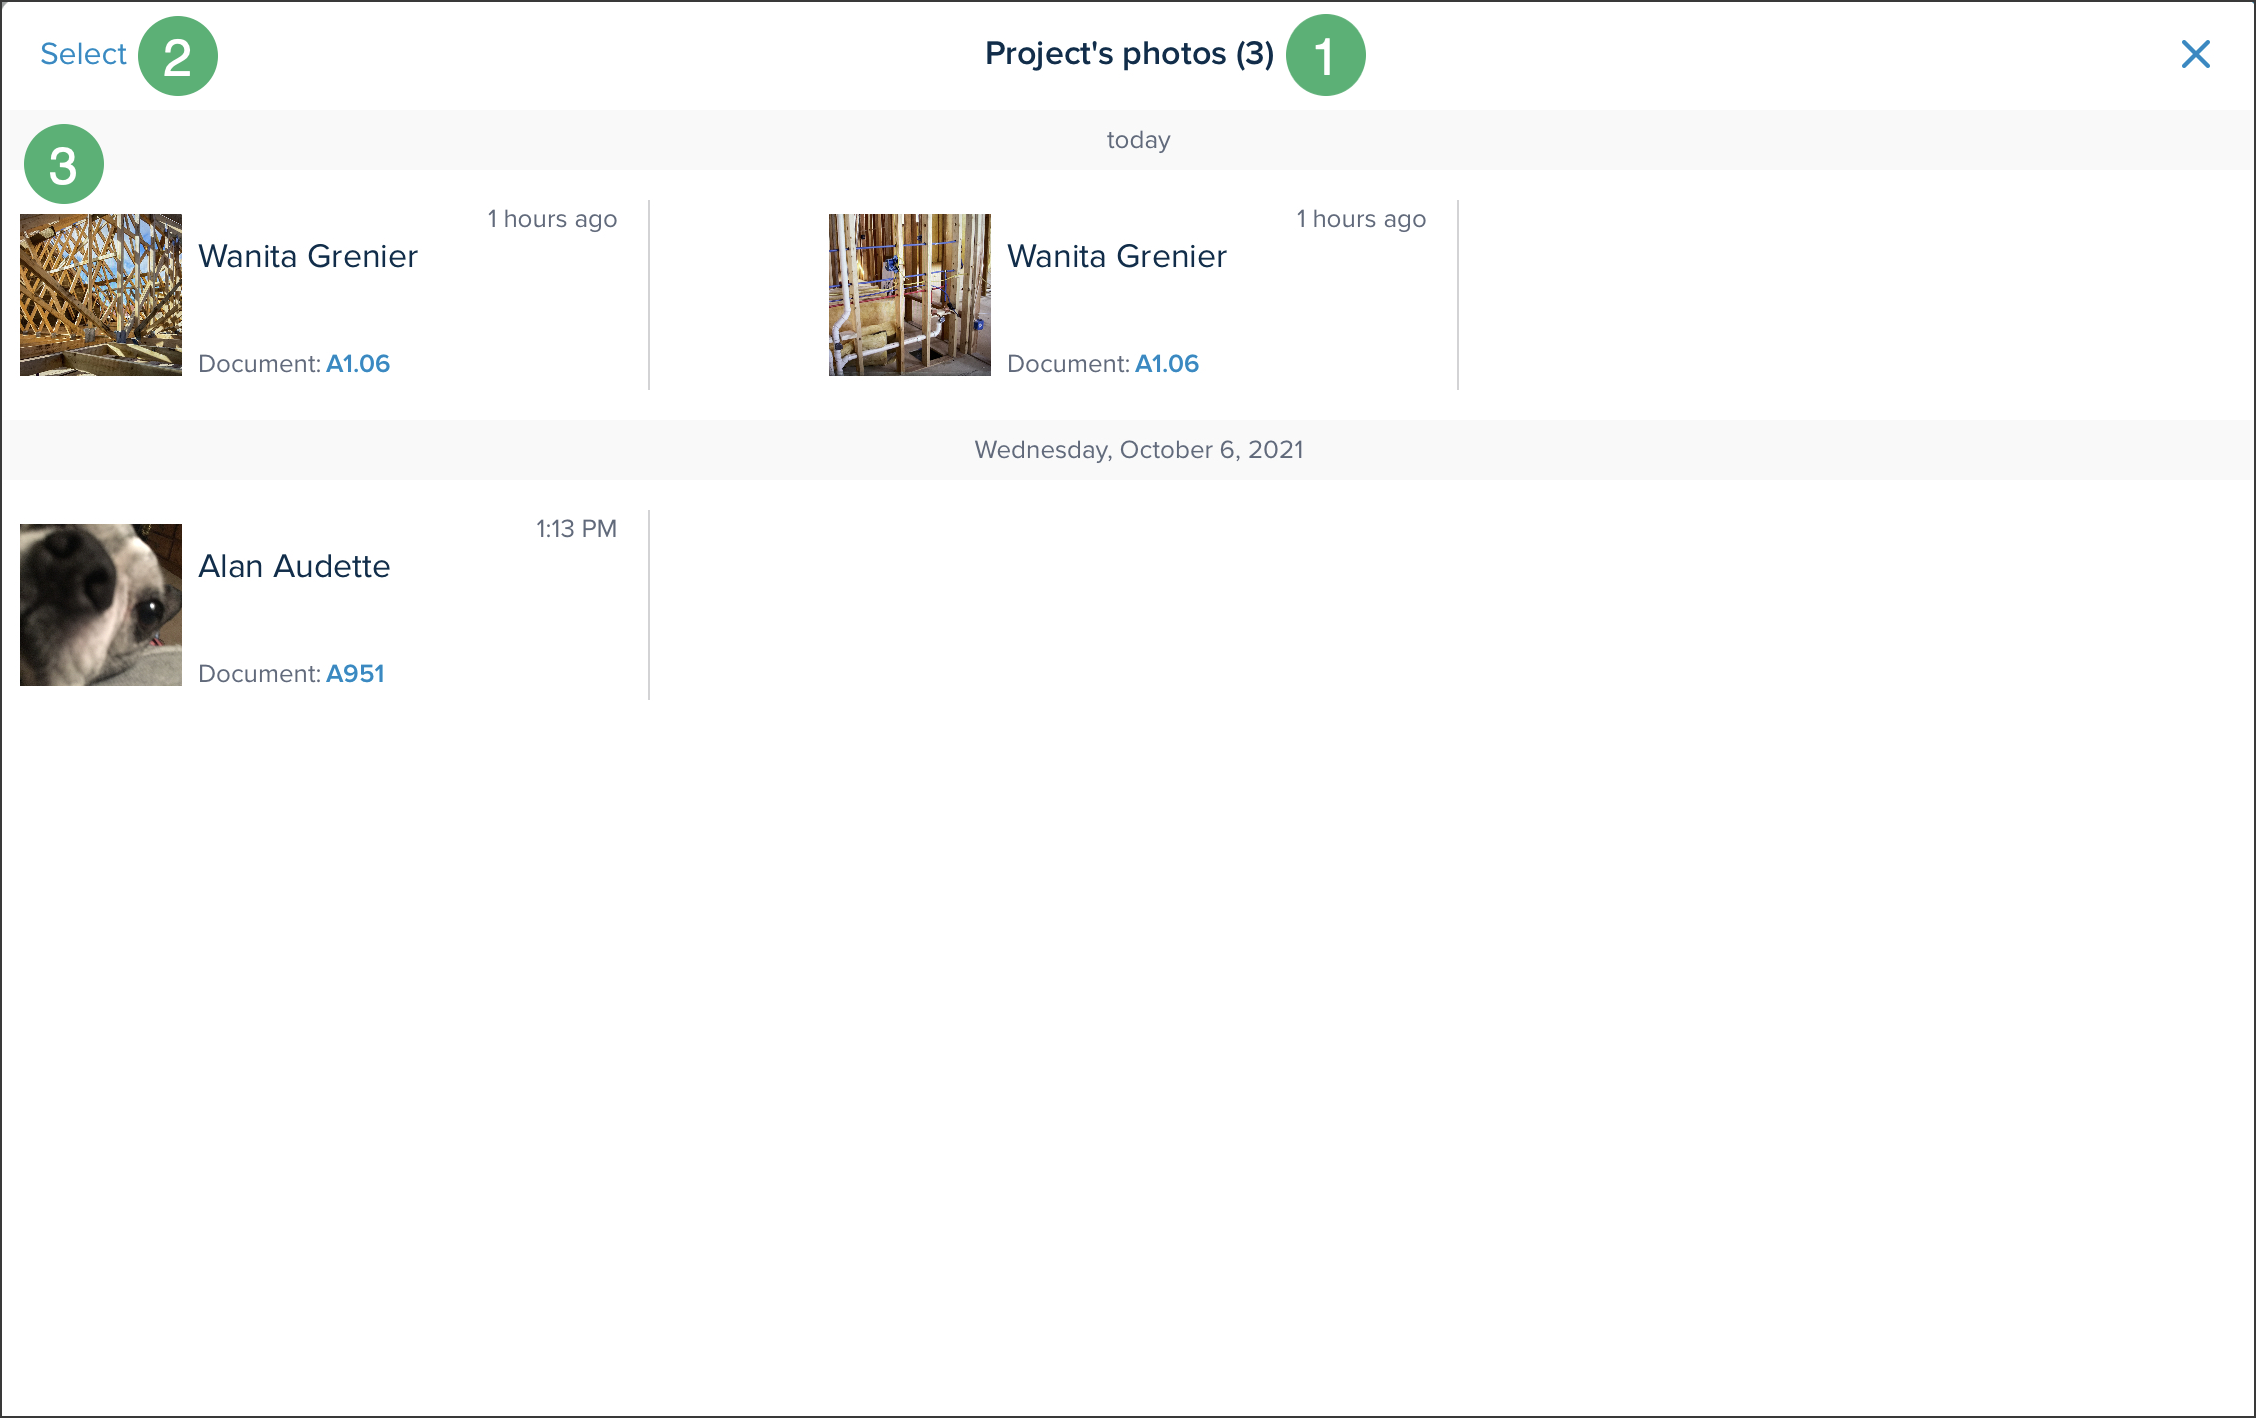
- The number of photos uploaded in the project.
- Select: Select photos to perform certain actions on them:
- Share
- Delete
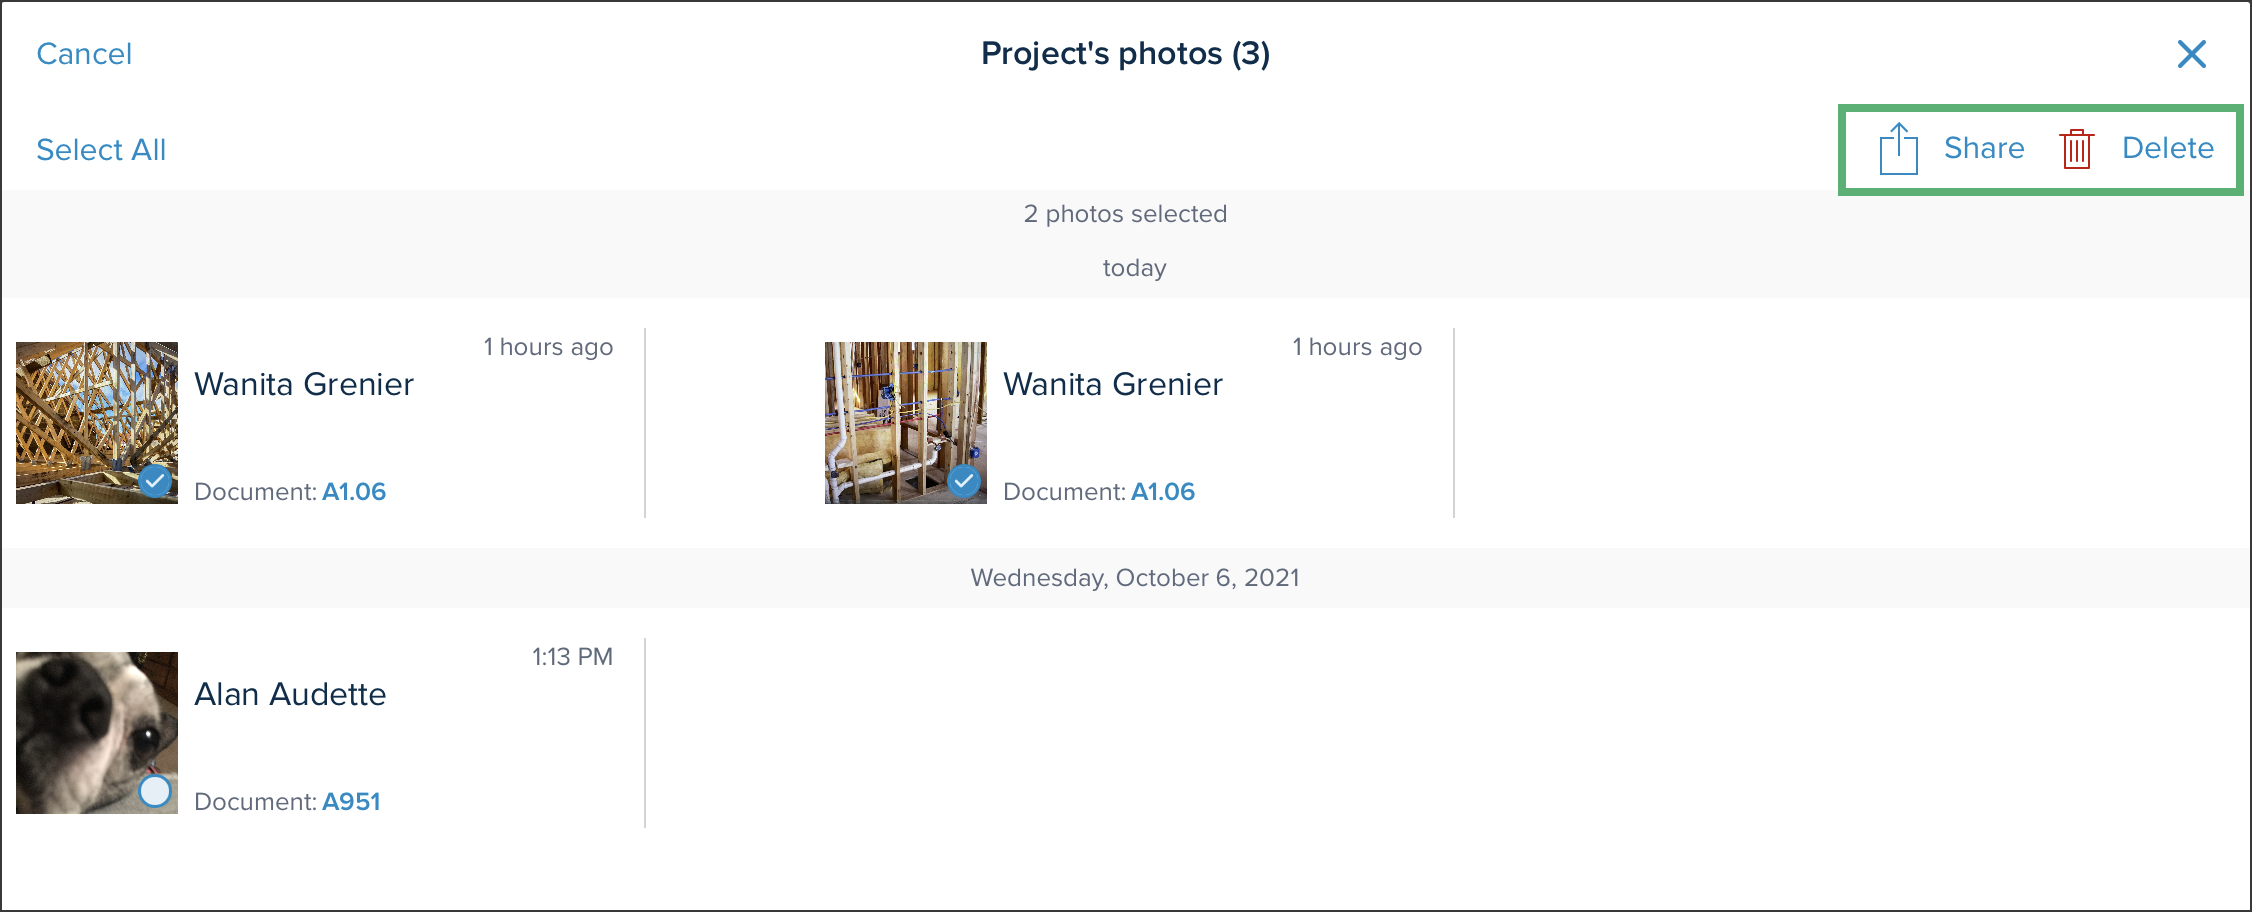
- Photo list: Displays the photos in order of date including the following information:
- Date the photo was uploaded
- Time the photo was uploaded
- Name of the user who uploaded the photo
- Thumbnail of the photo
- Document number
Inside Documents
Tapping on a document will open it and will allow you to create markups on the document, compare documents, jump from one revision to the other, and export the document.
Plans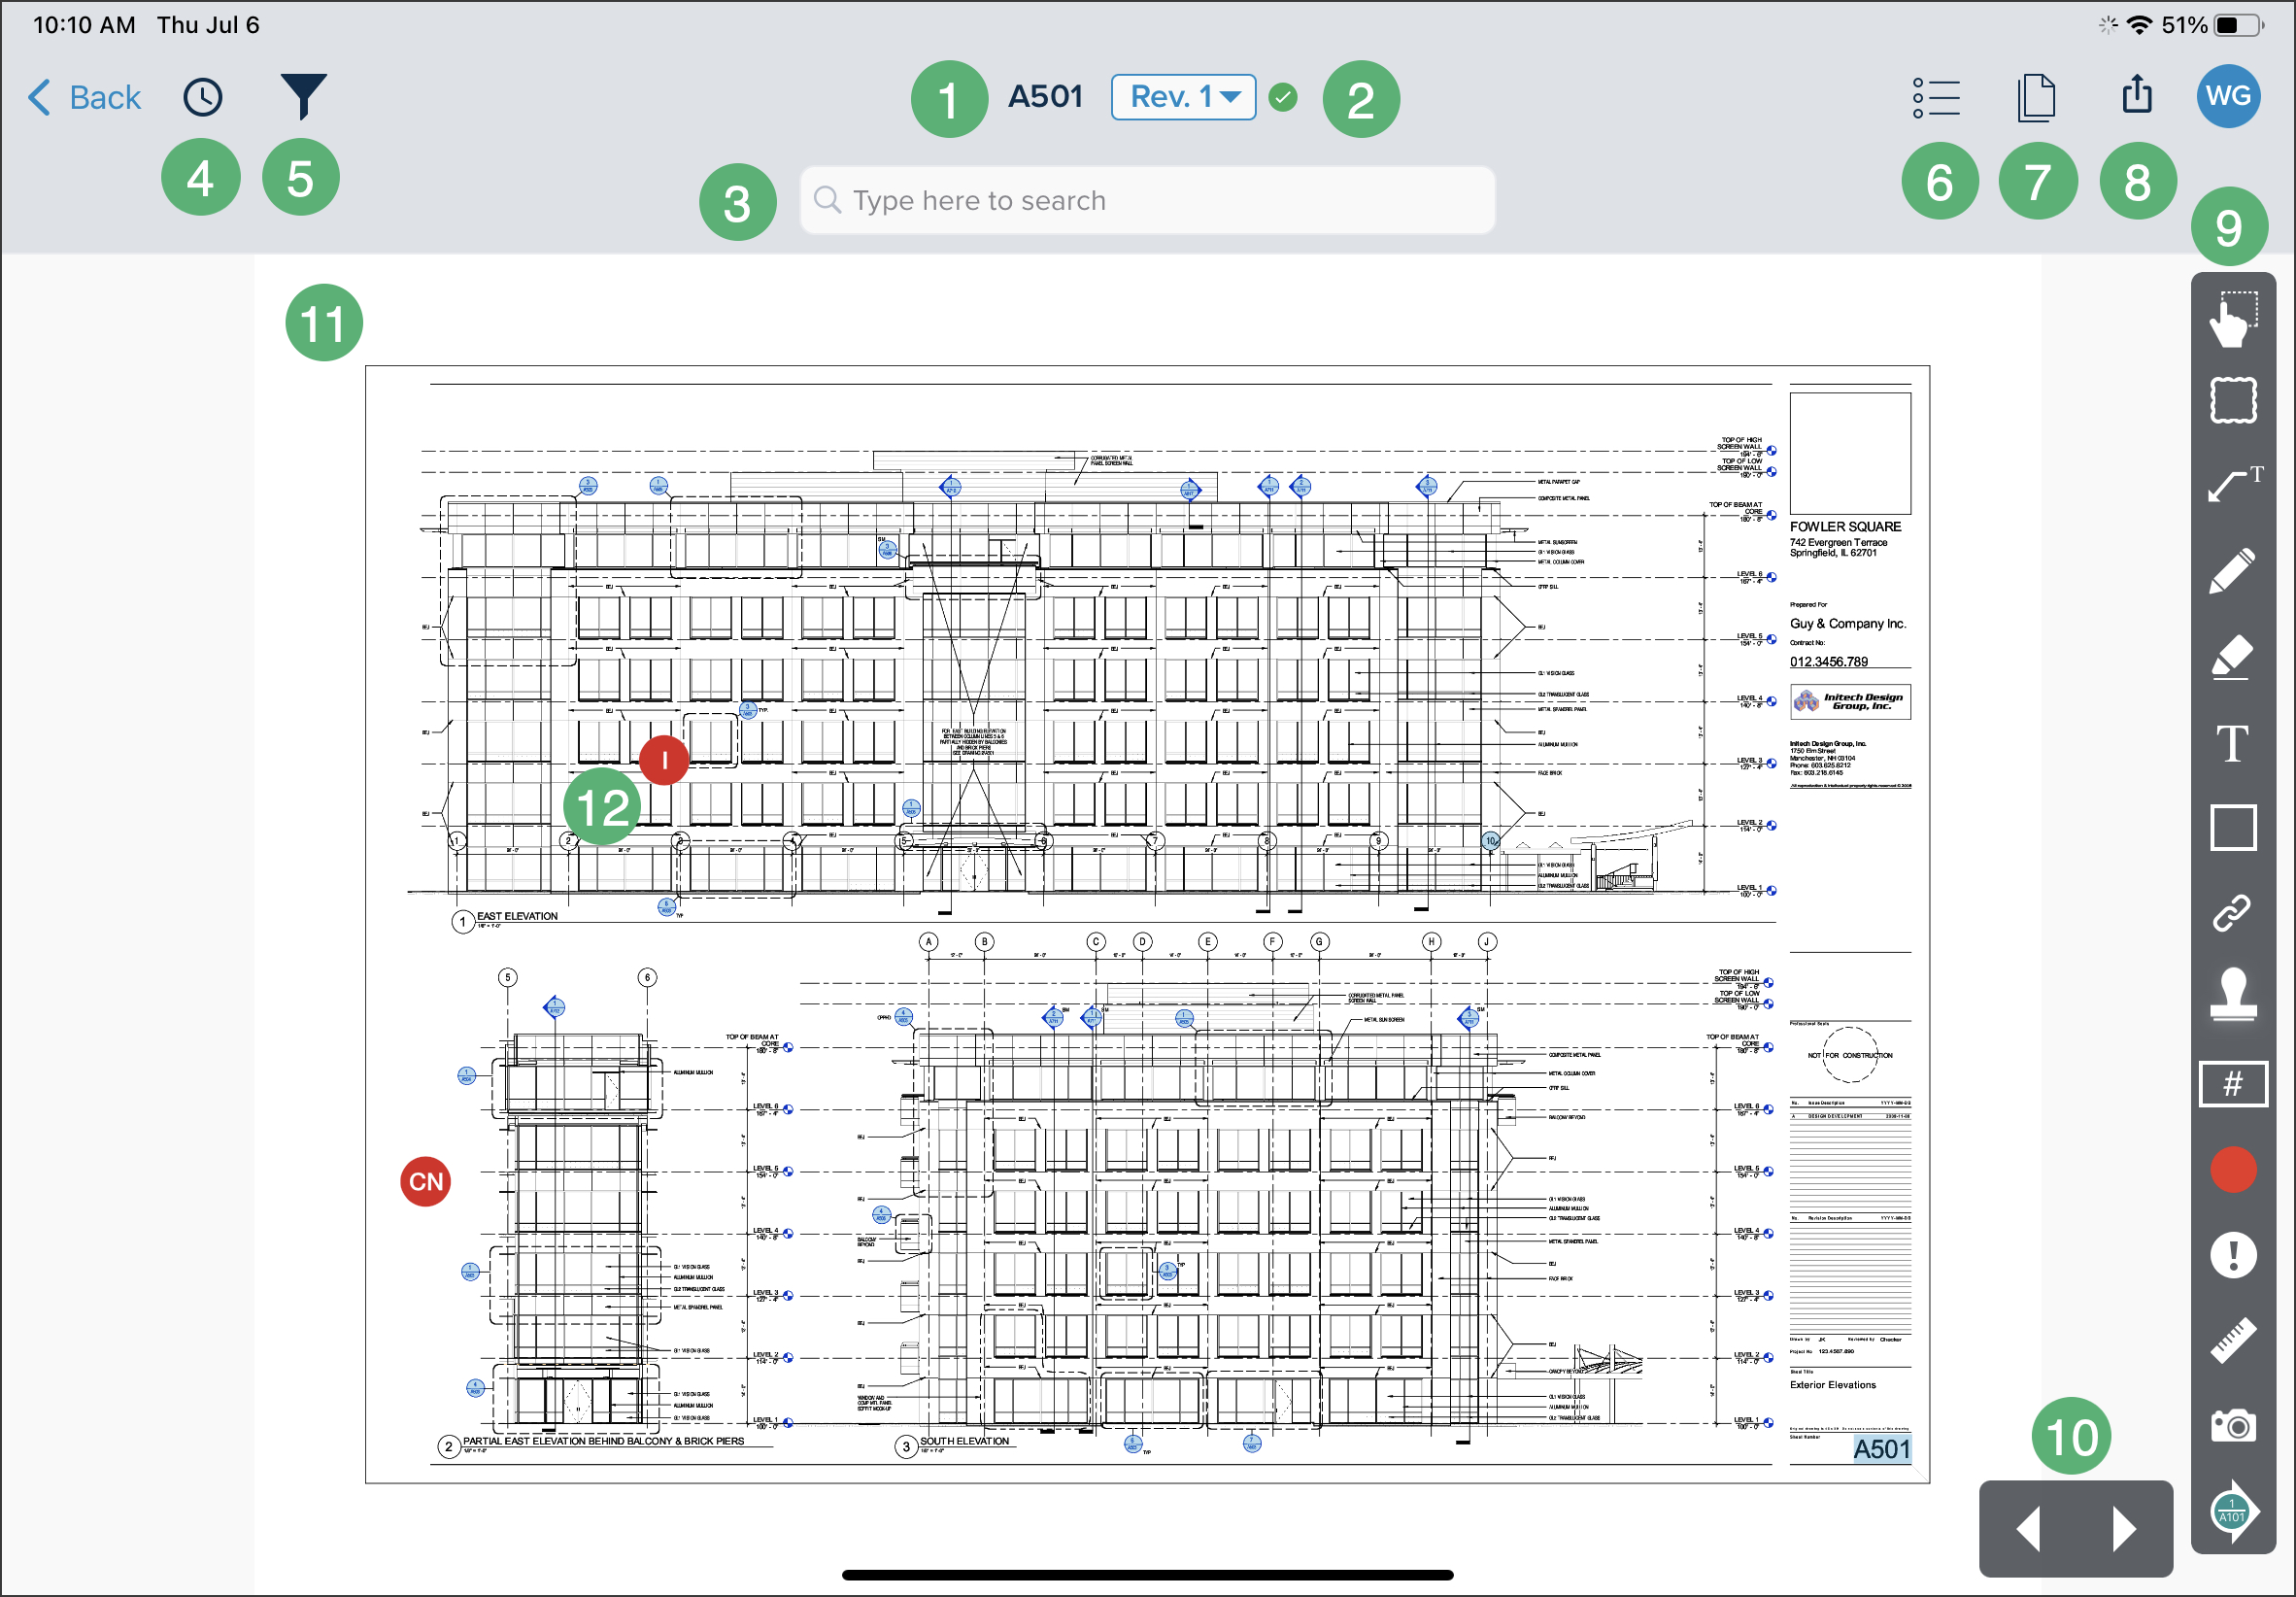
Sheet number: Displays the sheet number that is currently into the preview window.
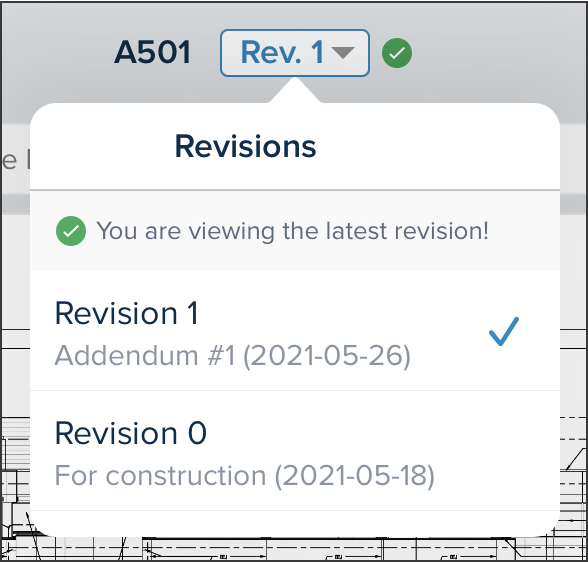
Revision dropdown: Use the dropdown to switch from one document revision to the other.
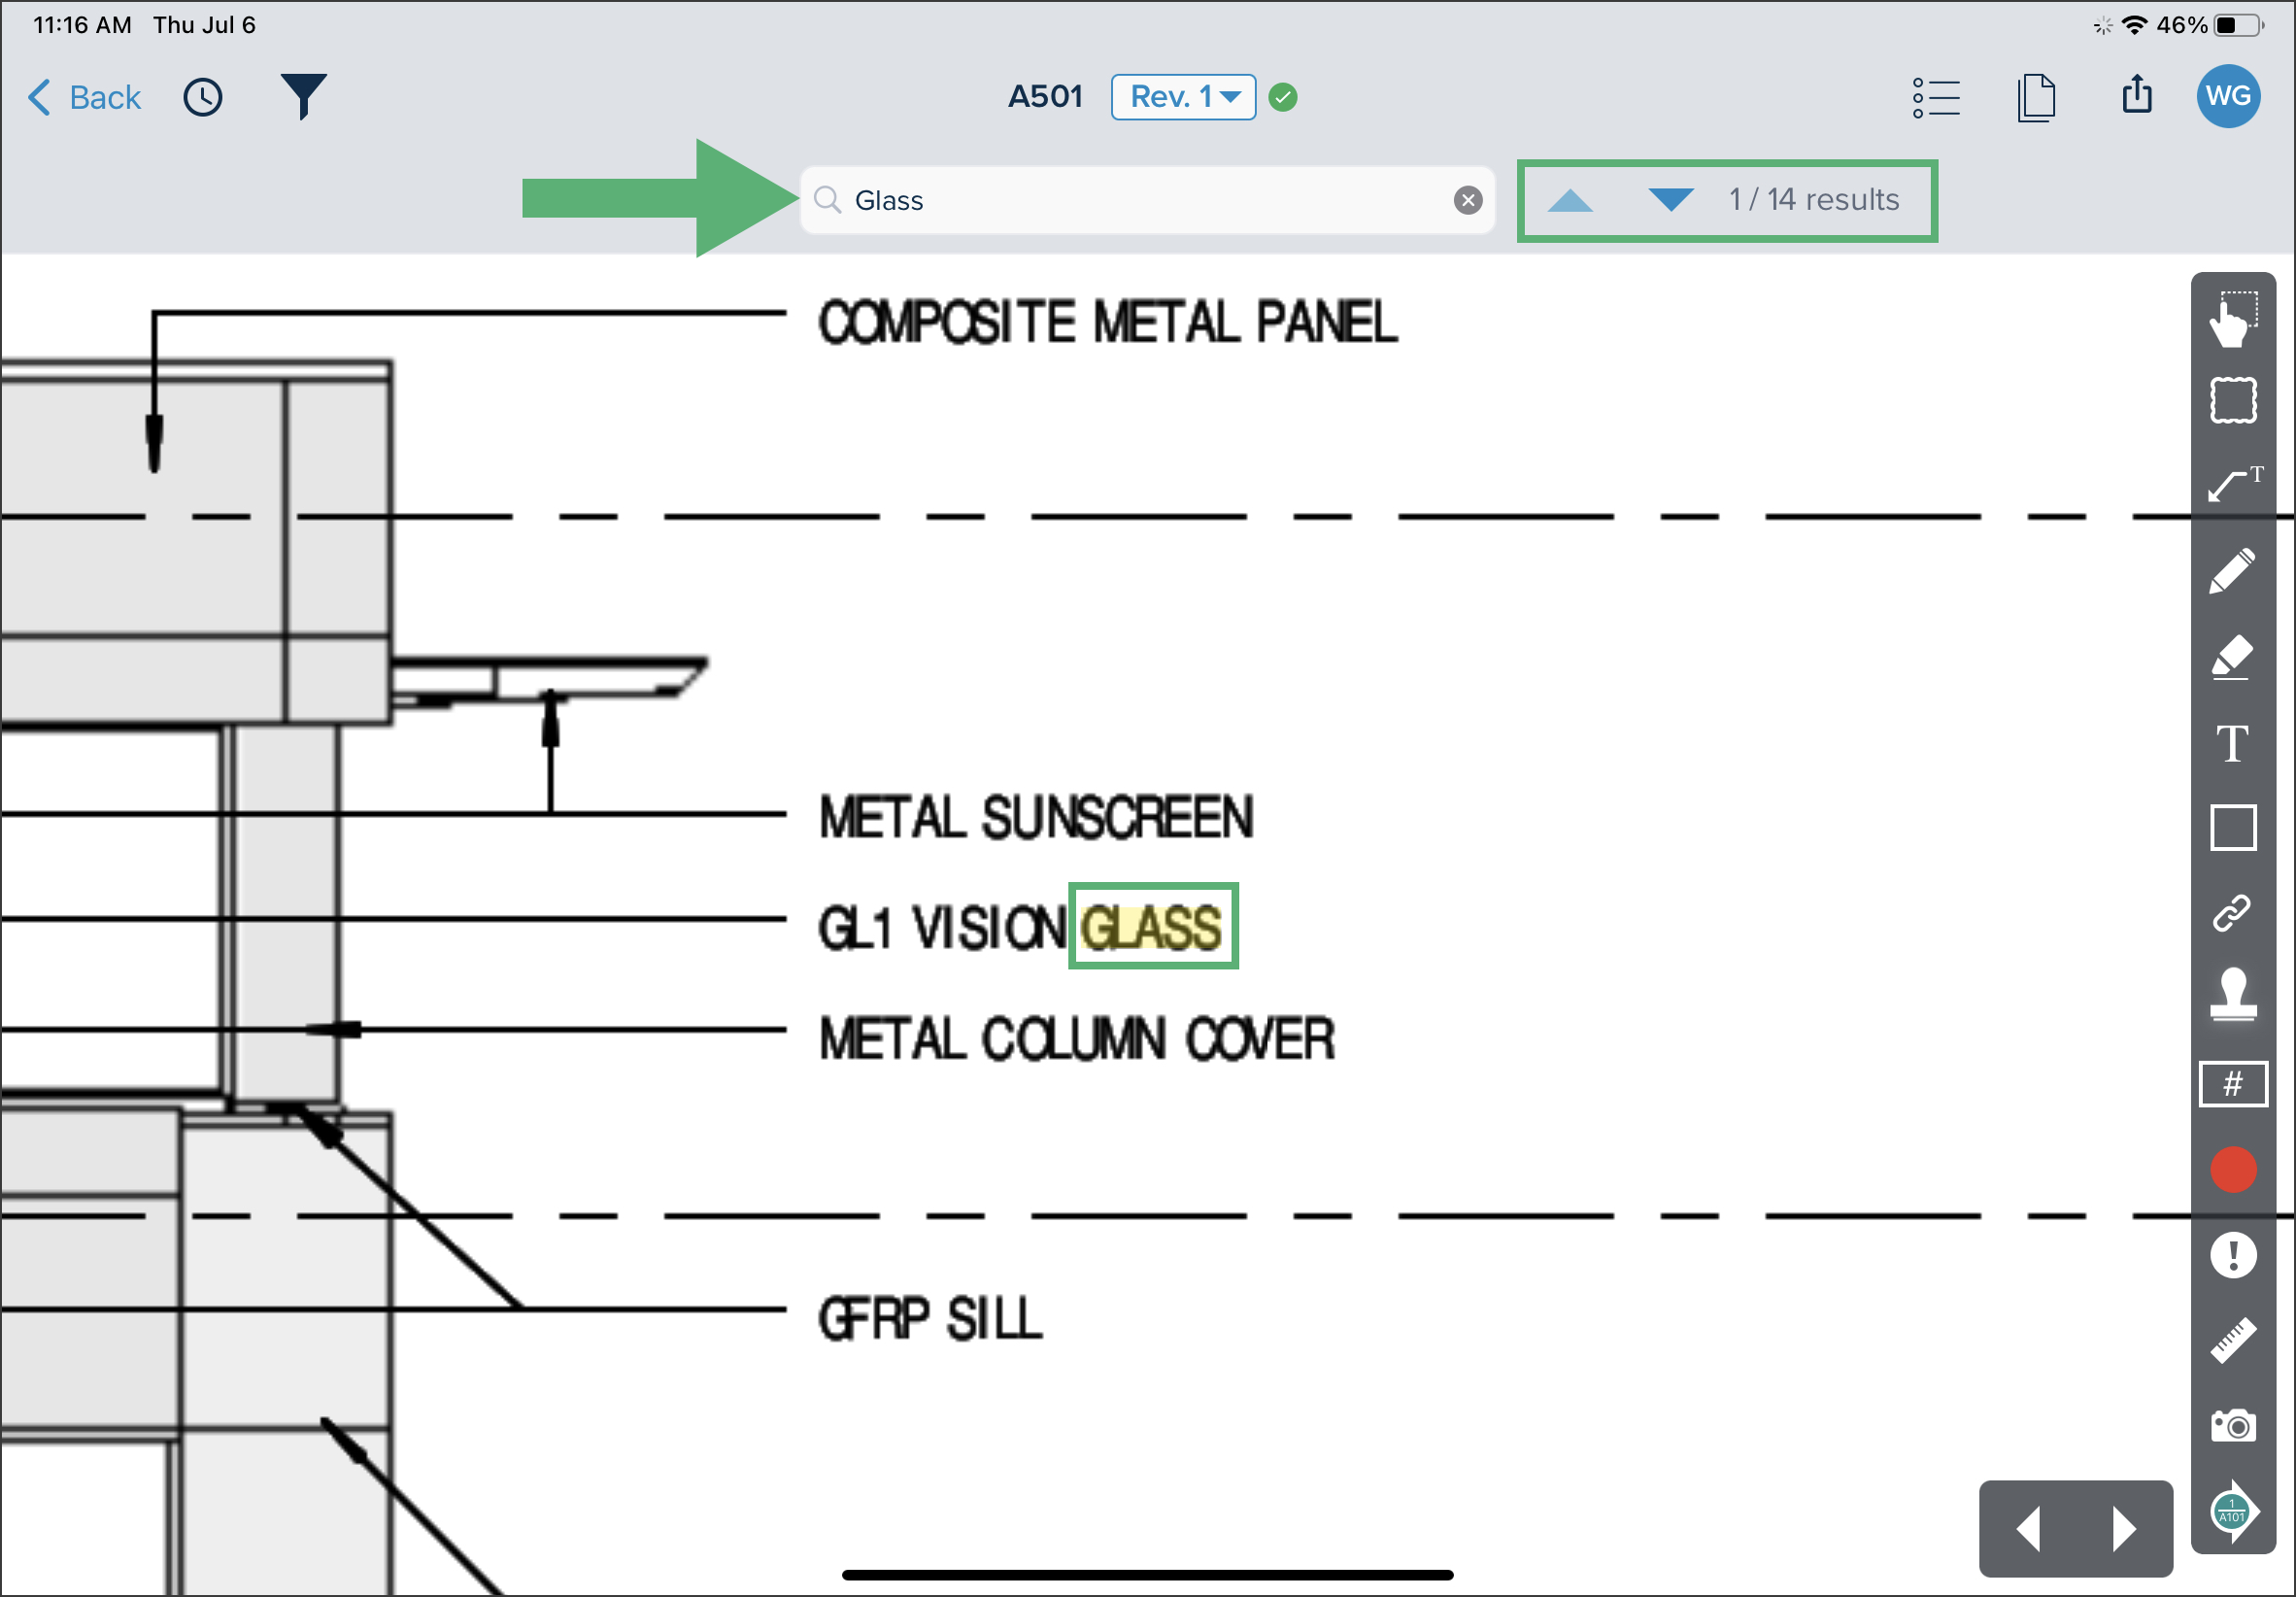
Search: Use key words to search for elements within the plan.
Recently Viewed: Gives a preview of the documents that you recently opened. Tap a document to open it.

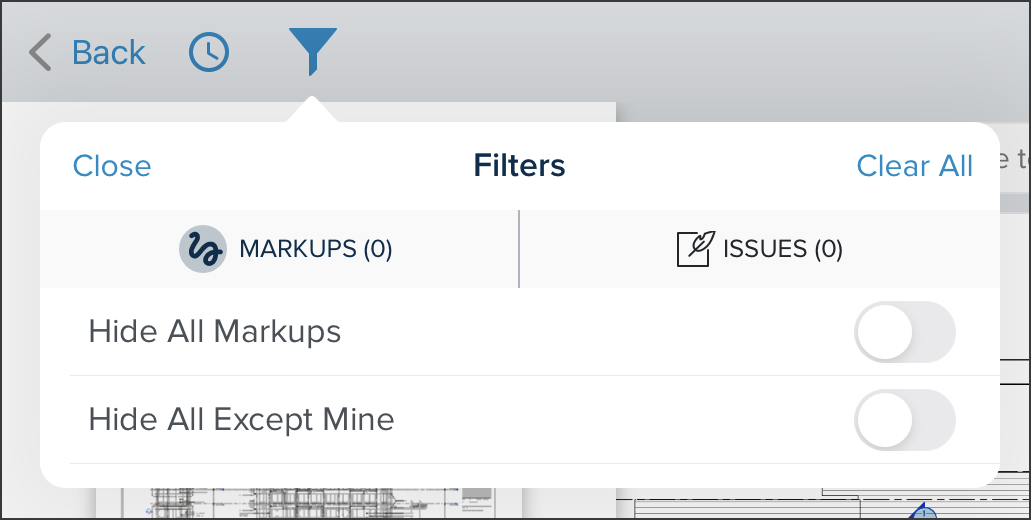
Filters: Apply filters on the plan to display the elements you are looking for.
MARKUPS
ISSUES
List menu: View Issues and Photos attached to this plan.
Compare: Select a document to compare with. Compare by layering the documents or displaying them side-by-side. Share the comparison with someone else. When comparing by layering, one plan will be black and the other red.
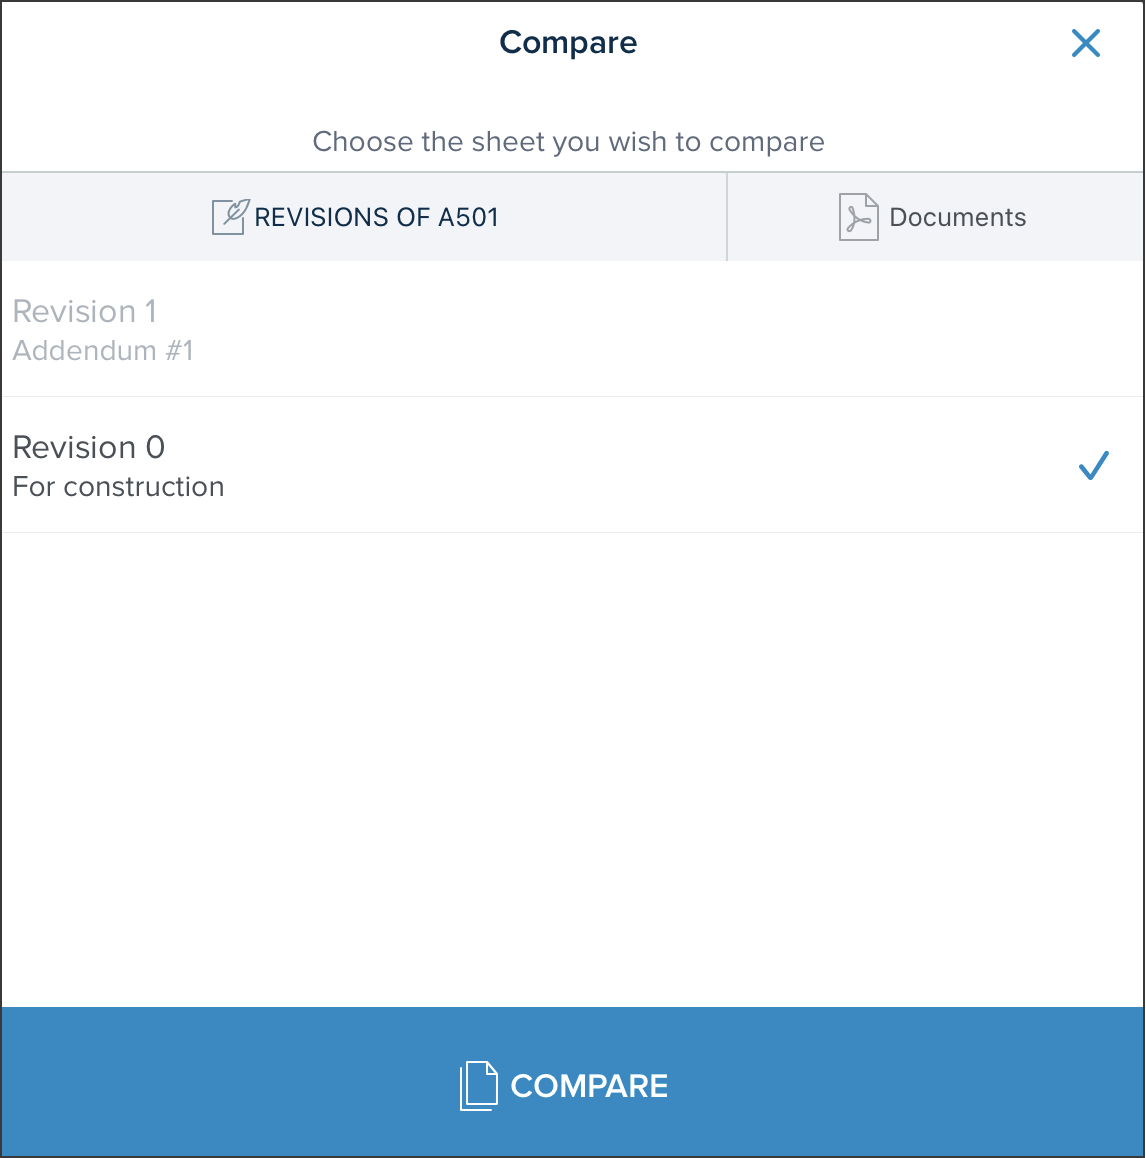
.png)
Share: Share the plan's Current View or the Full Sheet.
Markup tools: Use the markup tools to create annotations on the plan.
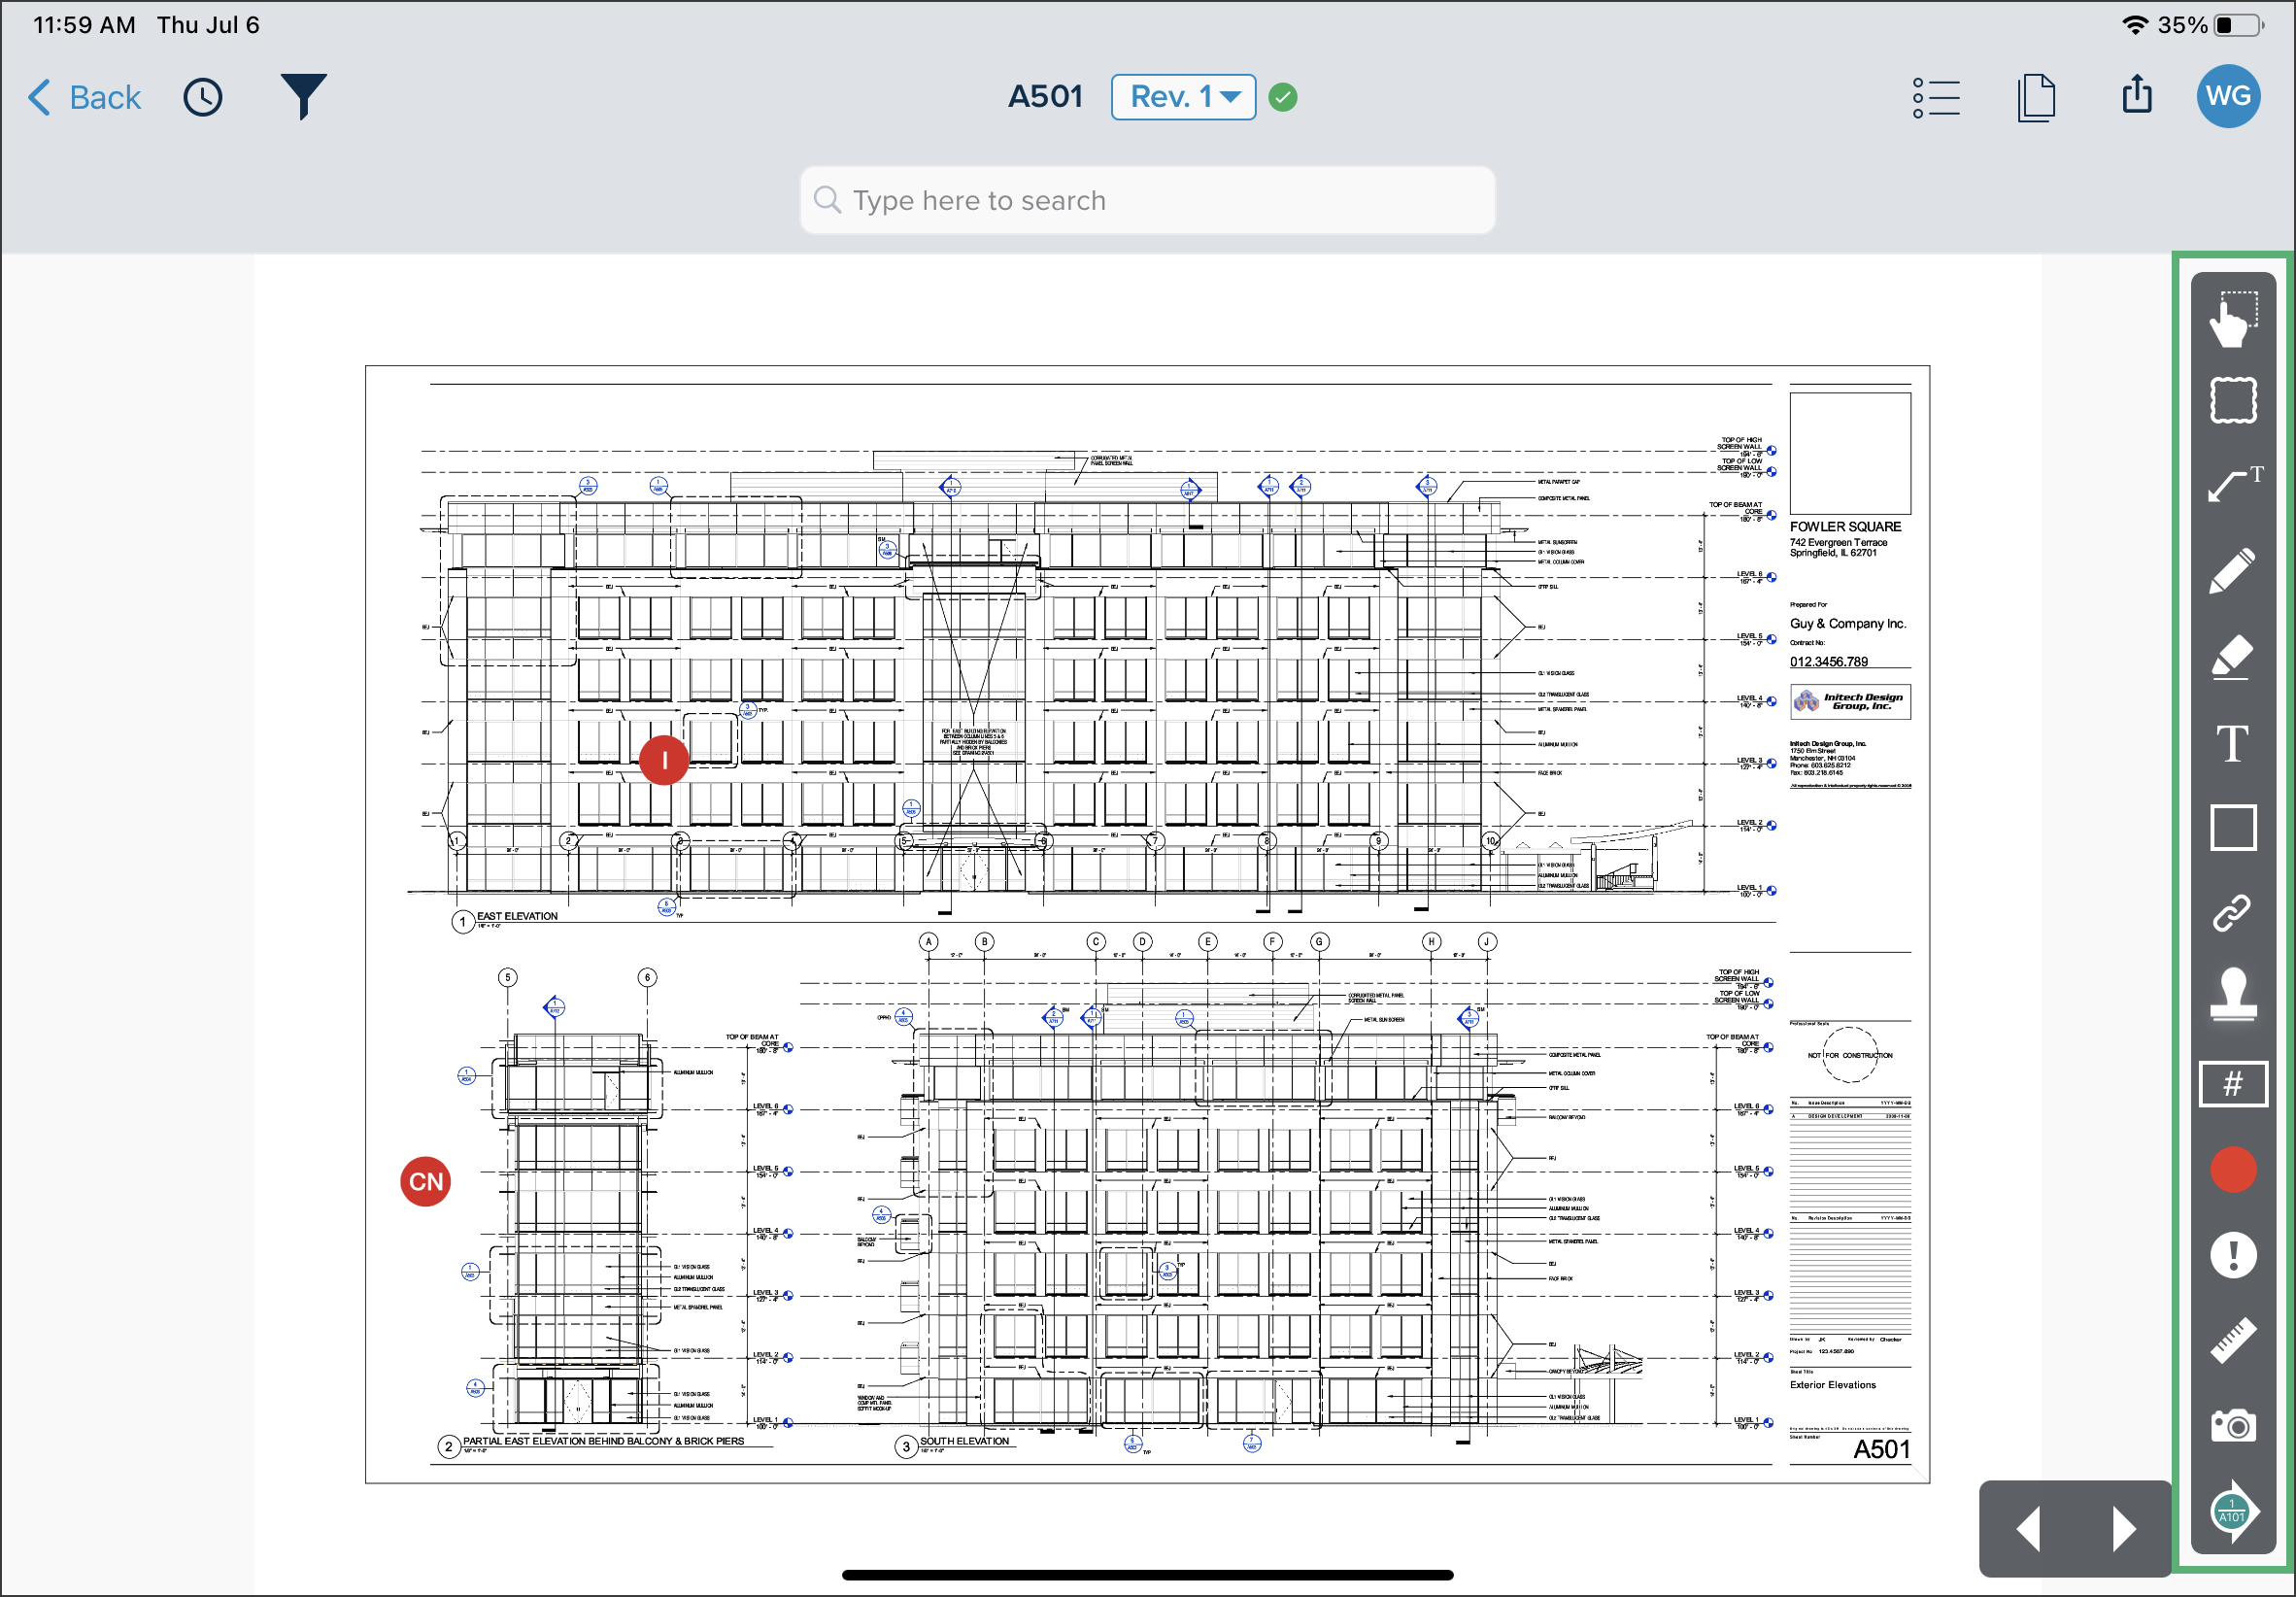
Sheet navigator: Go from one sheet to the other by tapping on the arrows.
Document preview: Displays a view of the plan where you can zoom in and out by double tapping or using two fingers.
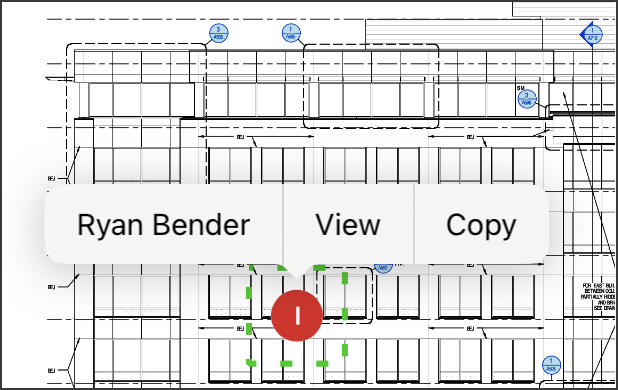
Issues: Icon displaying where there is an issue on the plan with the colour of its status, and the initials of the category. Tap the issue to see who created it, View it, or copy it.
Documents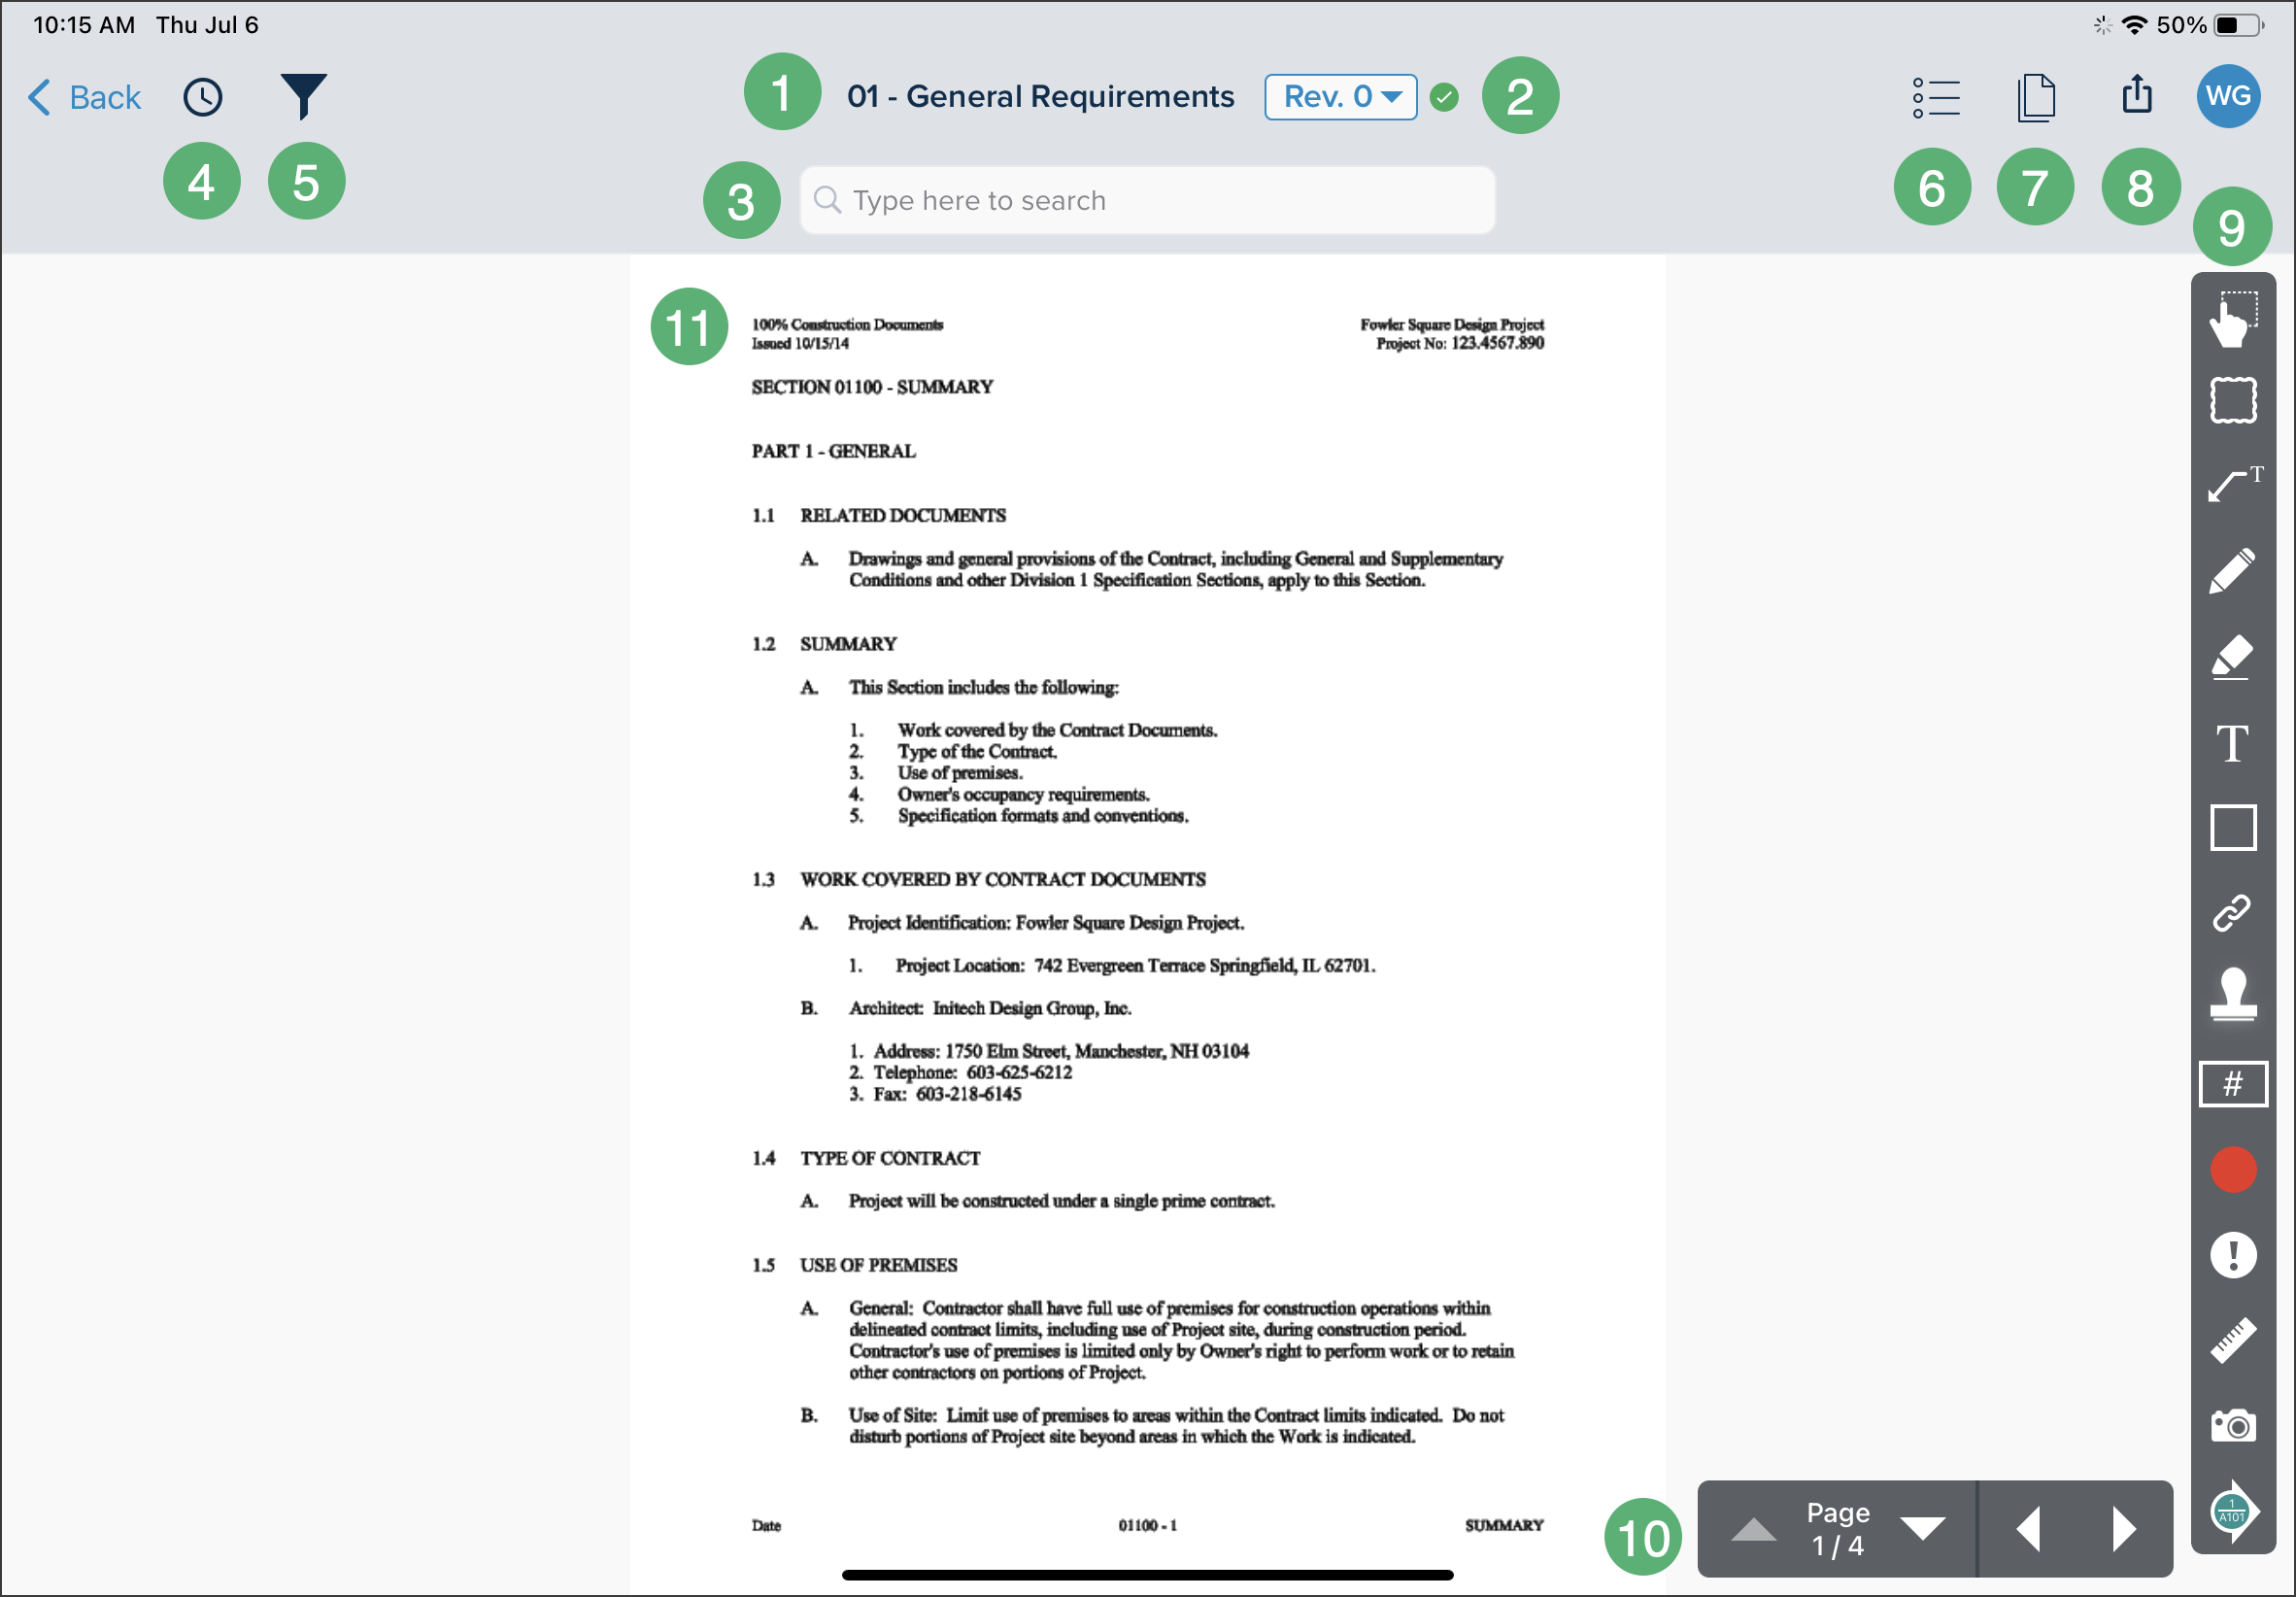
Document title: Displays the title of the document that is currently into the preview window.
Revision dropdown: Use the dropdown to switch from one document revision to the other.
Search: Use key words to search for elements within the document.

Recently Viewed: Gives a preview of the documents that you recently opened. Tap a document to open it.

Filters: Apply filters on the document to display the elements you are looking for.
List menu: View Issues and Photos attached to this document.

Compare: Select a document to compare with. Compare by layering the documents or displaying them side-by-side. Share the comparison with someone else.


Share: Share the document's Current View or the Full Sheet.
Markup tools: Use the markup tools to create annotations on the document.

Page navigator: Go from one page to the other by tapping on the arrows.
Document preview: Displays a view of the document where you can zoom in and out by double tapping or using two fingers.
.jpg)
Next Steps
Now that you are familiar with the STACK Field App, you can check out:
Related Articles
Basic System Requirements for STACK | Build & Operate
Was this article helpful?