Users
- Print
- DarkLight
- PDF
Users
- Print
- DarkLight
- PDF
Article summary
Did you find this summary helpful?
Thank you for your feedback!
Key Information
The Users tab in the PROJECT INFO is mainly to manage users on projects. Users are added to the organization in the Org Users tab.
In order to add users to a project, they must be created in your organization first.
It is possible to Create a user in the Users tab as well as in the Org Users tab.
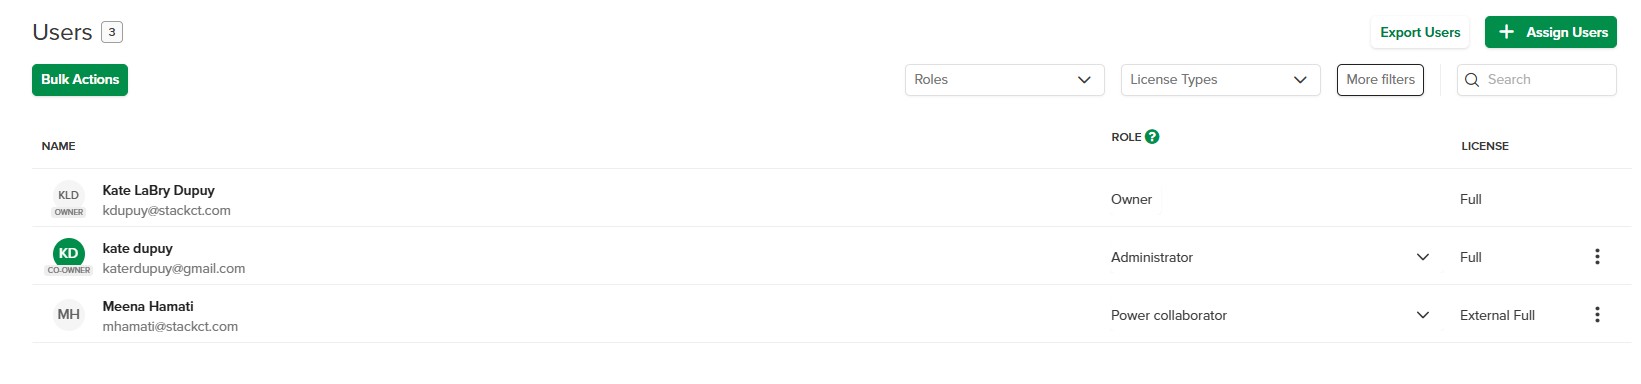
Users Overview
Assign Users to a Project

In the PROJECT INFO > Users tab, click + Assign Users.
Click the dropdown arrow next to the user you want to assign to the project. To assign multiple users at a time, click the Bulk Actions button and check the box next to each user you want to assign.
TIP
If you have a long list of users and want to find a user in particular, use the Search bar to find them quickly. As you type, the most relevant results will be displayed.
Assign the role you want the user to occupy on the project.
Click UPDATE.
Their new role will be updated in the ROLE column.
Create a User
If you wish to assign a user that is not yet in your organization, you can first add them by using the Create User feature and then assign them to the project.
.gif)
In the PROJECT INFO > Users tab, click + Assign Users.
Click Create User.
Enter the user's Email.
Click NEXT.
If the user is part of your organization, toggle the Is this user an Employee of your organization? button.
Click NEXT.
Make sure there is a license available for the new user. The toggle button will be blue if there are licenses available and grey if not.
Click NEXT.
Click the dropdown arrow next to the project that you wish to assign them to.
Select the role that you want them to occupy on the project.
Click CREATE USER.
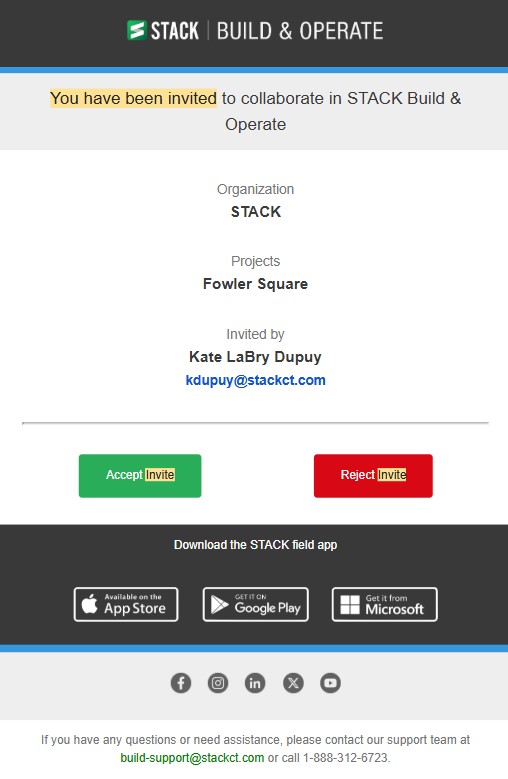
The user will receive an email letting them know that they have been invited on the project.
They will need to Accept or Reject the invite.
Once they accept the invite, they will be invited to login to STACK and join the project.
You will then see them in the list of users for the project.
Export the List of Users

In the PROJECT INFO > Users tab, click Export Users.
An Excel file containing the list of users will be exported to your internet downloads.
Click to open it and save it to your computer.
Filter or Search for Users
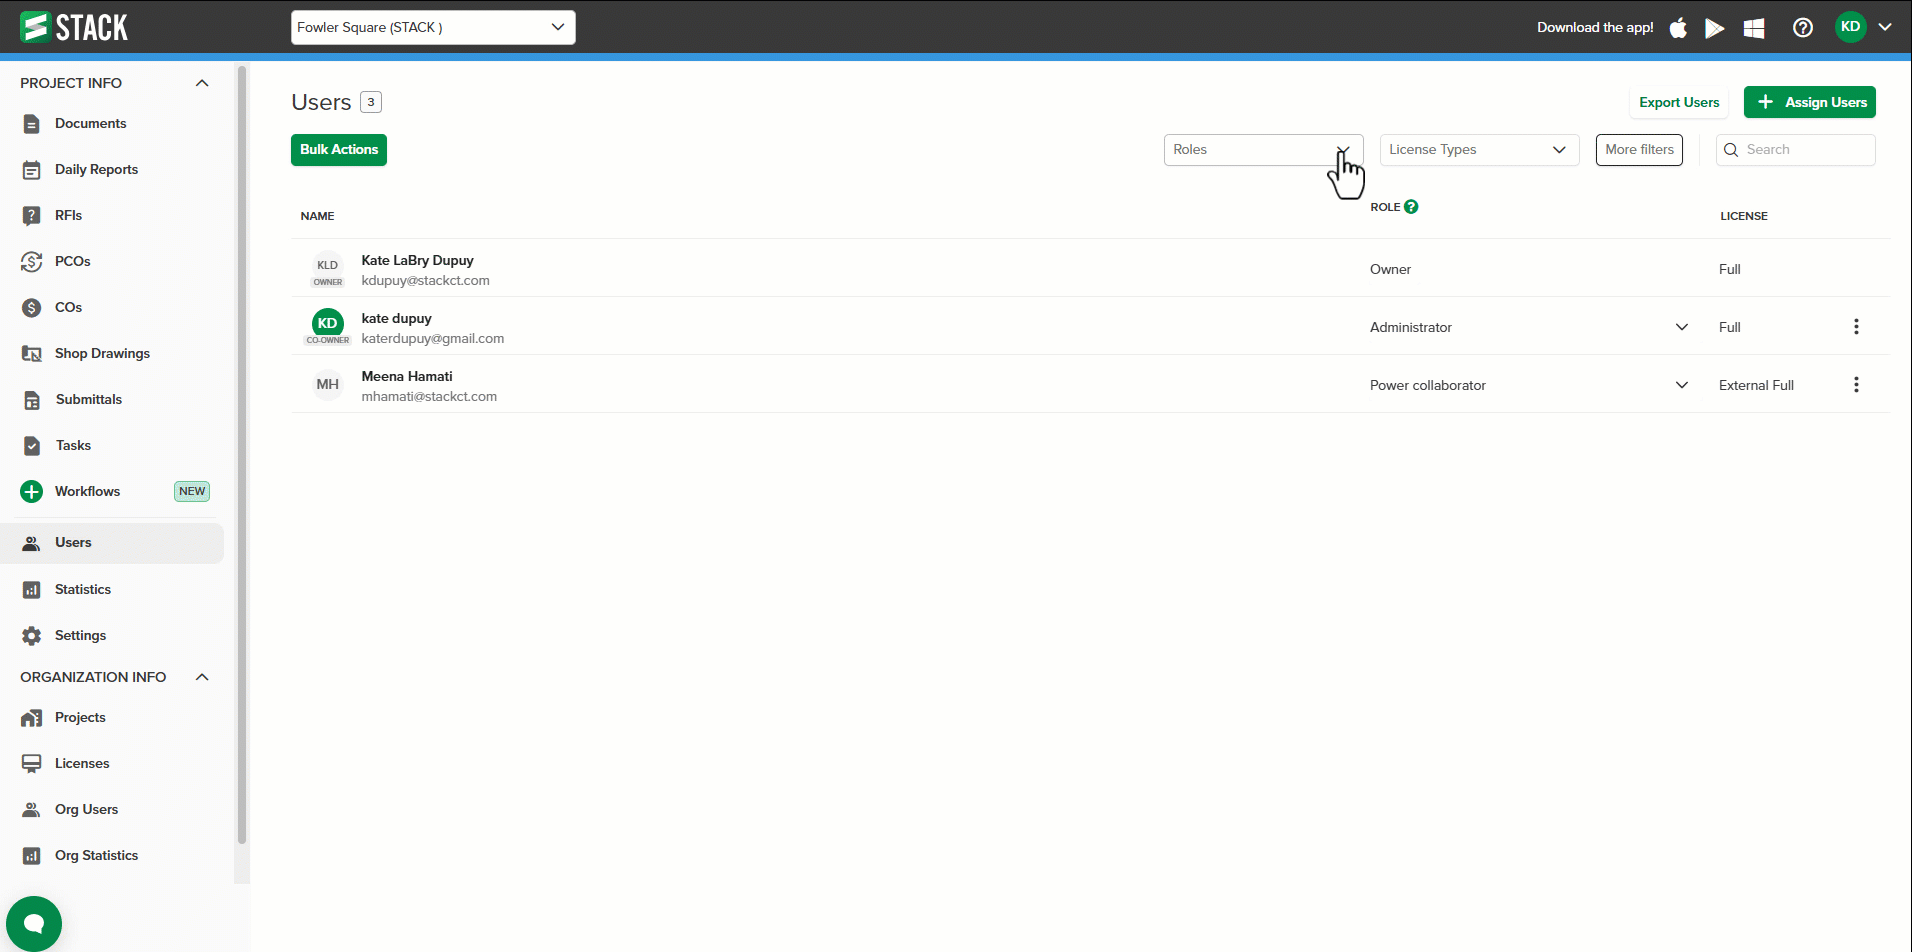
In the PROJECT INFO > Users tab, use the Roles, License Types, and/or More filters (Employees Only, Pending Invitation) filters to filter users, or use the search bar to find a user in particular.
The most relevant results will be displayed in the Users list.
To close filters, click the X in the filter pill.
Manage Users on a Project
Change a User's Role

In the PROJECT INFO > Users tab, click the dropdown next to user for which you want to change role.
Select the new role you want them to occupy.
Their new role will be displayed in the ROLE column.
Manage Roles and Permissions
You can set permissions for users on projects and then on the folder level to have complete control over what they can access or not.

In the PROJECT INFO > Users tab, click the three dots next to the user for which you want to set permissions.
Select Manage Roles and permissions.
Adjust the role on the project level for the selected user by clicking the dropdown and selecting a role.
To adjust permissions on the folder level, click the three dots in the PERMISSIONS column.
Deselect the folders for which you don't want to give access.
Click APPLY.
Click UPDATE USER.
Manage license
You can see what type of license is assigned to a user and either remove their license or completely remove them from your organization.

In the PROJECT INFO > Users tab, click the three dots next to user for which you want to manage the license.
Select Manage license.
In this window, you will see what type of license is assigned to the user, how many you have left and a link to purchase more licenses if needed.
Toggle the button to assign the user a license or to remove their license.
If requires, click Remove user from Organization to remove them completely from your STACK organization.
Click UPDATE USER.
The changes will be reflected in the Users list.
Remove User from Project
When user is removed from a project, issues that have been assigned to them will need to be reassigned to another user.
Removing a user completely from the organization can only be done by the owner or a co-owner of the organization.

From the Left Side Navigation menu, select Users.
Click the three dots next to the user you wish to remove. You can also remove a group of user by clicking the Bulk Actions button, selecting the users you wish to remove and the three dots next to one of the users.
Select Remove from Project.
If the user is assigned to issues, you will need to assign them to another user. From the dropdown, select the issue you want to assign the issue to.
Click REMOVE.
Remove User from Organization

In the PROJECT INFO > Users tab, click the three dots next to the user you want to remove from your organization.
Select Remove from Organization.
The projects that they are assigned to will be displayed and you will need to confirm that you want to remove them from your organization by clicking REMOVE USER(S).
The user will no longer be displayed in the Users list.
Related Articles
If you need additional assistance, please Contact Us.
Was this article helpful?