STACK App Viewer
- Print
- DarkLight
- PDF
STACK App Viewer
- Print
- DarkLight
- PDF
Article summary
Did you find this summary helpful?
Thank you for your feedback!
Key Information
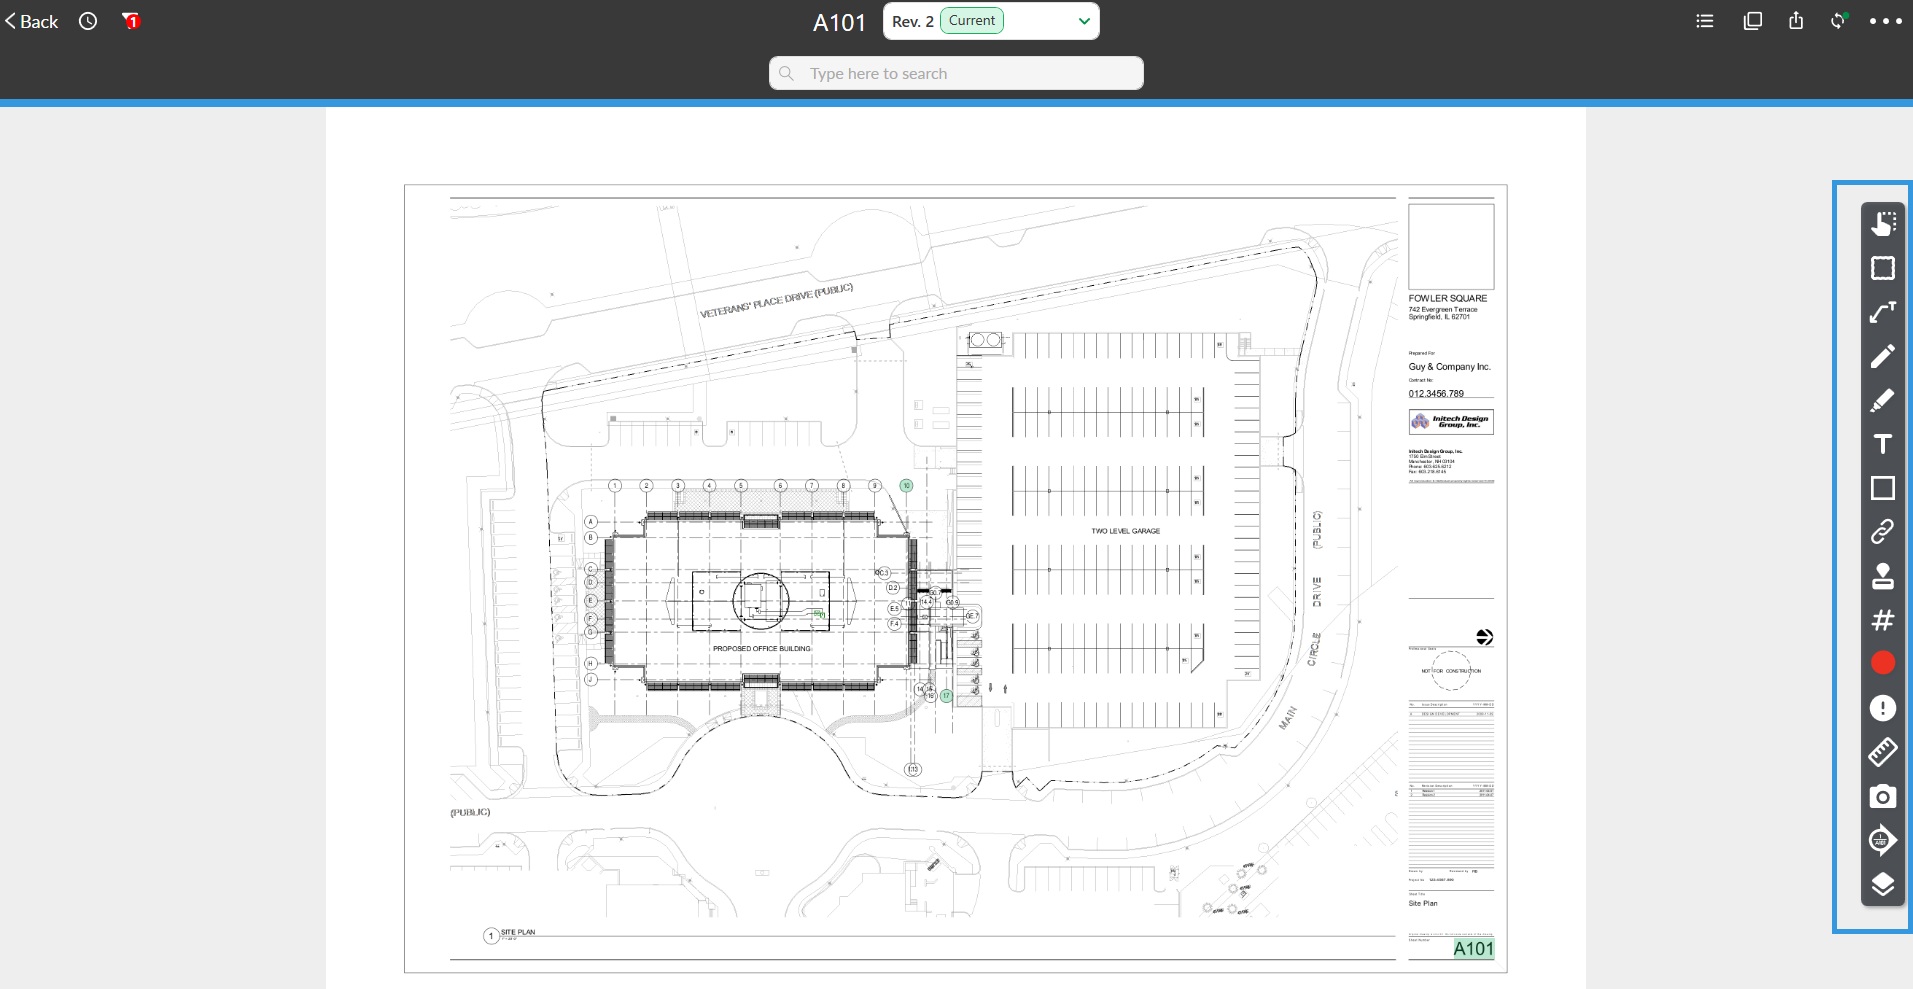
The viewer is where you can view, annotate, compare, share plans and documents on the STACK Field App.
The viewer is accessed when tapping on a document to open it.
STACK App Overview
Viewer Window
Tapping on a document thumbnail or selecting it from the list in Documents will open it in the App Viewer.
In the Documents window, tap a drawing or document to open it.
The document will appear in the Viewer.
To zoom in, use two fingers and stretch out.
To zoom out, use two fingers and pinch.
To pan, use finger and swipe.
To select an element on a plan, tap on it.
Revisions
The Revision dropdown allows accessing previous document revisions.
NOTE
When a user opens a document while online, STACK automatically checks and loads the latest available revision, even if a full project sync has not yet been completed. If a previous revision is opened and the user returns to the Documents list, reopening that document will default to the most current revision. The sync process has been updated to ensure that newly issued revisions are constantly included.
.gif)
Tap the dropdown arrow.
The document revisions will be displayed in the dropdown, including the following information:
Revision number
Name of the version set
Date and time the version set was uploaded
Badge displaying if the revision is Current or Not Current
Tap the revision you want to access it.
Revisions for Documents Other than PDFs
NOTE
Non-PDF documents cannot be opened directly in the STACK App viewer. Instead, you can use the Open With option to view them in another application.
.gif)
Select the folder where the document is located.
Navigate to the document.
Tap the three dots on the lower right corner of the document.
From the popup menu, select View Revisions.
- Add to Favorites
- Save for Offline
- Download
- Share
- Open With
- View RevisionsA popup window will display all the document’s revision and will show which one is Current.
Tap the download icon to download the document.
Tap the Open with icon to open the document.
Click Done to Done or the X on the top right to close the popup.
Search
The search bar allows using keywords to search for words within a document.
NOTE
The Search function is not activated by default. When a project is opened for the first time, STACK will ask if you want to activate the feature. Afterwards, to activate the Search function, the user will need to go to the Project Preferences accessible from the three-dot menu.

Tap the search bar.
Type in the keyword.
Tap Search.
The STACK Field App will zoom in to the first location where the word is found.
Tap the arrows to navigate from one location to the other.
Tap the X to close the search.
Filters
The filters are used to hide or display Markups and Issues on the plan.

Tap the filters icon at the top left of the window.
In MARKUPS:
Hide All Markups: Toggle to hide all the markups on the plan.
Hide All Except Mine: Toggle to hide all markups except the ones that you have added.
In ISSUES:
NOTE
Lists, Categories, and Locations must be added when creating issues before being able to select them as filters.
Hide all Issues: Toggle to hide all issues on the plan.
Statuses: Toggle either to choose which statuses to display:
Open
In Progress
Completed, pending validation
Closed
Assignees: Select the issues assignee for which you want to show issues.
Lists: Select the Lists for which you want to display the issues.
Categories: Select the Issue Category for which you want to display the issues.
Priorities: Select the Priority level for which you want to display the issues.
Low
Normal
High
Locations: Select the Locations for which you want to display the issues.
Tap Clear All to remove all applied filters.
Tap Close to exit filters.
List
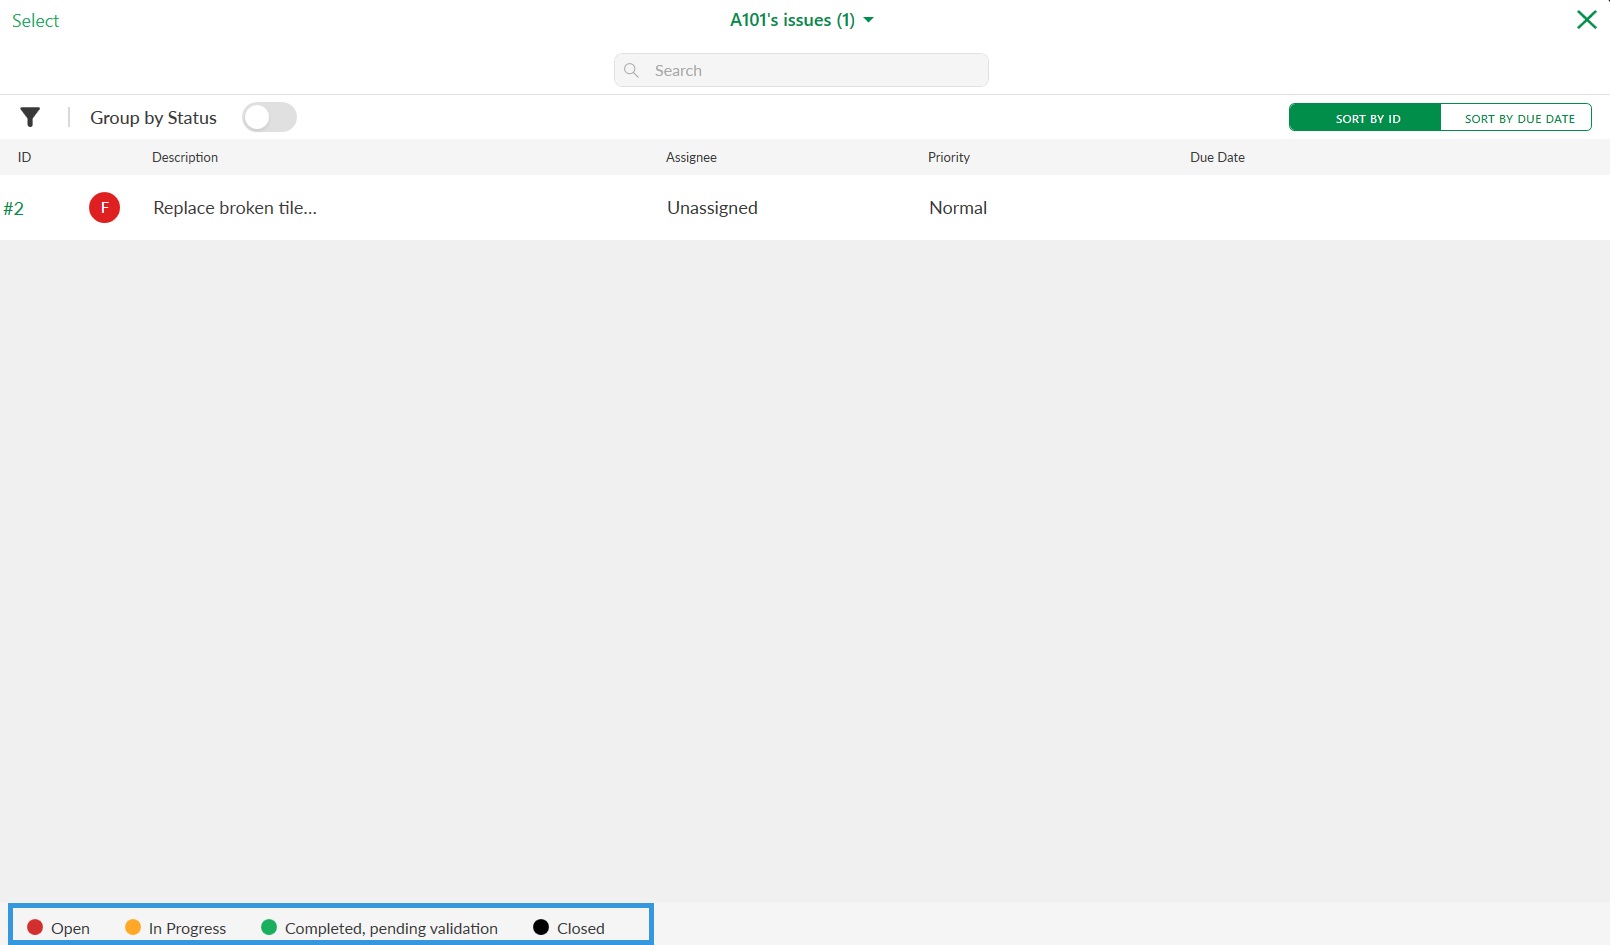
The List Popup menu allows viewing the Issues that have been created and the Photos that have been uploaded.
NOTE
When opening either Issues or Photos from the List menu, it will open only the ones at the project or folder level where you are located.
.jpg)
Issues
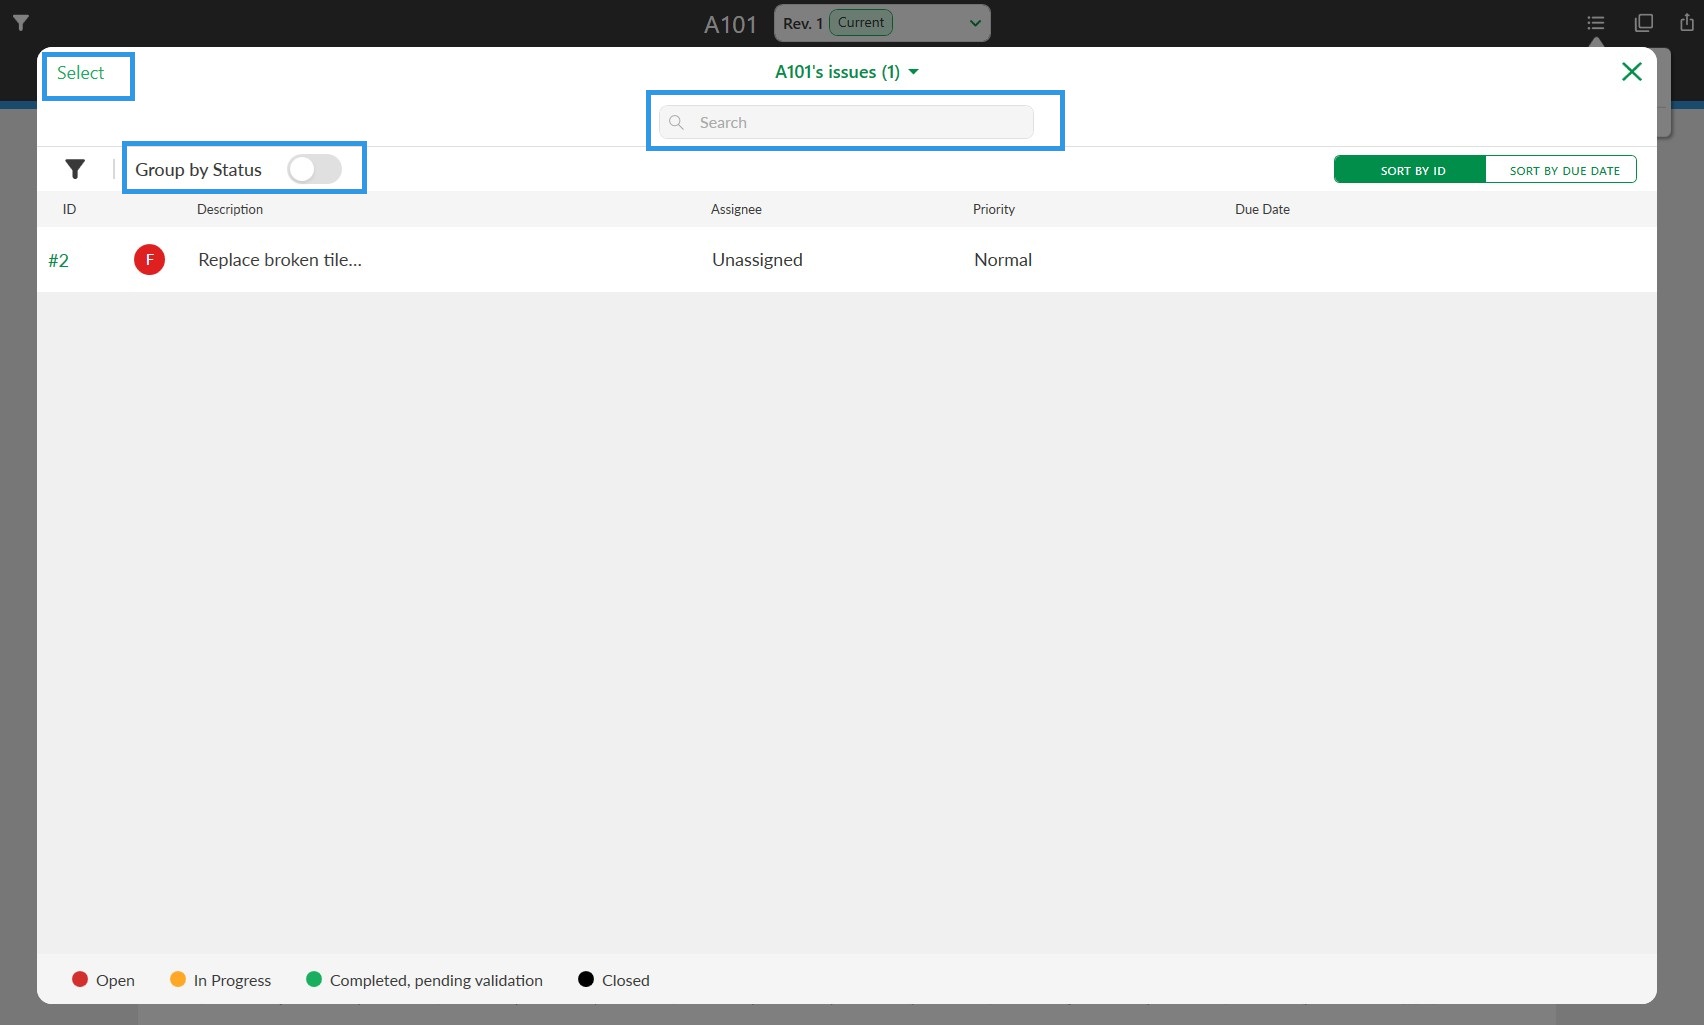
The number of issues on the project.
Search: Using keyword search for issues in particular. As you type, the results containing the most relevant results will appear.
Select: Deselect or select issues to perform certain actions on them:
Assign
Download as CSV
Download as Word
Download as PDF
Filter: Apply filters on the issues to display the specific ones you are looking for.
GENERAL
STATUSES
ASSIGNEES
LISTS
CATEGORIES
PRIORITIES
LOCATIONS
Group by Status: Toggling on the group status button will group the issues by their status. Otherwise, they will appear in the order of the ID numbers.
Sort:
Sort by ID
Sort by Due Date
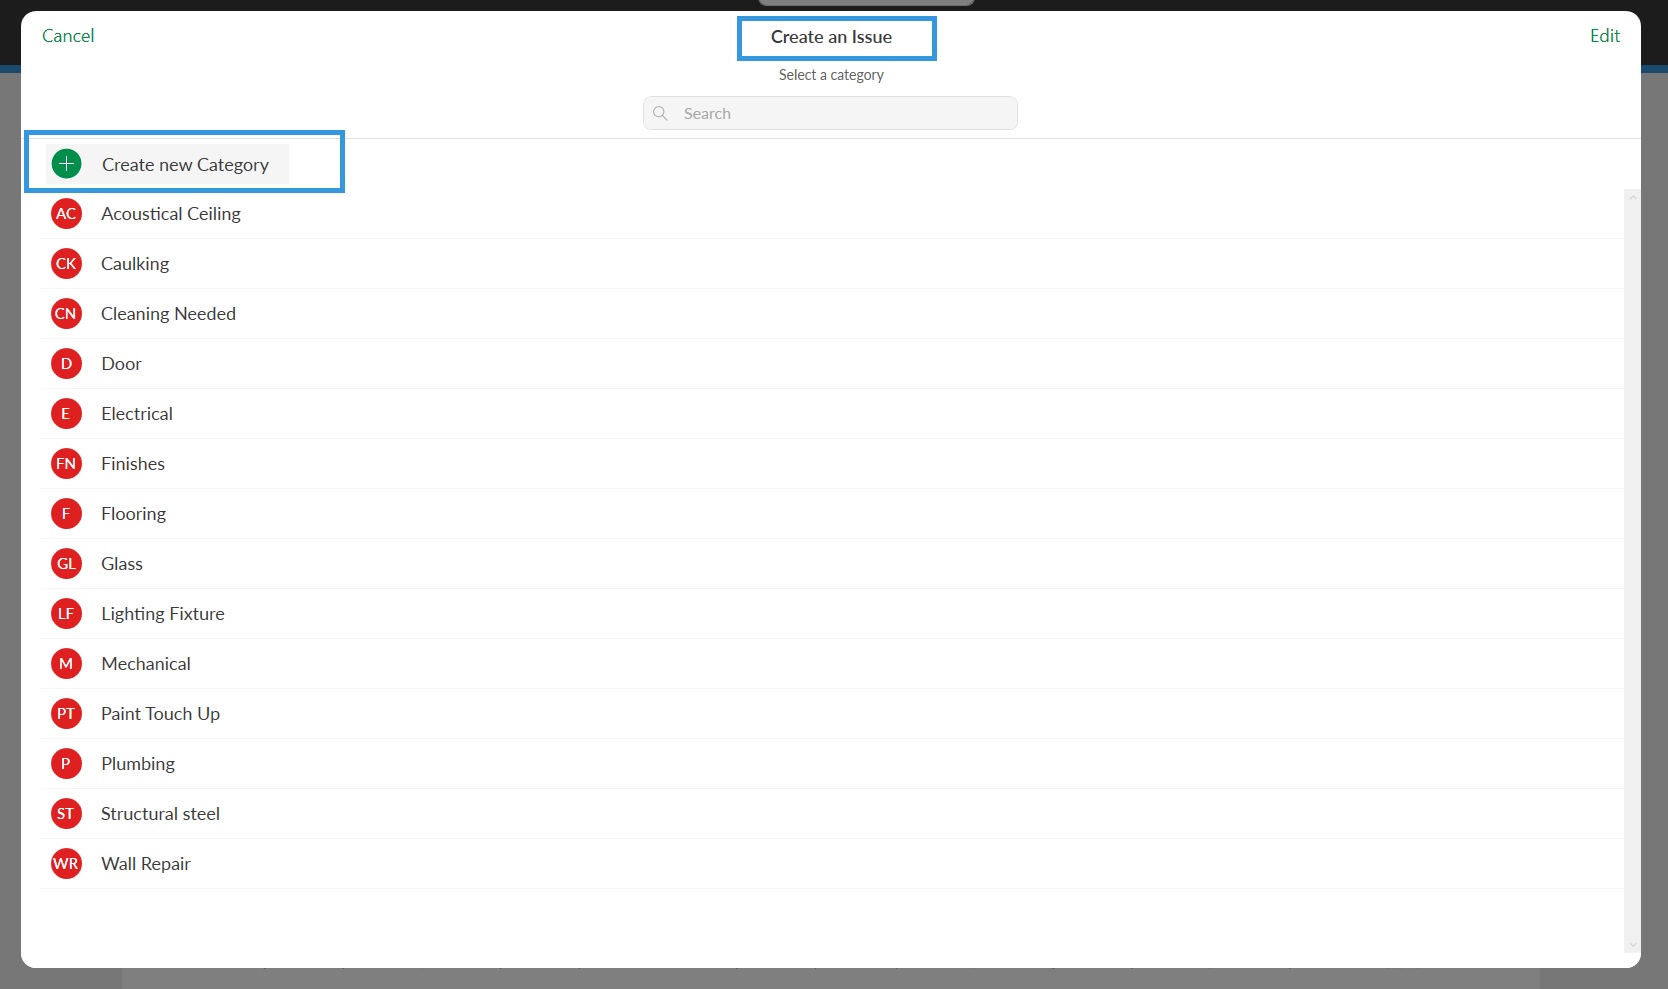
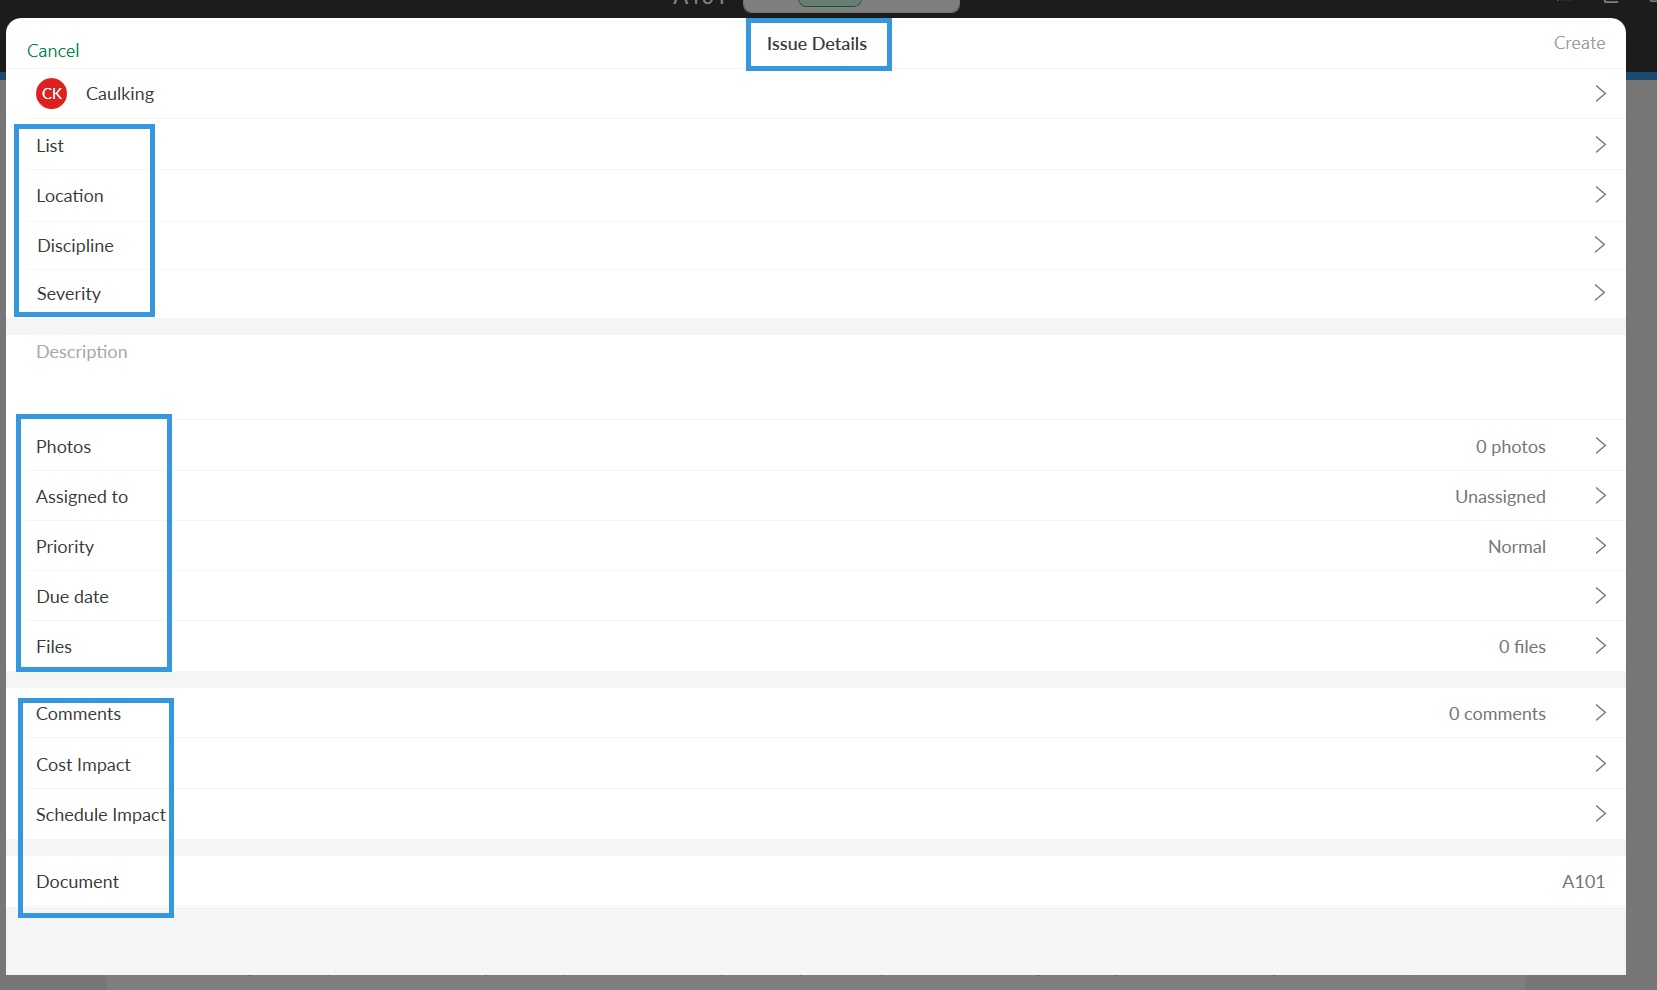
+ Create new issue: Create a new issue by selecting a category and by filling in the Issue Details.
Issues list: Displays all the issues on the selected project with the following information:
ID: When an issue is created, it is assigned an ID number. This number cannot be edited.
DESCRIPTION: The description that was entered when the issue was created.
ASSIGNEE: The name of the user the issue was assigned to when the issue was created.
PRIORITY: The priority level of the issue.
Low
Normal
High
DUE DATE: The date that the issue is expected to be resolved.
DOCUMENT: If the issue was created on a plan using the exclamation point markup tool, the sheet number will be displayed.
Status legend: A legend of the issue statuses that appear next to the description.
Open (Red)
In Progress (Yellow)
Completed (Green)
Closed (Black)
Photos
Displays the photos that have been uploaded using the camera markup tool. For more information, refer to the Toolbar article.
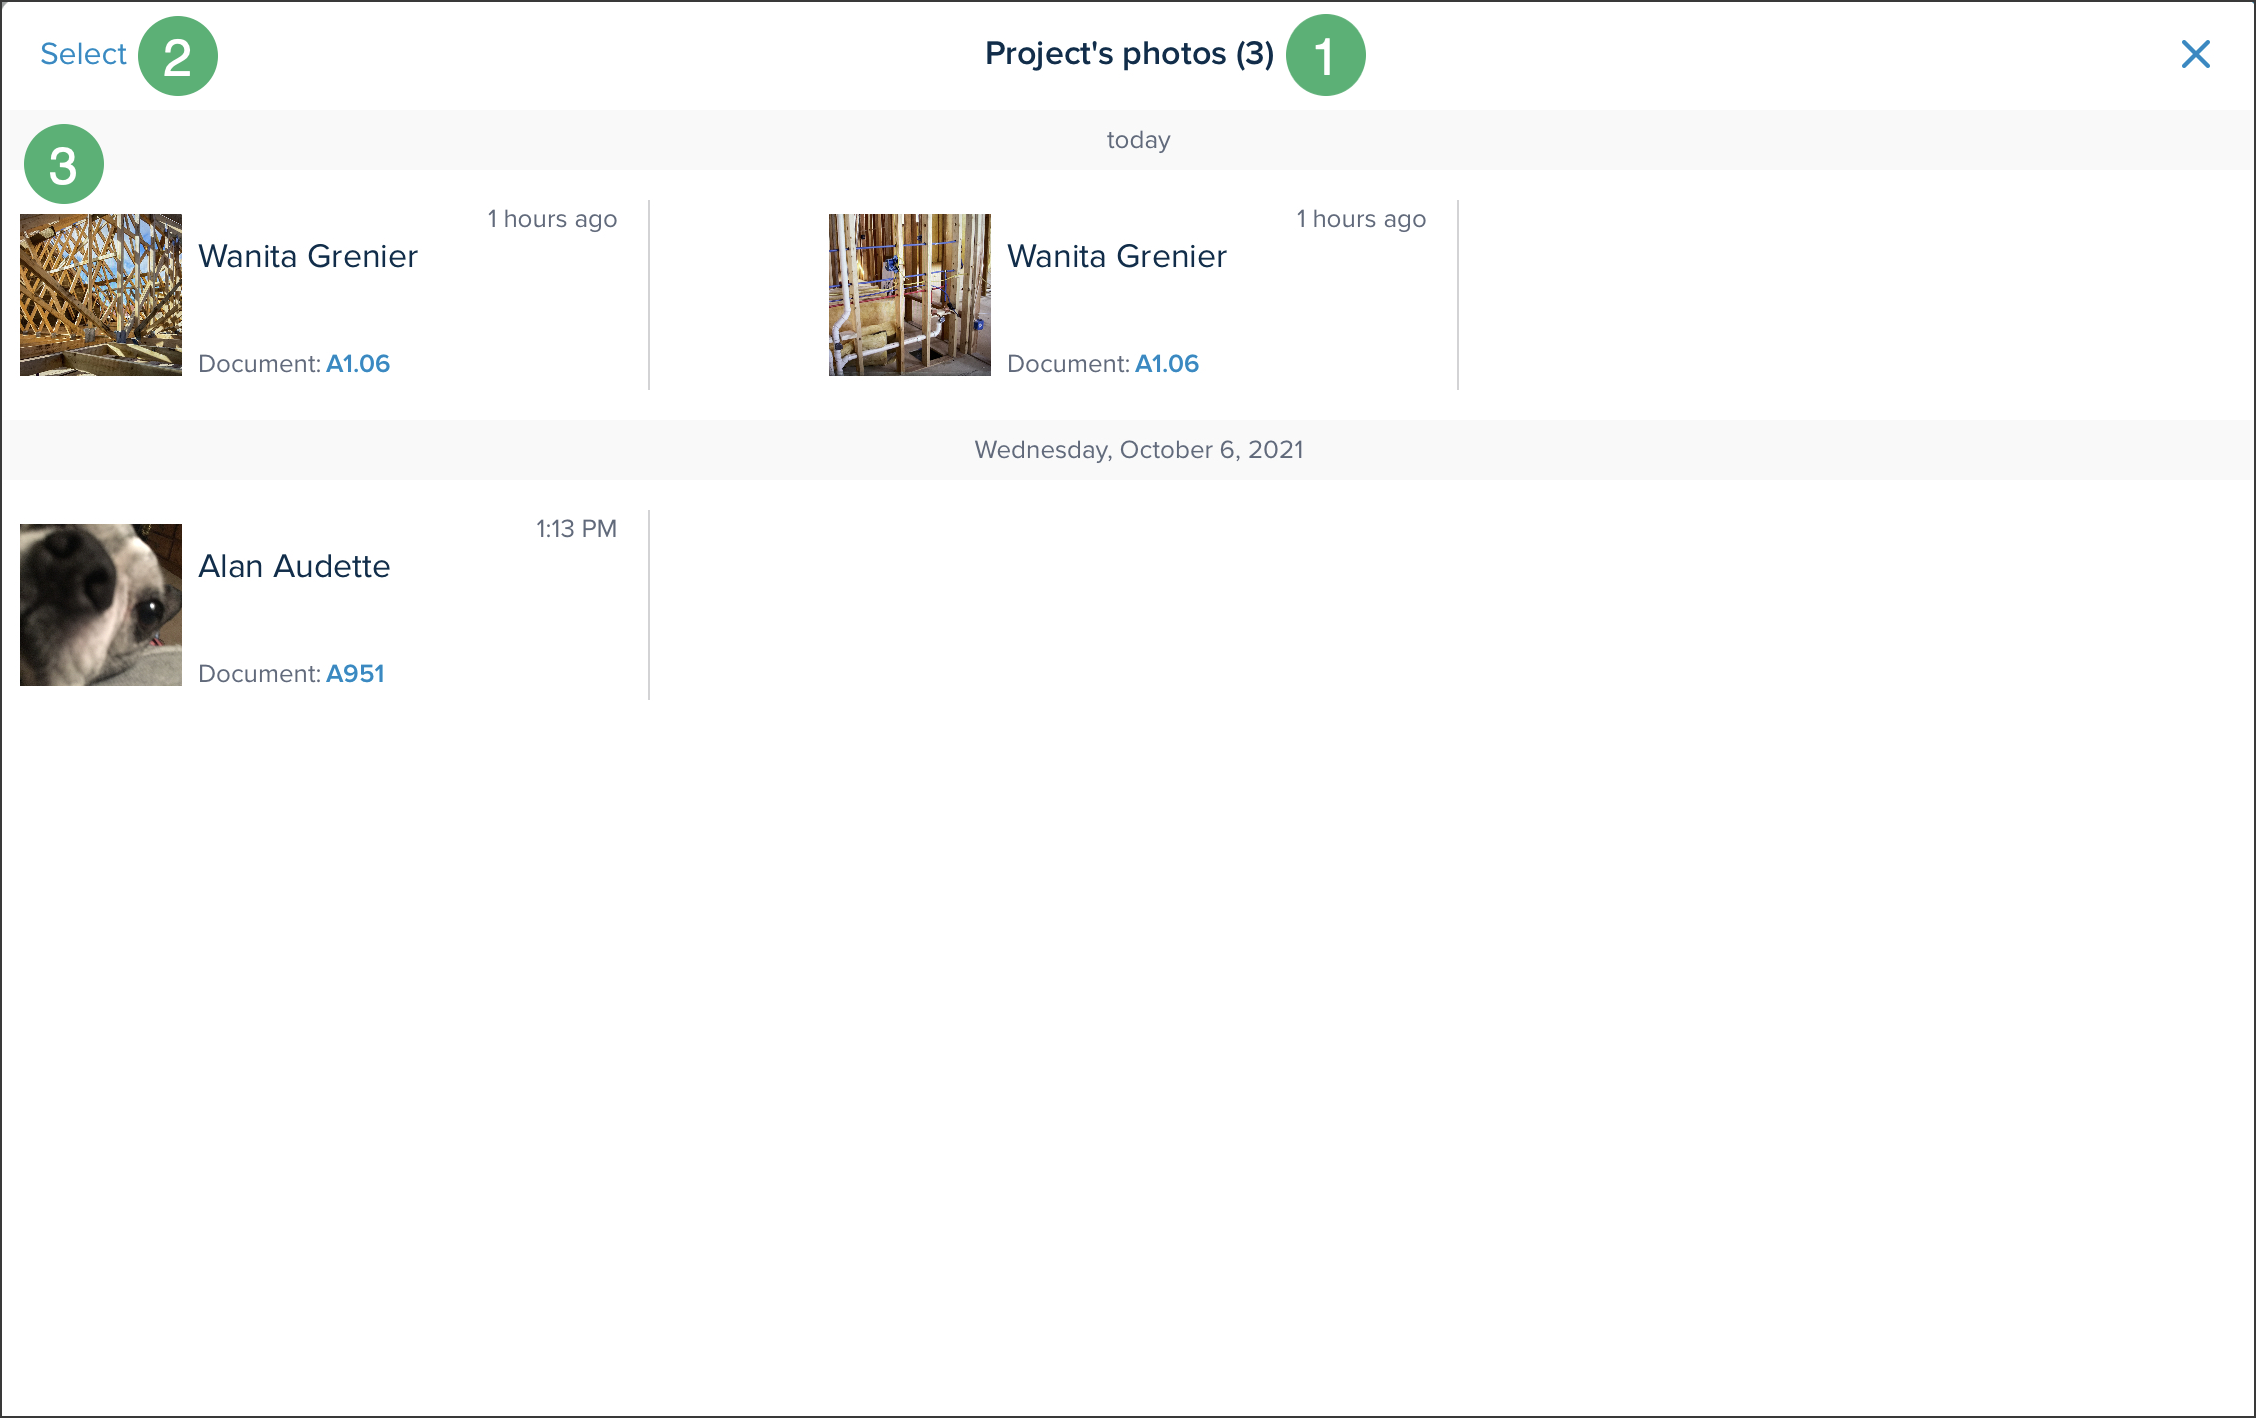
The number of photos uploaded in the project.
Select: Select photos to perform certain actions on them:
Share
Delete
Photo list: Displays the photos in order of date including the following information:
Date the photo was uploaded
Time the photo was uploaded
Name of the user who uploaded the photo
Thumbnail of the photo
Document number
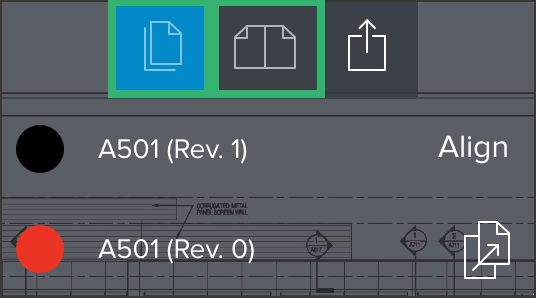
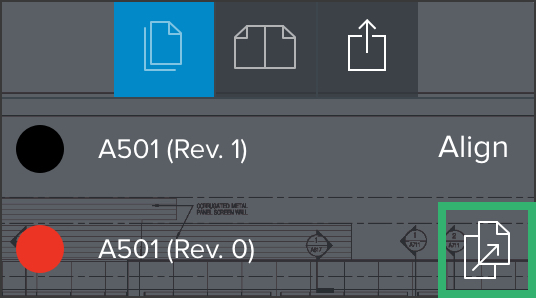
Compare
Allows comparing two documents or revisions, either side-by-side or layered.
.gif)
Tap the Compare icon in the upper right corner.
Select either the revision or the document to compare with.
Tap COMPARE.
Choose to compare by layering the document or by viewing them side-by-side.
In the side-by-side view, tap the padlock icon to pan or zoom in and out. Both sheets will sync when performing a pan or zoomed view.
In the layered view, tap the coloured circles next to the revision number to change the colour they appear in the comparison view.
Tap Align to adjust the placement of the drawing.
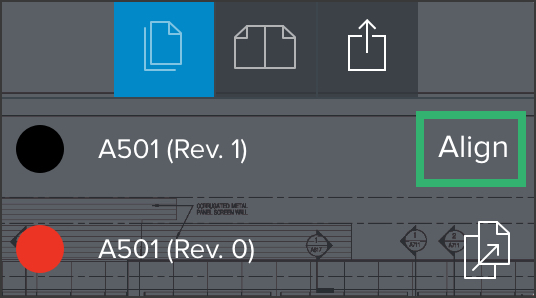
Move the plan using your finger or use the arrows and plus and minus signs.
Tap DONE.
Tap the switch document icon to change which revision/document will be brought to front.
Share the comparison by tapping the share icon.
.png)
Add Markups to the comparison using the toolbar.
NOTE
The markups added in the comparison view will not be saved in the document itself, but will only be applied in the comparison to be able to share it.
Cloud
Text and Arrow
Pencil
Highlighter
Colour
Tap Exit Compare.
Download a Document
.gif)
Access the project where the document is located.
Navigate to the file.
Click the Select icon.
Select the document and/or plan that you want to download. You can download multiple documents by selecting more than one.
Adjust the settings of your download.
Click Download.
An email will be sent to you including a link to your downloaded documents.
Share

Tap the Share icon in the right upper corner.
Select to share either the Current View or the Full Sheet.
NOTE
When sharing a Current View, the recipient will receive a PNG file of the current image in the viewer.
When sharing a Full Sheet the recipient will receive a copy of the original PDF file with all added markups.
Choose how you want to share the comparison.
Toolbar
Use the toolbar to add Annotations and raise Issues on specific locations on documents.
View the Toolbar article for detailed instructions.
Navigation Arrows
When a folder includes more than one document, use the arrows to navigate from one document to the other. Aside from the arrows, a finger can be used to swipe as well.

Related Articles
If you need additional assistance, please Contact Us.
Was this article helpful?