Workflows in the STACK Field App
- Print
- DarkLight
- PDF
Workflows in the STACK Field App
- Print
- DarkLight
- PDF
Article summary
Did you find this summary helpful?
Thank you for your feedback!
Key Information
Six of the most common Workflow types are already built-in STACK and are ready to use.
In addition to the default Workflows, users can add as many Workflow types as they need under the project settings, in the Web Portal.
Within each type, Workflow Items are created for specific documents, processes or issues.
Once an Item is created in the Web Portal, it can then be accessed in the STACK Field App to keep track of it.
Access Workflows
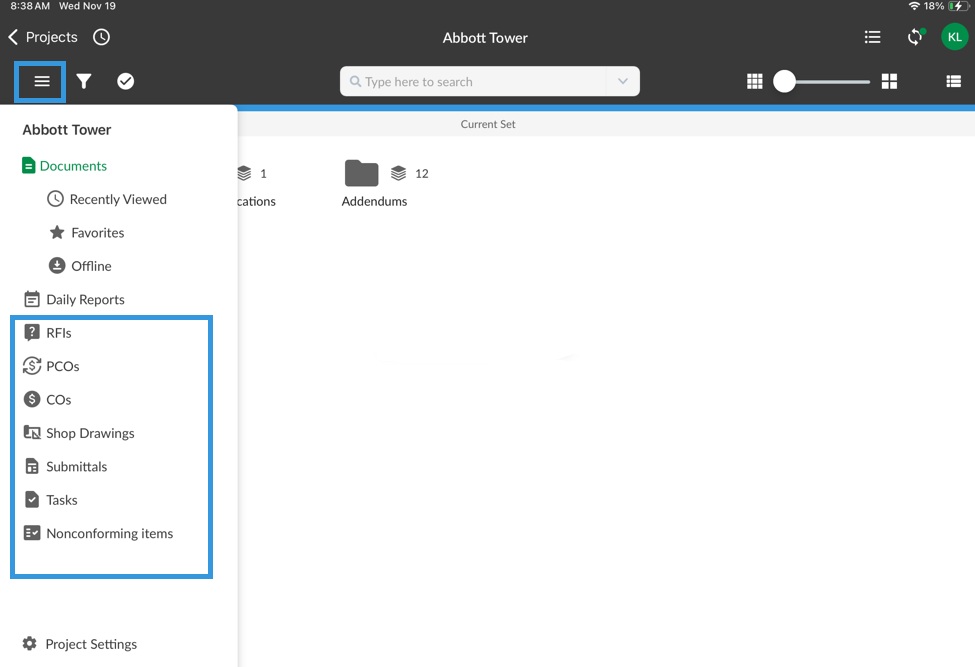
From the Project page, select the project for which you want to view the Workflows.
Tap the hamburger menu a the top left.
Select either of the Workflow types in the left side navigation menu. This will bring you to the Workflow List view.
In the List view, tap the desired Workflow Item. This will bring you to the Workflow's Item view where you can fill in the item and keep track of it's progress.
Workflows on iPhone
Workflows are accessible on iPhone. The STACK Field App on phone features all the same functions as on the iPad although they will differ slightly in appearance. Similarly to the iPad, all workflow items will sync with the Web Portal once connected to data or wifi.
The following video is only to give you a visual idea of how Workflows look on phone. Please refer to the present article for more detailed instructions.

Workflow List View
Workflow Items appear in the Workflow List after they have been created in a Workflow Type.
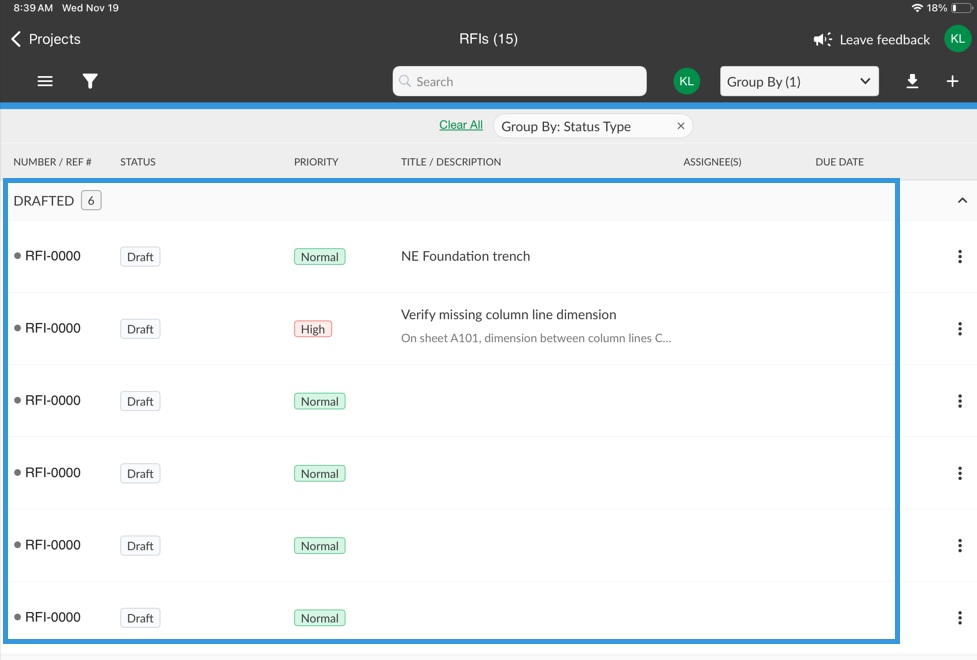
Tapping on an item will open it.
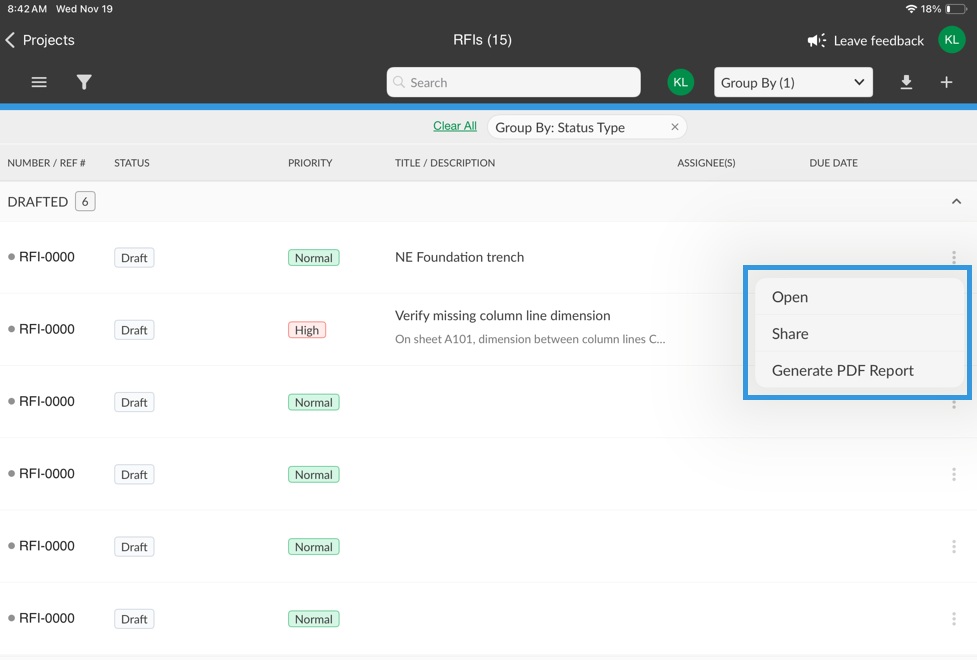
Tapping the three dots on one of the Workflow items allows:
Opening the Workflow Item
Sharing the Workflow Item
Generating a PDF Report
Filters
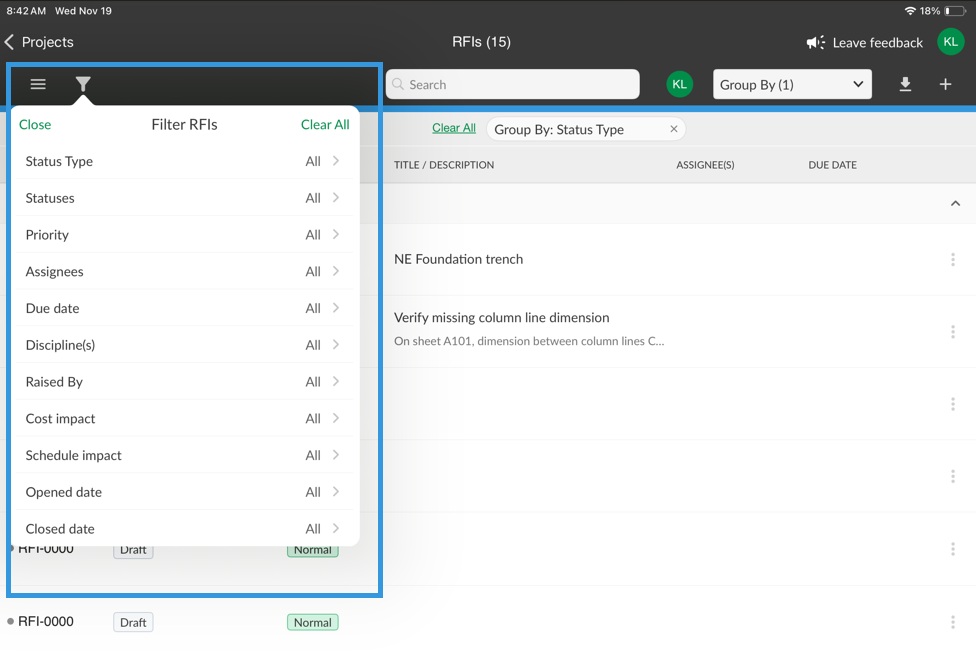
Tap the Filters Icon in the upper left corner.
Select one of the filters to set filters.
Select the desired filters:
Status Type:
Drafted
Opened
Closed
Voided
Statuses:
Draft
In Progress
On Hold
Completed
Void
Assignees
Due date:
Overdue
Today
Tomorrow
Next 3 days
Next 7 days
Next 14 days
Last 7 days
Last 14 days
Discipline:
Geotechnical
Civil
Landscape
Structural
Architecture
Interiors
Equipment
Fire Protection
Plumbing
Mechanical
Electrical
Telecom
And any discipline that's been added in the Web Portal's PROJECT INFO > Settings > Project Fields tab.
Raised By
Cost impact
Schedule Impact
Opened date:
Today
Last 7 days
Last 14 days
Closed date:
Today
Last 7 days
Last 14 days
Tap Back.
If desired, select another filter category to set other filters.
Tap Close.
The Workflow List view will be updated to reflect the selected filters and the number of filters applied with show on the filter icon itself.
To cancel any filter, tap the X on the filter's pill.
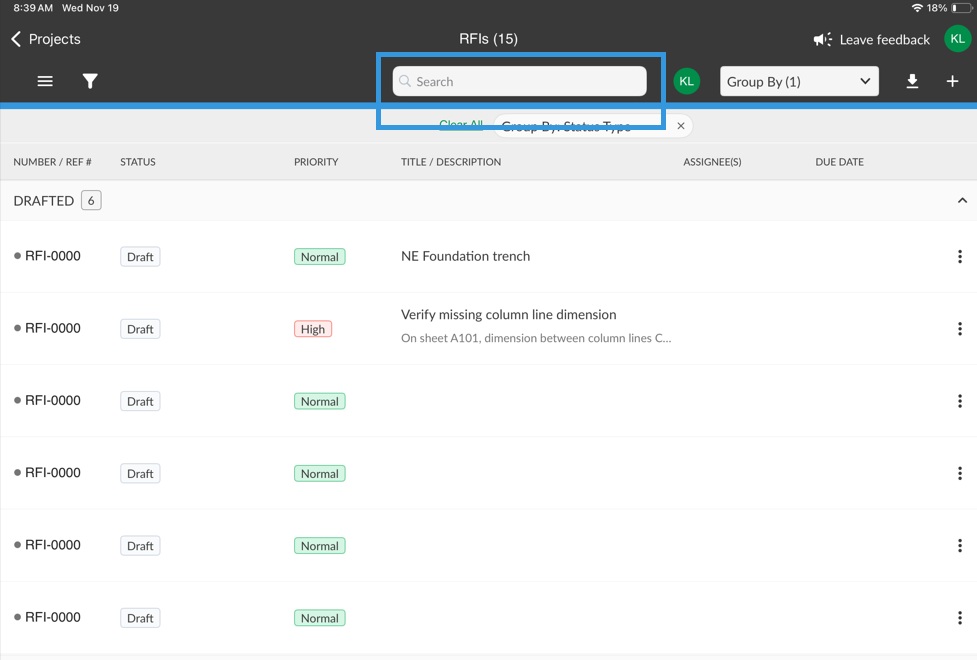
Search
Use the Search bar to search Workflow items by key words. As you type, the most relevant search results will be displayed.
Group By
Use the Group By dropdown to group the Workflow List Items in a specific order.
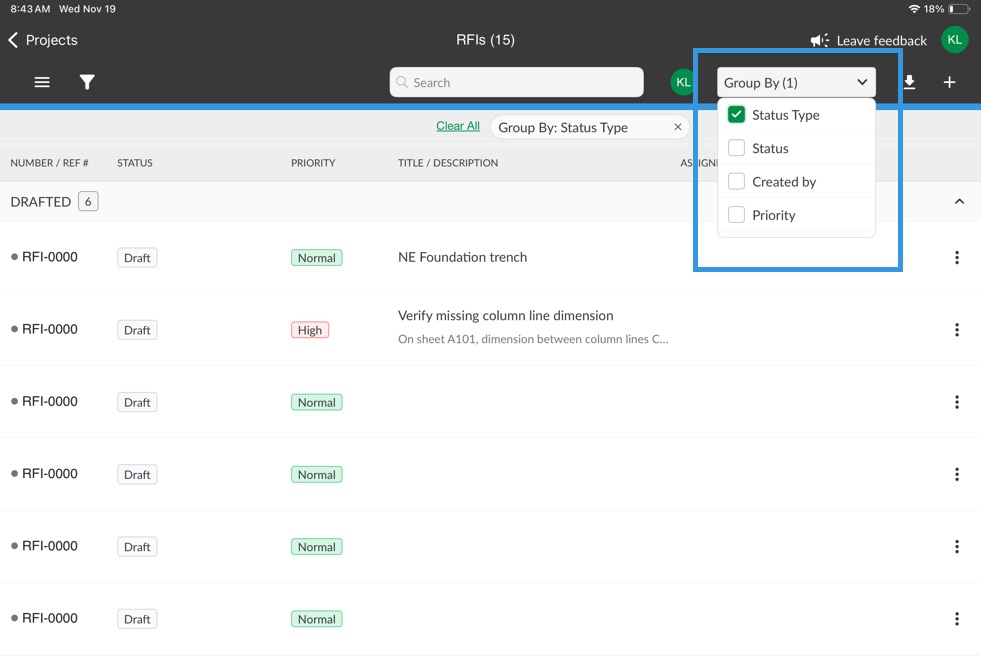
Tap the Group By dropdown menu.
Select how you want to group the Workflow Items:
Status Type (by default)
Status
Created by
The List will automatically reorder itself.
To remove the grouping, tap the X in the Group By pill.
Generate XLS Report
Allows generating an XLS report which will be sent to your email.
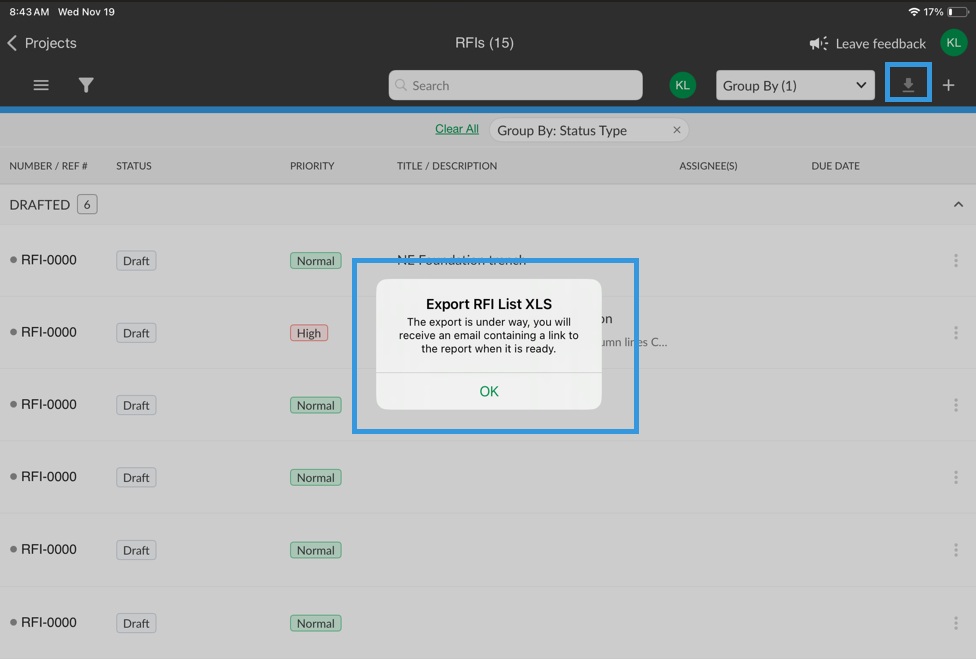
Tap the download icon in the upper right.
Go to your email.
Click the link to the report to download it.
Go to your downloads and open the file.
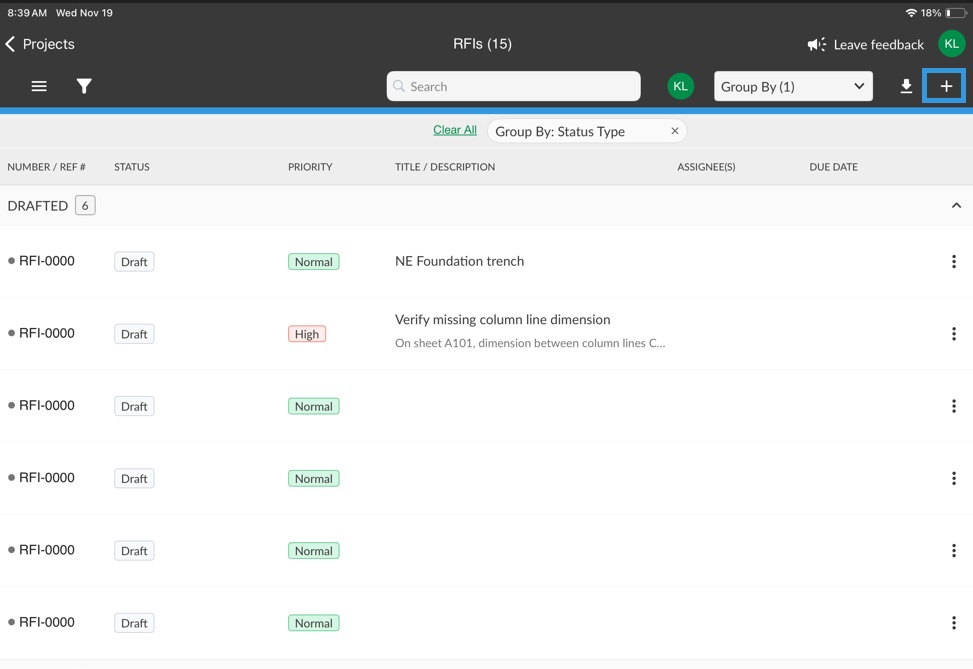
Create a Workflow Item
Allows creating a new Workflow Item. See the Creating a Workflow Item section for details.
Creating a Workflow Item
After a Workflow type has been added in the project in the Web Portal, the new Workflow Type will appear in the left side navigation menu. From there, a Workflow item can be created either in the Web Portal or the STACK Field App.
Tap the hamburger menu.
Select the Workflow type for which you want to create a Workflow item.
Tap the + sign in the upper right corner.
This will bring you to the Workflow Item window.
The Workflow will have a Draft status when first created and will be given an automatic number with the prefix and four zeros.
Fill in the sections described bellow.
Workflow Sections
General
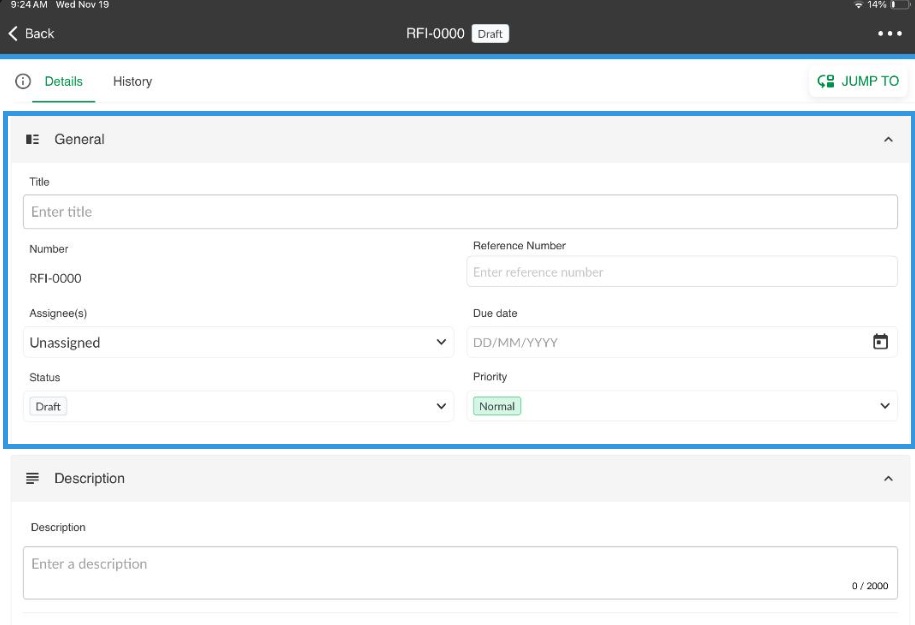
Title: Give a descriptive title to the workflow item.
Number: The workflow number is given automatically and cannot be changed. It will change automatically when passing to an Opened or Closed status type.
Reference number: Add any numbering system that may be required by your organization.
Assignee(s): Select which user(s) to assign the workflow item to.
Due Date: Click the calendar and select the date at which the process or issue must be resolved.
Status: The current status of the workflow item. Note that, in order to change the item to an Opened or Closed status type, the item must have a Title
Priority:The priority level you want to give to the Workflow Item.
Low
Normal
High
Description
.jpg)
Description: Enter a complete description for the Workflow item.
More Information: Add any relevant information relating to the process or issue raised in the Workflow.
Resolution: Enter details about how the process or issue has been resolved and any other details relating to the resolution. These fields are flexible and can be used for different content, based on the different Workflow types. For example, for an RFI, Description should include the question and Resolution should include the answer. In a CO example, Description can be used for the scope, More Information can be used for the pricing and Resolution can be used for approval purposes.
Additional Information
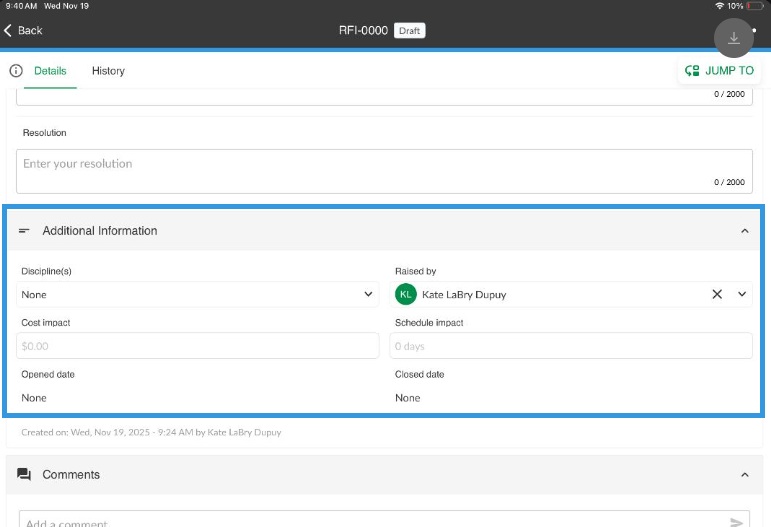
Discipline(s): From the dropdown menu, select one or multiple disciplines. The available disciplines are those listed or added in the Project Fields tab when the project was created.
Raised by: Choose the name of the user who initiated the workflow item.
Cost Impact: Enter the dollar amount reflecting the cost impact of the workflow item. (Negative values are allowed if needed.)
Schedule Impact: Specify the number of days the project will be delayed due to the workflow item. (Negative values are allowed if needed.)
Opened date: Select the date when the workflow item was opened. The Open Date marks the first time a workflow item enters an Open status and remains fixed despite any subsequent status changes. If an item is closed without ever being in an Open state, the Open Date will be the same as the Closed Date.
Closed date: Select the date by which the workflow item is expected to be resolved. The Closed Date records the last time a workflow item transitions to a Closed status. This date remains unchanged if the item shifts between different Closed statuses. If the item moves from a Closed status to Draft, Open, or Void, the Closed Date is removed.
Comments
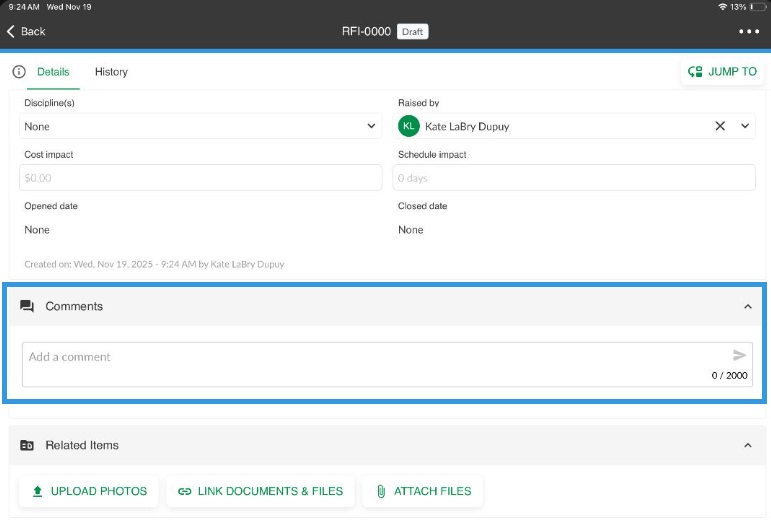
Comments: Comment about the Workflow. This is where a back and forth discussion about the item can happen.
To add a new comment about the Workflow itself, enter your information in the Add a comment field. You can enter multiple lines of comments.
Tap the arrow to send.
The new comment will be added into the Comments section including the following information:
Initials of the user who made the comment
The comment itself
Date and time the comment was made
Related Items
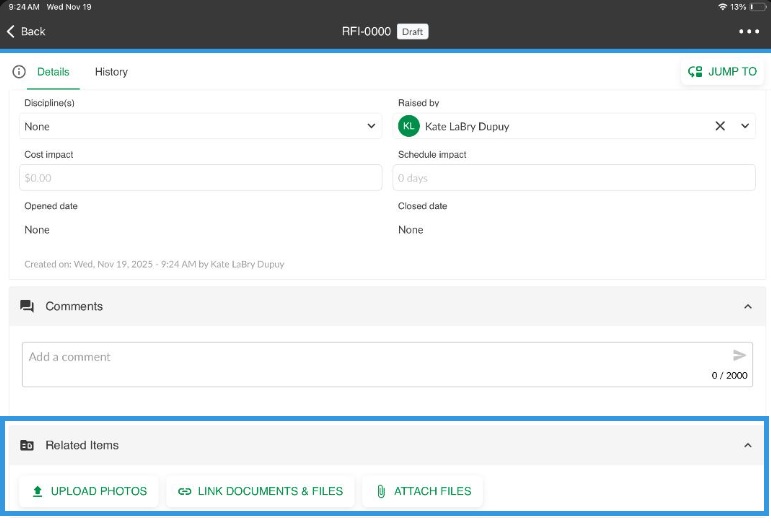
UPLOAD PHOTOS: Photos that may be relevant to the Workflow.
LINK PROJECT DOCUMENTS & FILES: Any documents or files that you have uploaded in the project that may be relevant to the Workflow.
ATTACH FILES: Attach any additional information, submissions and/or drawings to the workflow.
PHOTOS
Tap UPLOAD PHOTOS.
NOTE
You can upload photos from your iPad or from Google Drive, Google Photos, Dropbox, OneDrive, and from Box.
Select to either:
Take a photo: Take a photo with your iPad's camera. If you take a photo while tapping on the pencil icon, you can add markups using the tools in the toolbar and enter some notes relating to the photo. If you take it by tapping on the circle, you won't be able to add markups afterwards.
Photo library: Navigate your photo albums to find the photo(s) that you want and tap Done.
Choose files: Navigate your files albums to find the photo(s) that you want and tap Open.
Tap the three dots to:
Edit: Edit the photo NAME and add NOTES. You can also share the photo by tapping the share icon.
Download: Save the image or share it.
Delete: Delete the photo from the current Workflow Item.
Tap LINK PROJECT DOCUMENTS.
NOTE
You link document from your iPad or from Google Drive, Google Photos, Dropbox, OneDrive, and Box.
Navigate the document structure to find the document you want.
Tap the blue circle to select the photo(s).
Tap LINK.
Tap the three dots to:
Edit: Allows editing NOTES only. You can also share the photo by tapping the share icon.
Share Full Sheet: Save the document or share it.
Open linked document: Opens the document in Documents from the left side navigation menu.
Remove: Removes the document from the Workflow Item.
FILES
Tap ATTACH FILES.
Tap +ADD.
Navigate to find the file(s) that you want to attach and select them by adding a checkmark.
Tap Open.
To remove files from the upload, tap select and tap the trash can next to the files.
Next to the file, you have the option to download the file or share it.
Tap the X to close the window.
A list of the files will appear in the Related Items section.
Click the three dot menu to:
Open With
Download
Delete
Action Buttons
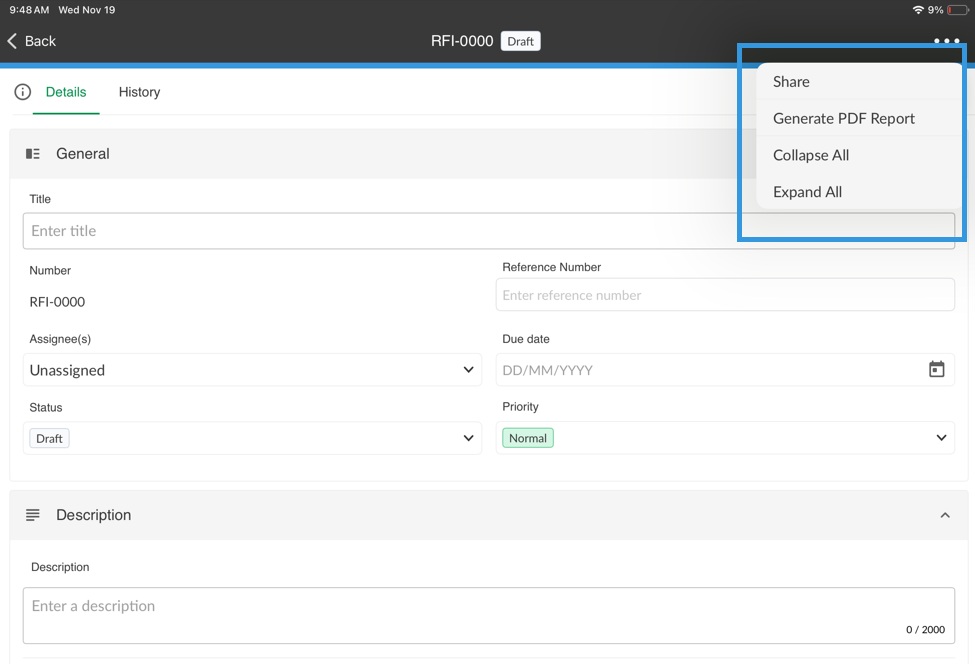
Three Dots menu:
Share: Save the Workflow or share it.
Generate PDF Report: Allows exporting a PDF Report of the Workflow Item which will be sent to your email.
Collapse All: Allows collapsing all Workflow sections which can then be individually expanded by clicking the dropdown arrow.
Expand All: Allows expanding all Workflow sections after they have been collapsed.
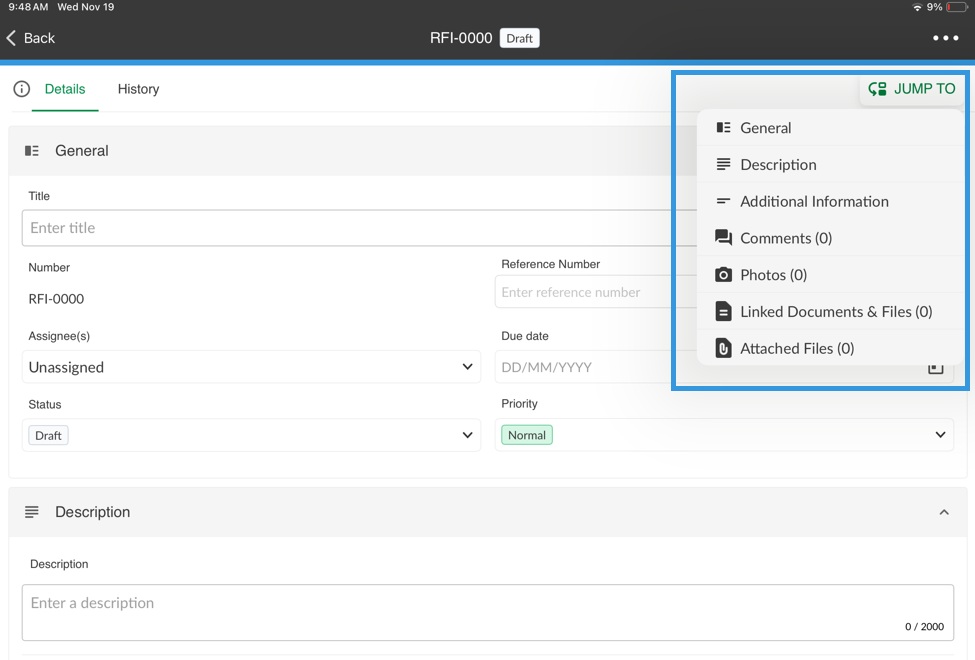
JUMP TO: Jump to a specific section of the Workflow. Tap a specific section to access it.
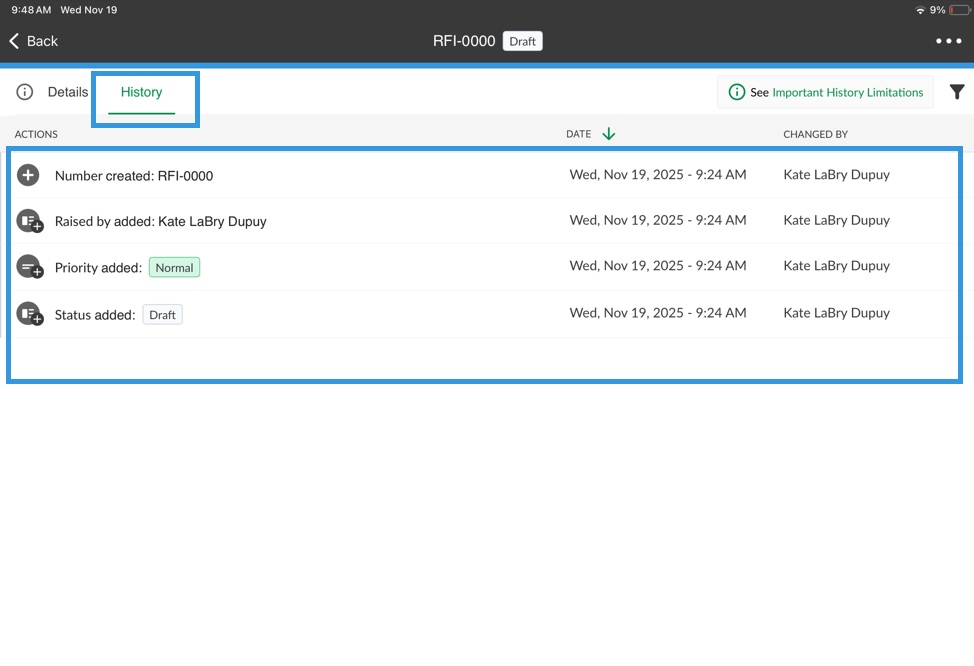
Workflow Item History
With workflow History, you can view all updates and modifications that have been made on a workflow items since its creation.
NOTE
History events for items prior to the date History was released (August 5th, 2024) are correct, but incomplete.
Once you click on a workflow item from the list, click on the History tab next to the workflow item Details.
Please refer to Workflow Item History in the Workflows in the Web Portal article as functionalities and interface are relatively similar.
Filtering Workflow Item History
When you have a long list of entries in History, it may be challenging to find the information you are looking for. STACK has made it possible to filter the history by "actions performed on" so you can quickly find what you need.
History Filters
Changed By: Brings you the list of users who have changed an item.
NOTE
The number of users selected will be displayed on the filter icon.
Title
Number
Ref#
Raised By
Assignee(s)
Due Date
Status
Description
More Information
Resolution
Comments
Photos
Project Documents
Workflow Configuration
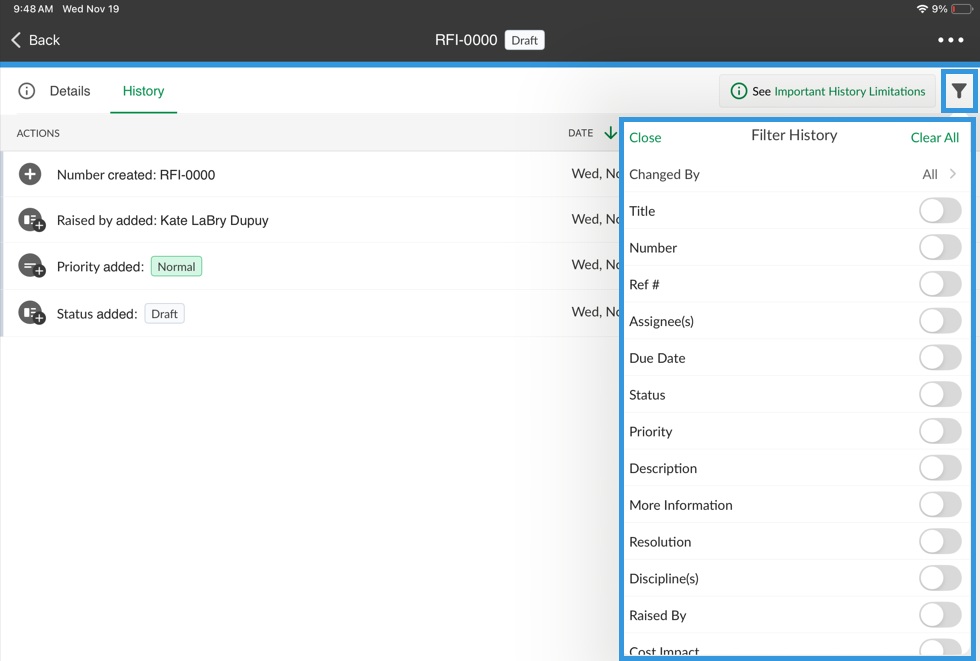
Tap the filter icon.
Toggle the filter history items you want to apply.
The History list will automatically update as you apply filters.
Tap Clear all to remove all the filter and have the complete list appear.
Tap Close to return to the History list.
Related Articles
If you need additional assistance, please Contact Us.
Was this article helpful?