Daily Reports Sections
- Print
- DarkLight
- PDF
Daily Reports Sections
- Print
- DarkLight
- PDF
Article summary
Did you find this summary helpful?
Thank you for your feedback!
Key Information
All sections of the Daily Report must be filled out.
If a section does not need to be filled out, check the None checkbox so it is marked as completed.
A warning message will appear when a section has not been filled out.
Weather
IMPORTANT: In order to have weather data in the Daily Report, the location latitude and longitude must be set in the project settings. (See Create a New Project for details). The units displayed in the weather section (metric or imperial) are set in the project settings as well.
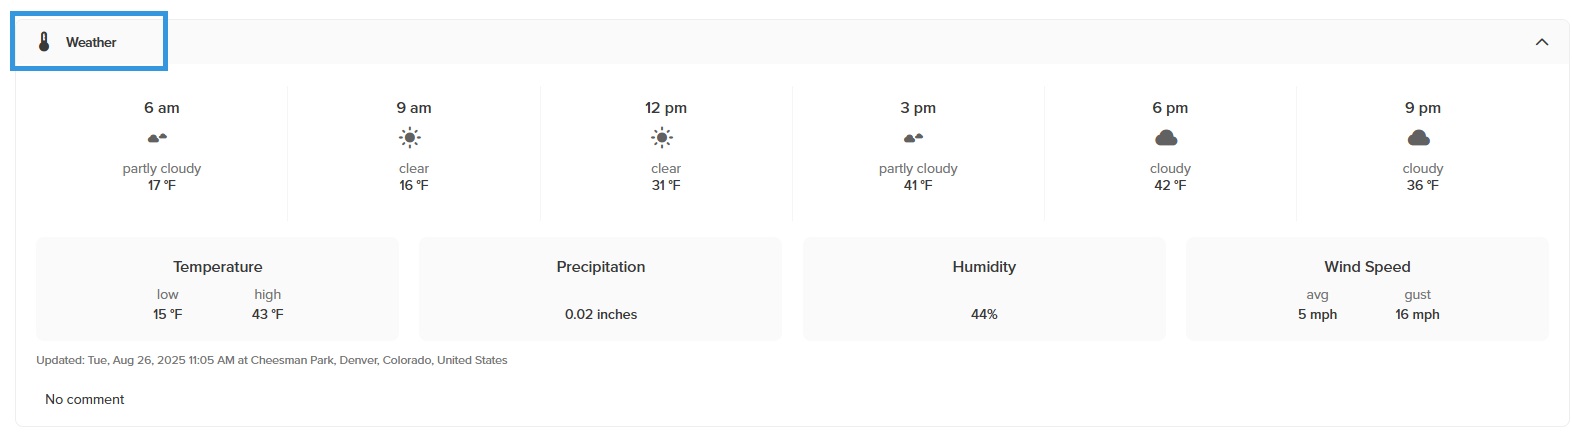
The Weather section displays the following information:
Expected weather conditions and temperatures per every three hours
Temperature: Overall temperature for the day
Precipitation: Expected precipitations for the day
Humidity: Average humidity level for the day
Wind Speed: Average wind speed and gust for the day
The weather's timestamp and location when the report was last opened, before it is Completed or Submit
NOTE
The weather timestamp and location will be updated when the report is opened throughout the day it was created and it's been 15 minutes since it was last updated, if the report is Unsigned or In Progress.
The Reviewer has the option to update the weather if it has changed, if the report is In Review.
The report is no longer updated when:
it was updated after midnight on the date the report was created
it is in a Commit or Approved state
TIP: If the browser window displaying the weather data is too small to view all the data, you can scroll to view the rest of the weather section.
In the Add a comment section, you can enter a comment about the weather which will be added into the Comments section.
If the Reporter creates a new Daily Report for a date that is in the future, a message will appear in the weather section saying that the weather information will be added on the day of the report.
NOTE: If the Reporter creates a report while offline, the weather data will be added once connected.
Resources
.jpg)
Workforce
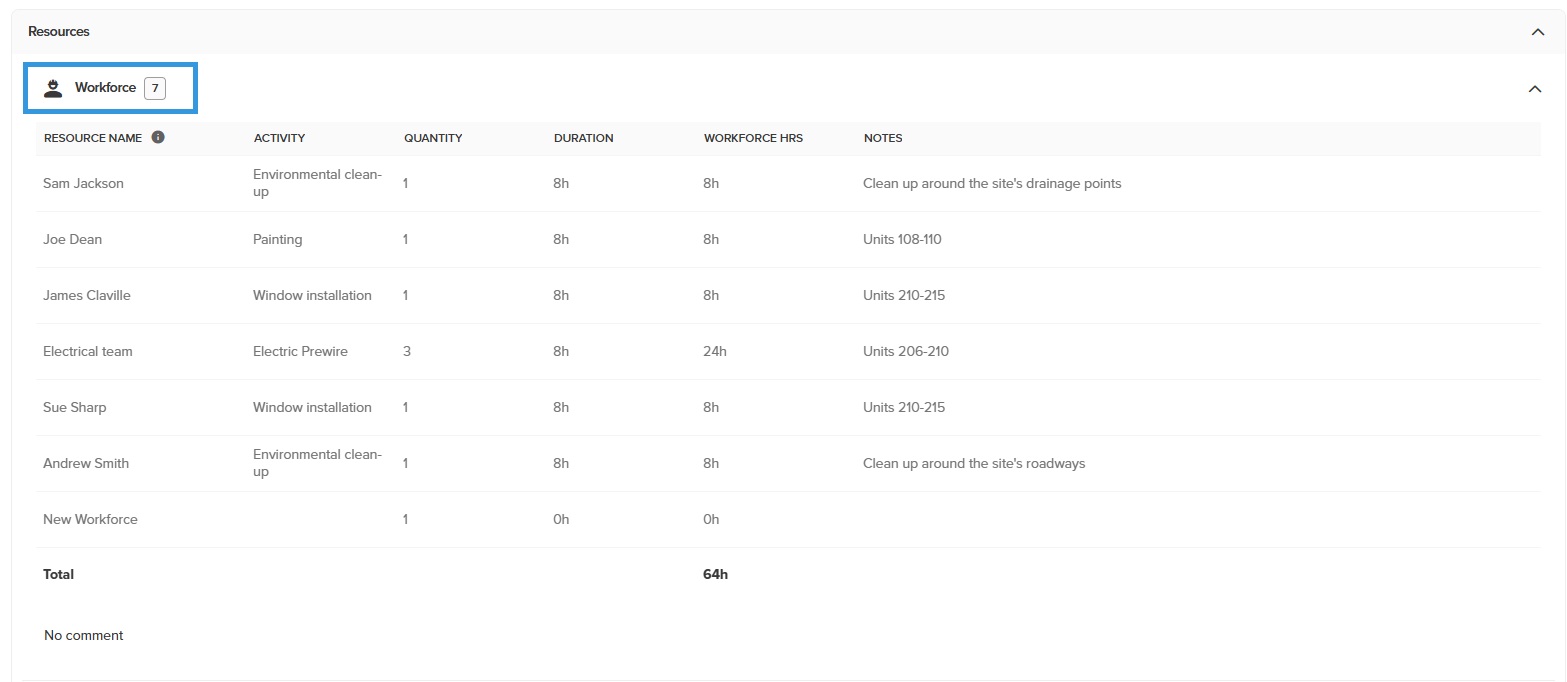
In the Workforce section, workforce may be added as a a team with the numbers of people it includes, as single, or several individuals.
TIP: If you have your workforce information in an Excel document, you can copy and paste your data from your Excel spreadsheet to the Workforce section by clicking in the Resource name field and pasting your whole table.
Click +Add workforce in the web and the + sign in the App.
Fill in the following fields (NOTE: Names and Activities that have been used in the project are automatically remembered by the software for easy entry.):
Resource name: The name of the team lead.
Activity: The type of work they did.
Quantity: The number of people in the team.
Duration: The number of hours worked per person.
Workforce hrs: You don't need to fill this field in. This is the Total number of hours worked for the team.
Notes: Any notes relating to this team.
To add another workforce, click + ADD workforce in the Web or the + sign in the App.
If you need to delete a workforce:
Web Portal: Click the three dots and select Delete.
STACK Field App: Tap the trashcan icon next to the workforce.
Equipment

The Equipment section allows adding any heavy equipment, either individually or in groups, that are on site during the day.
TIP: If you have your equipment information in an Excel document, you can copy and paste your data from your Excel spreadsheet to the Equipment section by clicking in the Resource name field and pasting your whole table.
Click + Add equipment in the web and the + sign in the App.
Fill in the following fields:
Resource name: The name of the equipment.
Activity: The type of activity the equipment performs.
Quantity: The number of equipment units of this type on the site today.
Duration: The number of hours that the equipment(s) performed the activity.
Equipment hrs: The sum of the number of hours that the equipment performed the task for all the equipment of this type (updates automatically with quantity and duration fields)
Notes: Any notes relating to this equipment.
To add another equipment item, click + Add equipment in the Web or the + sign in the App.
If you need to delete an equipment item:
Web Portal: Click the three dots and select Delete.
STACK Field App: Tap the trashcan icon next to the equipment.
Events
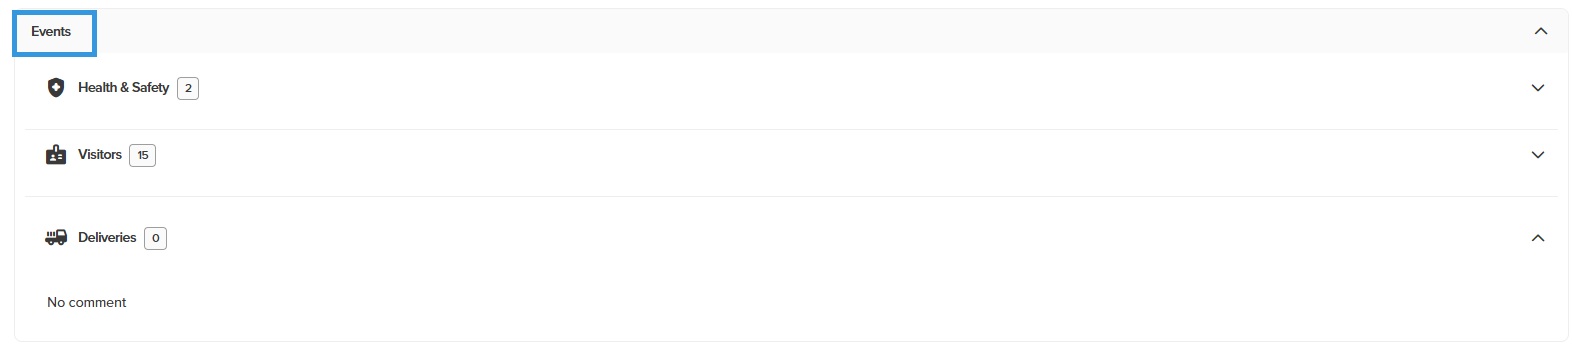
Health & Safety
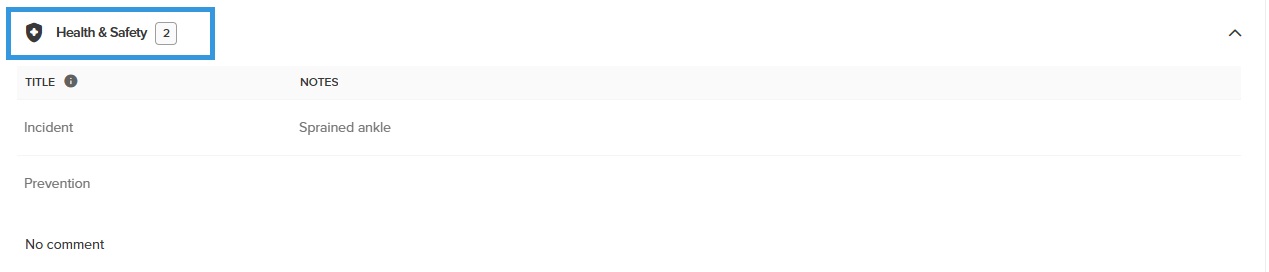
The Health & Safety section allows mitigating risks by keeping track of company standard safety processes. In this section:
Document any ongoing on-site prevention program
Track daily identification and resolution of Health & Safety concerns
Track larger, more critical safety incidents
Click + Add health & safety in the web and the + sign in the App.
Fill in the following fields:
Title: The title of the H&S issue which should be descriptive of the type of process or incident. Titles that have been used in the project are automatically remembered by the software for easy entry.
Notes: A detailed description of the H&S issue.
To add another H&S issue, click + Add health & safety in the web and the + sign in the App.
If you need to delete a H&S issue:
Web Portal: Click the three dots and select Delete.
STACK Field App: Tap the trashcan icon next to the H&S issue.
Visitors
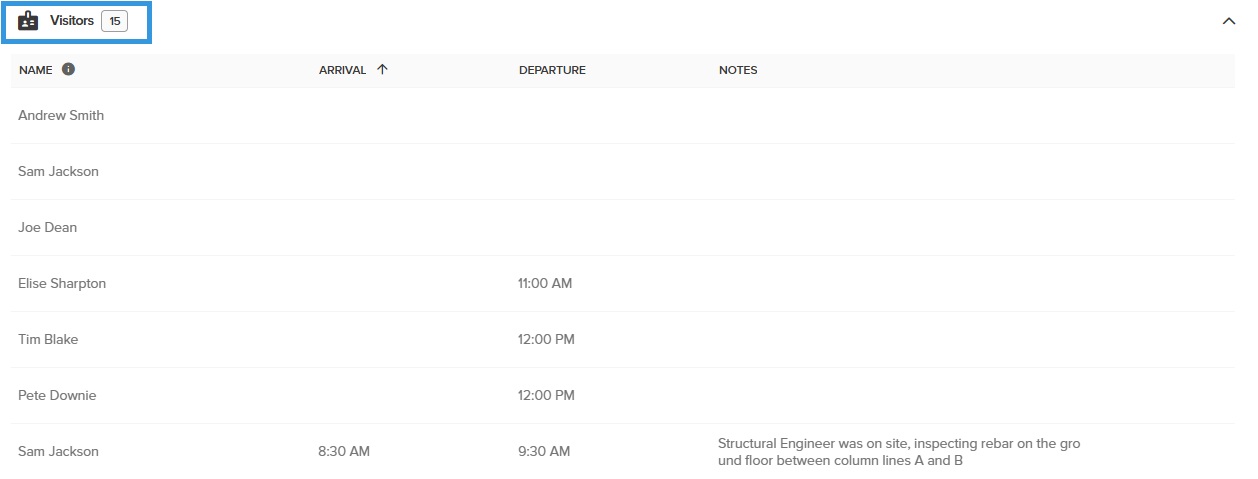
The Visitors section allows recording of all visitors that came to the site on that specific day.
TIP: If you have visitors information in an Excel document, you can copy and paste your data from your Excel spreadsheet to the Visitors section by clicking in the Name field and pasting your whole table.
Click + Add visitor in the web and the + sign in the App.
Fill in the following fields:
Name: The name of the visitor or the name of the companies they represent.
Arrival: Select the time the visitor arrived on the site.
Departure: Select the time the visitor left the site.
Notes: add any additional notes related to that specific visitor.
To add another visitor, click + add visitor in the web and the + sign in the App.
If you need to delete a delivery:
Web Portal: Click the three dots and select Delete.
STACK Field App: Tap the trashcan icon next to the visitor.
Deliveries

The Deliveries section allows recording all delivery details to have an increased accuracy of what is delivered on site and at what time.
TIP: If you have your delivery information in an Excel document, you can copy and paste your data from your Excel spreadsheet to the Delivery section by clicking in the From field and pasting your whole table.
Click + Add delivery in the web and the + sign in the App.
Fill in the following fields:
From: Enter the name of the company who made the delivery.
Time: Specify the delivery time.
Tracking Number: Enter the tracking number of the item delivered.
Content: Specify the content of the delivery.
Notes: Add any relevant notes about the delivery.
To add another delivery, click + Add delivery in the web and the + sign in the App.
If you need to delete a Delivery:
Web Portal: Click the three dots and select Delete.
STACK Field App: Tap the trashcan icon next to the delivery.
Related Items

Photos

Our Daily Reports allow adding any photos that may be relevant to your daily report.
Once added, a photo may be viewed, deleted, or the photo name and notes may be edited.
Extension supported:
.pgn (including panoramics)
.jpeg/jpg (including panoramics)
STACK Field App
Click + ADD PHOTO on the web, and the + sign in the App.
Select Take a photo, Photo library, or Choose files.
If you choose:
Take a photo
Tap the round button to take the photo.
It is also possible to add markups to the photo with the pencil icon which will bring you to a markup screen.
In this screen, you can edit the photo information and add markups using the markup tools.
Photo library
Select what album you want to retrieve the photo from.
Select the photo(s) you want to import and click Done.
Choose files
Navigate to the location of the photo you want to import.
Select the photo and tap Open.
The photo is added to the Photos section.
To see the details relating to the photo, click on the photo or hover over it in the Web Portal.
Editing a Photo
Tap a photo to open the editor.
NOTE: It is also possible to share a photo using the send icon in the upper right corner.
Apply any required changes and tap the X in the upper right corner.
Deleting a Photo
Tap the trash can icon in the lower left corner of the photo.
The photo will no longer appear in the Photos section.
Web Portal
In the Photos section, you can view the photos that have been added through the STACK Field App or the Web Portal.
By clicking on a photo, you will have an enlarged view of the photo and the Details relating to the photo: Name, Notes, Uploaded by, and Taken on.
Use the + and - buttons to zoom in or out of a photo.
Click and hold to move the photo around within the viewer.
Adding a Photo
Editing a Photo
Click on the photo you want to edit.
Apply any required changes to the following fields:
NAME: Edit the name of the photo that was given during import.
NOTES: Edit any notes that were added during import.
Click CLOSE.
To edit more photos, click on the navigating arrows at the bottom of the photo.
Removing a Photo
Click the three dots under the photo and select Remove.
The photo will no longer be in the Photos section.
Documents & FILES
STACK allows linking any documents that you have uploaded in the project that may be relevant to your daily report.
STACK Field App
.gif)
Web Portal

Click Link Project Documents & files.
Navigate to the document or file you want to link and select it. Selecting a folder will not link the folder, but will link all of the documents in the folder.
NOTE
In the checkbox, a dash illustrates that some documents have been selected in the folder while a checkmark illustrates that the whole content of the folder has been selected.
Click LINK.
A thumbnail of the document will be displayed in the Documents & files section.
NOTE
When an Issue and/or an Annotation is associated to the document, an icon will be shown on the document thumbnail illustrating the type of issue or annotation.
.png)
Click the thumbnail to open the document.
Use the + and - signs to zoom in and out. Some mouse wheels will also work, as well as pinch/drag on the STACK Field App.
Click and drag your mouse to pan throughout the image.
Click CLOSE to return to the daily report.
Three Dot Menu
Edit
Click the three dots in the thumbnail window.
Select Edit.
If needed, toggle to a previous revision.
Apply any changes required.
Notes can also be added. These notes are specific to the Daily Report, not the document itself.
Click CLOSE.
Download
Click the three dots in the thumbnail window.
Select Download.
The file will be downloaded in your internet downloads.
Click to open it and save it to your computer.
Click the three dots in the thumbnail window.
Select Open Linked Document.
The document will open as it would when clicking on it in the Documents tab.
Navigate between revisions and/or zoom in and out of the document.
Click the X to close the window.
This will bring you to the Documents tab where the document is located.
Click the three dots in the thumbnail window.
Select Remove.
The document will be removed from the daily report.
TIP
Documents can also be removed by de-selecting the document's checkbox in the Link Project Documents window.
Observations

The observations section can be used to enter any relative information that does not fit into either of the other sections, such as safety & security issues, equipment maintenance issues, technological issues, incidents of vandalism, etc.
Click + Add observation in the web and the + sign in the App.
Fill in the following fields:
Title: The title of the observation which should be descriptive of the type of observation. Titles that have been used in the project are automatically remembered by the software for easy entry.
Notes: A detailed description of the observation.
To add another Observation, click +Add Observation in the Web or the + sign in the App.
If you need to delete an Observation:
Web Portal: Click the three dots and select Delete.
STACK Field App: Tap the trashcan icon next to the observation.
Comments

To add a new comment about the report itself, enter your information in the Add a comment field. You can enter multiple lines of comments.
Click the arrow to send.
The new comment will be added into the Comments section including the following information:
Initials of the user who made the comment
The comment itself
Date and time the comment was made
Related Articles
Daily Reports in the Web Portal
Daily Reports in the STACK Field App
If you need additional assistance, please Contact Us.
Was this article helpful?